一、DataX部署
-
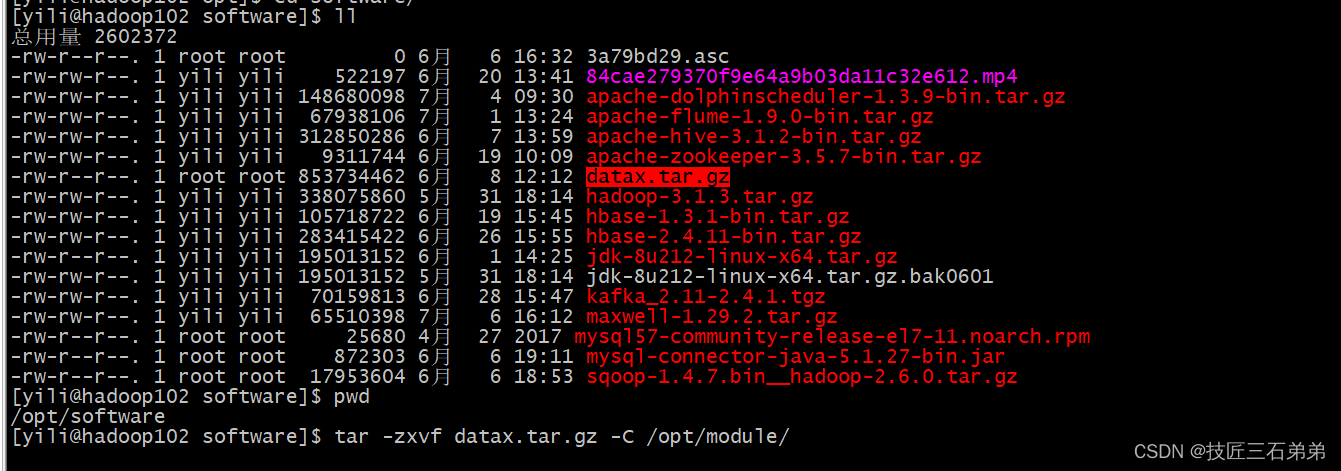
上传DataX压缩文件至/opt/software/目录下,并解压文件至/opt/module/下。
-
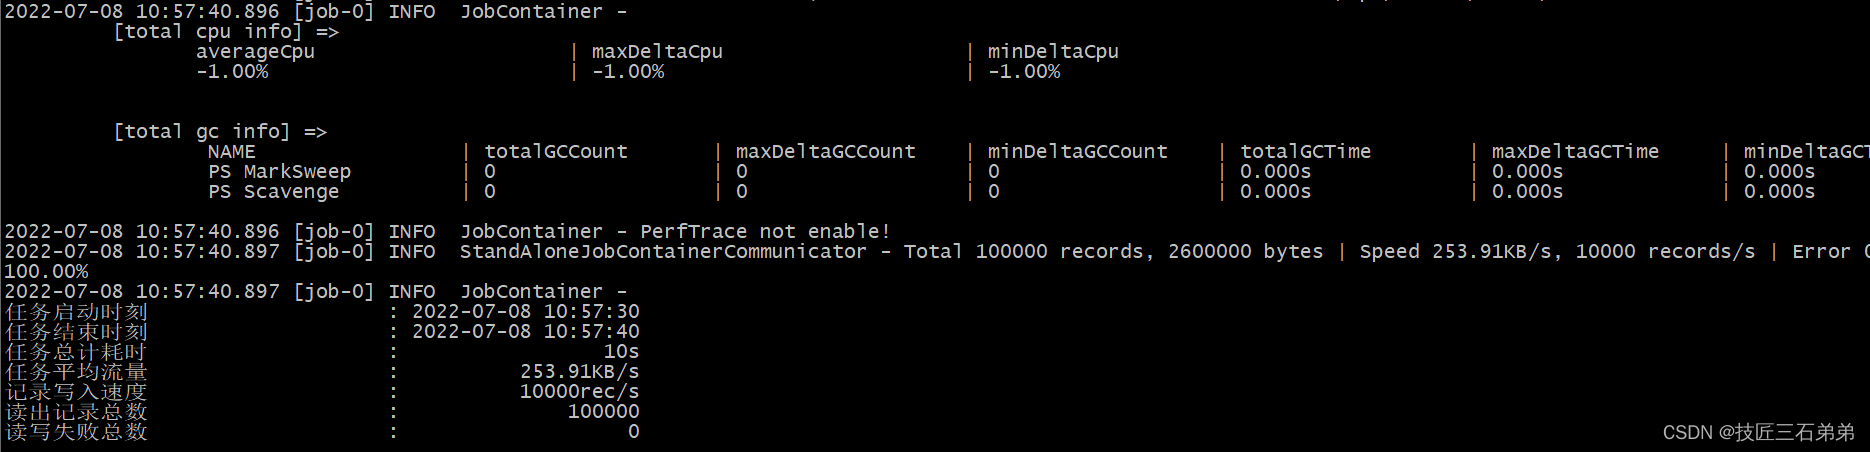
自测检查DataX,出现如下截图内容,说明安装成功
二、DataX使用 -
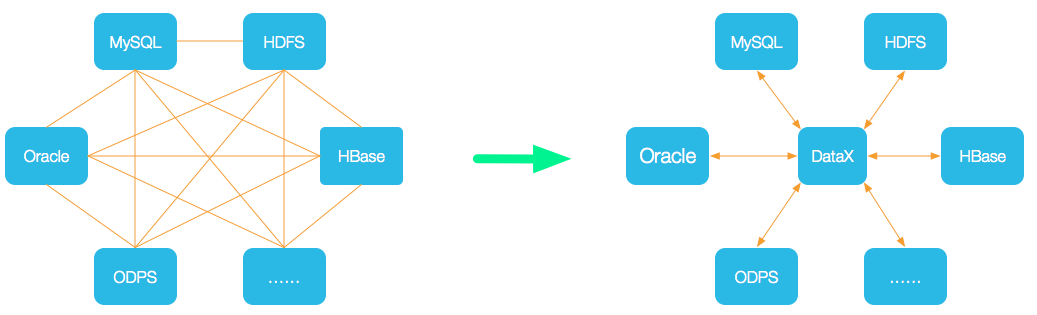
DataX使用概述
DataX使用还是十分简单的,用户只需要根据自己同步数据的数据源和目的地来选择相应的Reader和Writer,并将Reader和Writer的信息配置在一个json文件中,然后执行下述命令进行提交数据同步任务即可。
[yili@hadoop102 datax]$ python bin/datax.py job/job.json
- DataX配置文件格式
可以通过下述命令进行查看DataX配置文件模板
[yili@hadoop102 datax]$ python bin/datax.py -d mysqlreader -w hdfswriter
https://gitee.com/mirrors/DataX/blob/master/README.md
- 同步MySQL数据到HDFS案例
(1)案例要求:同步gmall数据库中base_province表数据到HDFS的/base_province目录
(2)需求分析:要实现该功能,需选用MySQLReader和HDFSWriter,MySQLReader具有两种模式分别是TableMode和QuerySQLMode,前者使用table,column,where等属性声明需要同步的数据;后者使用一条SQL查询语句声明需要同步的数据。
下面分别使用两种模式进行演示。
1)MySQLReader之TableMode
Json配置文件内容:
{"job": {"content": [{"reader": {"name": "mysqlreader","parameter": {"column": ["id","name","region_id","area_code","iso_code","iso_3166_2"],"where": "id>=3","connection": [{"jdbcUrl": ["jdbc:mysql://hadoop102:3306/gmall"],"table": ["base_province"]}],"password": "123456","splitPk": "","username": "root"}},"writer": {"name": "hdfswriter","parameter": {"column": [{"name": "id","type": "bigint"},{"name": "name","type": "string"},{"name": "region_id","type": "string"},{"name": "area_code","type": "string"},{"name": "iso_code","type": "string"},{"name": "iso_3166_2","type": "string"}],"compress": "gzip","defaultFS": "hdfs://hadoop102:8020","fieldDelimiter": "\t","fileName": "base_province","fileType": "text","path": "/user/yili/gmall/base_province","writeMode": "append"}}}],"setting": {"speed": {"channel": 1}}}
}
2)MySQLReader之QuerySQLMode
Json配置文件内容:
{"job": {"content": [{"reader": {"name": "mysqlreader","parameter": {"connection": [{"jdbcUrl": ["jdbc:mysql://hadoop102:3306/gmall"],"querySql": ["select id,name,region_id,area_code,iso_code,iso_3166_2 from base_province where id>=3"]}],"password": "123456","username": "root"}},"writer": {"name": "hdfswriter","parameter": {"column": [{"name": "id","type": "bigint"},{"name": "name","type": "string"},{"name": "region_id","type": "string"},{"name": "area_code","type": "string"},{"name": "iso_code","type": "string"},{"name": "iso_3166_2","type": "string"}],"compress": "gzip","defaultFS": "hdfs://hadoop102:8020","fieldDelimiter": "\t","fileName": "base_province","fileType": "text","path": "/base_province","writeMode": "append"}}}],"setting": {"speed": {"channel": 1}}}
}
- DataX传参
【说明】通常情况下,离线数据同步任务需要每日定时重复执行,故HDFS上的目标路径通常会包含一层日期,以对每日同步的数据加以区分,也就是说每日同步数据的目标路径不是固定不变的,因此DataX配置文件中HDFS Writer的path参数的值应该是动态的。为实现这一效果,就需要使用DataX传参的功能。
DataX传参的用法如下,在JSON配置文件中使用${param}引用参数,在提交任务时使用-p"-Dparam=value"传入参数值。
1)具体示例如下:
[yili@hadoop102 datax]$ hadoop fs -mkdir /user/yili/gmall/base_province/2020-07-08
{"job": {"content": [{"reader": {"name": "mysqlreader","parameter": {"connection": [{"jdbcUrl": ["jdbc:mysql://hadoop102:3306/gmall"],"querySql": ["select id,name,region_id,area_code,iso_code,iso_3166_2 from base_province where id>=3"]}],"password": "123456","username": "root"}},"writer": {"name": "hdfswriter","parameter": {"column": [{"name": "id","type": "bigint"},{"name": "name","type": "string"},{"name": "region_id","type": "string"},{"name": "area_code","type": "string"},{"name": "iso_code","type": "string"},{"name": "iso_3166_2","type": "string"}],"compress": "gzip","defaultFS": "hdfs://hadoop102:8020","fieldDelimiter": "\t","fileName": "base_province","fileType": "text","path": "/user/yili/gmall/base_province/${dt}","writeMode": "append"}}}],"setting": {"speed": {"channel": 1}}}
}
2)执行脚本
[yili@hadoop102 datax]$ python bin/datax.py -p"-Ddt=2020-06-14" job/base_province.json
3)查看结果
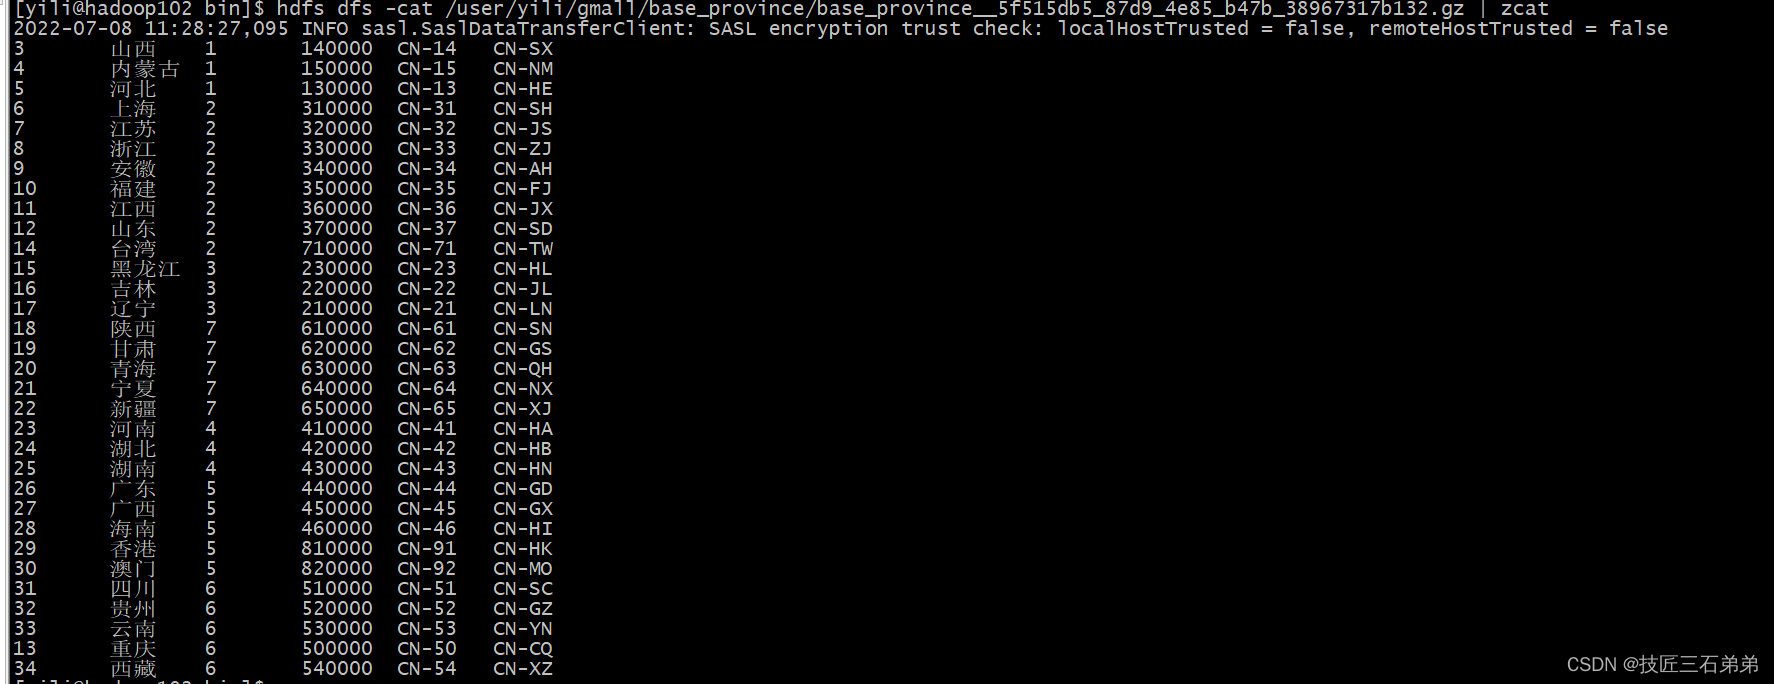
[yili@hadoop102 datax]$ hadoop fs -ls  /user/yili/gmall/base_province/
Found 2 items
drwxr-xr-x   - atguigu supergroup          0 2022-07-08 21:41 /user/yili/gmall/base_province/2020-07-08
- 同步HDFS数据到MySQL案例实操
(1)案例要求:同步HDFS上的/user/yili/gmall/base_province目录下的数据到MySQL gmall 数据库下的test_province表。
(2)需求分析:要实现该功能,需选用HDFSReader和MySQLWriter。
配置文件如下所示:
{"job": {"content": [{"reader": {"name": "hdfsreader","parameter": {"defaultFS": "hdfs://hadoop102:8020","path": "/base_province","column": ["*"],"fileType": "text","compress": "gzip","encoding": "UTF-8","nullFormat": "\\N","fieldDelimiter": "\t",}},"writer": {"name": "mysqlwriter","parameter": {"username": "root","password": "123456","connection": [{"table": ["test_province"],"jdbcUrl": "jdbc:mysql://hadoop102:3306/gmall?useUnicode=true&characterEncoding=utf-8"}],"column": ["id","name","region_id","area_code","iso_code","iso_3166_2"],"writeMode": "replace"}}}],"setting": {"speed": {"channel": 1}}}
}
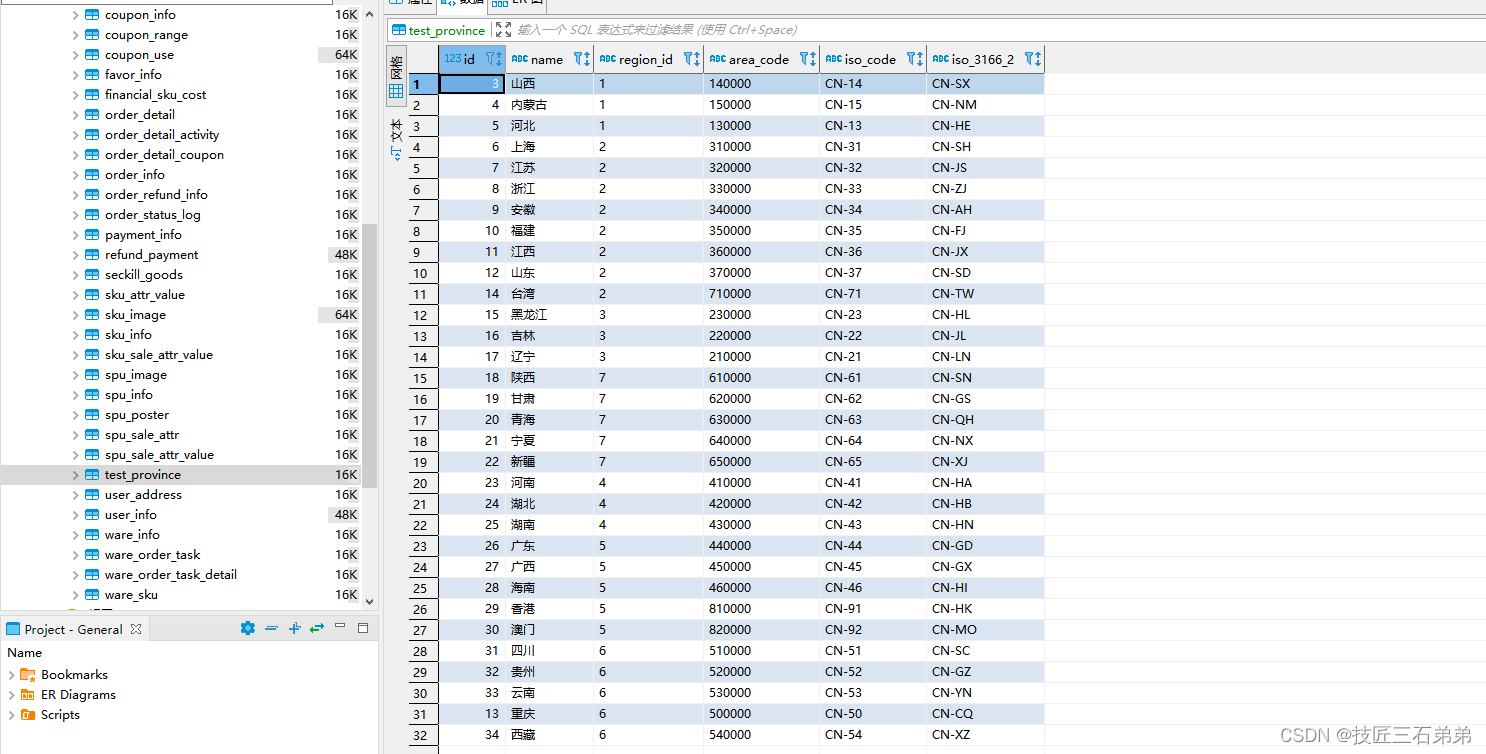
(3)查看Mysql目标表输出
- DataX配置文件生成脚本(改进:对json串输出增加格式化操作 -> 增加程序文件内容可读性)
(1)[yili@hadoop102 datax]$ vi /home/yili/bin/gen_import_config.py
# coding=utf-8
import json
import getopt
import os
import sys
import MySQLdb#MySQL相关配置,需根据实际情况作出修改
mysql_host = "hadoop102"
mysql_port = "3306"
mysql_user = "root"
mysql_passwd = "Wkz57Heu(h"#HDFS NameNode相关配置,需根据实际情况作出修改
hdfs_nn_host = "hadoop102"
hdfs_nn_port = "8020"#生成配置文件的目标路径,可根据实际情况作出修改
output_path = "/opt/module/datax/job/import"#获取mysql连接
def get_connection():return MySQLdb.connect(host=mysql_host, port=int(mysql_port), user=mysql_user, passwd=mysql_passwd)#获取表格的元数据  包含列名和数据类型
def get_mysql_meta(database, table):connection = get_connection()cursor = connection.cursor()sql = "SELECT COLUMN_NAME,DATA_TYPE from information_schema.COLUMNS WHERE TABLE_SCHEMA=%s AND TABLE_NAME=%s ORDER BY ORDINAL_POSITION"cursor.execute(sql, [database, table])fetchall = cursor.fetchall()cursor.close()connection.close()return fetchall#获取mysql表的列名
def get_mysql_columns(database, table):return map(lambda x: x[0], get_mysql_meta(database, table))#将获取的元数据中mysql的数据类型转换为hive的数据类型  写入到hdfswriter中
def get_hive_columns(database, table):def type_mapping(mysql_type):mappings = {"bigint": "bigint","int": "bigint","smallint": "bigint","tinyint": "bigint","decimal": "string","double": "double","float": "float","binary": "string","char": "string","varchar": "string","datetime": "string","time": "string","timestamp": "string","date": "string","text": "string"}return mappings[mysql_type]meta = get_mysql_meta(database, table)return map(lambda x: {"name": x[0], "type": type_mapping(x[1].lower())}, meta)#生成json文件
def generate_json(source_database, source_table):job = {"job": {"setting": {"speed": {"channel": 3},"errorLimit": {"record": 0,"percentage": 0.02}},"content": [{"reader": {"name": "mysqlreader","parameter": {"username": mysql_user,"password": mysql_passwd,"column": get_mysql_columns(source_database, source_table),"splitPk": "","connection": [{"table": [source_table],"jdbcUrl": ["jdbc:mysql://" + mysql_host + ":" + mysql_port + "/" + source_database]}]}},"writer": {"name": "hdfswriter","parameter": {"defaultFS": "hdfs://" + hdfs_nn_host + ":" + hdfs_nn_port,"fileType": "text","fileName": source_table,"column": get_hive_columns(source_database, source_table),"writeMode": "append","fieldDelimiter": "\t","compress": "gzip","path": "${targetdir}"}}}]}}if not os.path.exists(output_path):os.makedirs(output_path)with open(os.path.join(output_path, ".".join([source_database, source_table, "json"])), "w") as f:json.dump(job, f, sort_keys=True, indent=4, separators=(',', ':'))def main(args):source_database = ""source_table = ""options, arguments = getopt.getopt(args, '-d:-t:', ['sourcedb=', 'sourcetbl='])for opt_name, opt_value in options:if opt_name in ('-d', '--sourcedb'):source_database = opt_valueif opt_name in ('-t', '--sourcetbl'):source_table = opt_valuegenerate_json(source_database, source_table)if __name__ == '__main__':main(sys.argv[1:])
(2)执行脚本
[yili@hadoop102 bin]$ python gen_import_config.py -d gmall -t activity_info
(3)生成json结果文件
[yili@hadoop102 datax]$ python bin/datax.py job/import/gmall.activity_info.json -p "-Dtargetdir=/user/yili/gmall/db/activity_info_full/2022-07-06"
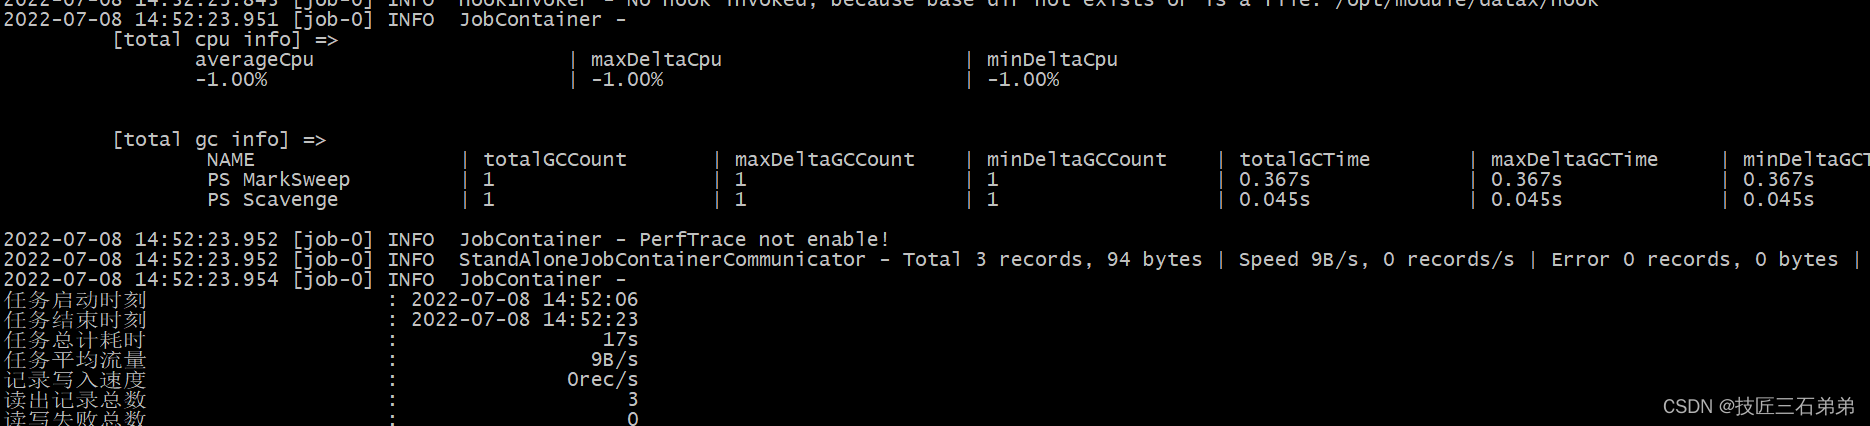
(4)执行日志显示成功
(5)HDFS上生成文件
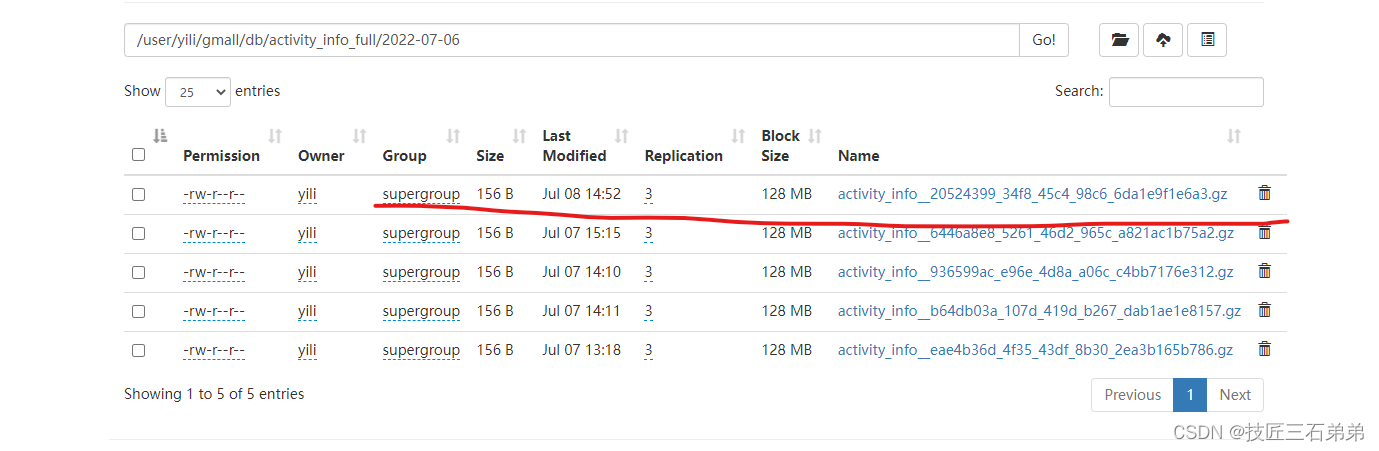


](https://img-blog.csdnimg.cn/66ba6053527248b9a69b6bce20321426.png)


