1. HUD
在移动端 App 开发中,Toast 、 Loading 和 Progress 是十分常用的UI控件,如果不做特殊要求,一般可以直接使用系统 API 提供的方法,但如果想要定制化 UI,就需要自定义实现了。
在 HarmonyOS 中,Toast 可以直接用 promptAction 实现,但是 Loading 和 Progress 并没有直接提供完善的组件封装(指 API11 及以前,API12 后未知)。
import promptAction from '@ohos.promptAction'promptAction.showToast({            message: 'Message Info',duration: 2000
})
在 iOS 的 UIKit 框架中,Toast 和 Loading 都是没有直接的 API 提供的,开发中一般会使用三方库,这类三方库大都统称为 HUD (Head Up Display) ,例如 MBProgressHUD 和 SVProgressHUD ,这里的 HUD 就是沿用了 iOS 端的命名习惯。
2. ArkUI 自定义组件: xt_hud
先上成果:
xt_hud 是我基于 ArkUI 框架封装的三方组件,适配 API11,具体的 API 符合原生开发使用习惯。
下载安装:
ohpm install @jxt/xt_hud
●Demo:
○gitee.com/kukumalu/xt…
○github.com/kukumaluCN/…
●具体 API 使用介绍:
好用的Toast/Loading/Progress自定义组件XTHUD
3. 自定义 HUD 组件的技术探索
HUD 这类组件,不同于 Button/Text 等常规的 ArkUI 组件,直接在对应父组件的构造函数 build() 中挂载、布局、交互即可,更多的情况是直接用在逻辑代码中。
如果 ArkUI 的自定义组件可以直接实例化对象,那我们就可以脱离父组件的 build() 挂载 UI 的过程,直接使用。
系统框架中的 promptAction 就是这样的 API,通过阅读其 API 文档,可以知道其大致是基于 CustomDialog 封装实现的。
import promptAction from '@ohos.promptAction'promptAction.showToast({            message: 'Message Info',duration: 2000
})
3.1. promptAction 的源码实现
系统的 promptAction 是怎么实现的呢?最简单的方式就是查看源码。
HarmonyOS Next 是基于 OpenHarmony 的,系统本身并不开源,但 OpenHarmony 是开源项目,源码仓库在这里:gitee.com/openharmony
我对于 OpenHarmony 了解并不太多,大致查了下,其中 ArkUI 最核心的源码仓库为:gitee.com/openharmony…
ArkUI开发框架源代码在 /foundation/arkui/ace_engine 下,目录结构如下图所示:
/foundation/arkui/ace_engine
├── adapter                       # 平台适配目录
│   ├── common
│   └── ohos
├── frameworks                    # 框架代码
│   ├── base                      # 基础库
│   ├── bridge                    # 前后端组件对接层
│   └── core                      # 核心组件目录
检索 PromptAction 类在如下目录中:
// arkui_ace_engine-master/frameworks/bridge/declarative_frontend/engine/jsUIContext.jsclass PromptAction {/*** Construct new instance of PromptAction.* initialize with instanceId.* @param instanceId obtained on the c++ side.* @since 10*/constructor(instanceId) {this.instanceId_ = instanceId;this.ohos_prompt = globalThis.requireNapi('promptAction');}showToast(options) {__JSScopeUtil__.syncInstanceId(this.instanceId_);this.ohos_prompt.showToast(options);__JSScopeUtil__.restoreInstanceId();}...
}
可以看到,其本质是调用了的桥接层的 C++ 代码实现,参考价值并不太高:
// arkui_ace_engine-master/interfaces/napi/kits/promptaction/js_prompt_action.cppstatic napi_value PromptActionExport(napi_env env, napi_value exports)
{napi_value showMode = nullptr;napi_create_object(env, &showMode);napi_value prop = nullptr;napi_create_uint32(env, DEFAULT, &prop);napi_set_named_property(env, showMode, "DEFAULT", prop);napi_create_uint32(env, TOP_MOST, &prop);napi_set_named_property(env, showMode, "TOP_MOST", prop);napi_property_descriptor promptDesc[] = {DECLARE_NAPI_FUNCTION("showToast", JSPromptShowToast),DECLARE_NAPI_FUNCTION("showDialog", JSPromptShowDialog),DECLARE_NAPI_FUNCTION("showActionMenu", JSPromptShowActionMenu),DECLARE_NAPI_FUNCTION("openCustomDialog", JSPromptOpenCustomDialog),DECLARE_NAPI_FUNCTION("updateCustomDialog", JSPromptUpdateCustomDialog),DECLARE_NAPI_FUNCTION("closeCustomDialog", JSPromptCloseCustomDialog),DECLARE_NAPI_PROPERTY("ToastShowMode", showMode),
};NAPI_CALL(env, napi_define_properties(env, exports, sizeof(promptDesc) / sizeof(promptDesc[0]), promptDesc));return exports;
}static napi_module promptActionModule = {
.nm_version = 1,
.nm_flags = 0,
.nm_filename = nullptr,
.nm_register_func = PromptActionExport,
.nm_modname = "promptAction",
.nm_priv = ((void*)0),
.reserved = { 0 },
};// arkui_ace_engine-master/interfaces/napi/kits/promptaction/prompt_action.cppnapi_value JSPromptShowToast(napi_env env, napi_callback_info info)
{TAG_LOGD(AceLogTag::ACE_DIALOG, "show toast enter");...
}
3.2. ArkUI 组件的本质
通过查看 API 文档,可知 ArkUI 组件本质是 TS 的 class ,继承于 CommonMethod 基类。
declare class ColumnAttribute extends CommonMethod<ColumnAttribute>
declare class TextAttribute extends CommonMethod<TextAttribute>
declare class ButtonAttribute extends CommonMethod<ButtonAttribute>declare class CommonMethod<T>
那么我们自定义的组件,理论上也可以直接通过 new 的方式去构造一个组件实例,并直接通过其实例对象执行方法。
3.3. new 一个自定义组件
假设我们自定义了一个 HUD 组件,并为其添加了 showToast 方法:
@Component
struct HUD {showToast() {console.log('showToast')}build() {Text('toast')}
}
在其他地方使用:
Button('show toast').onClick(() => {const hud = new HUD()hud.showToast()})
执行结果也确实符合我们的预期:
app Log: showToast
3.4. 自定义组件带属性构造时的报错问题
对于一个组件来说,仅有实例方法是不够的,逻辑层还需要一些属性,尤其是支持响应式更新的属性,以满足我们不同场景下的 UI 定制化逻辑。
@Component
struct HUD {@Prop text: string = ''showToast() {console.log('showToast: ', this.text)}build() {Text('toast')}
}Button('show toast').onClick(() => {const hud = new HUD({text: 'test'})hud.showToast()})
上述代码执行后会直接报错:
E     [ArkRuntime Log] TypeError: is not callable
E     [ArkRuntime Log]     at ViewPU (/Volumes/lxc/OpenHarmony-4.1-Release_harmony/harmony2/foundation/arkui/ace_engine/frameworks/bridge/declarative_frontend/engine/stateMgmt.js:4992:4992)
E     [Engine Log]Lifetime: 0.000000s
E     [Engine Log]Js-Engine: ark
E     [Engine Log]page: pages/HUD.js
E     [Engine Log]Error message: is not callable
E     [Engine Log]Stacktrace:
E     [Engine Log]    at ViewPU (/Volumes/lxc/OpenHarmony-4.1-Release_harmony/harmony2/foundation/arkui/ace_engine/frameworks/bridge/declarative_frontend/engine/stateMgmt.js:4992:4992)
通过报错信息可以知道自定义组件所对应的 class 实际上应该是继承或者可能是间接继承于 ViewPU 类的。
3.5. 通过方舟字节码探索自定义组件的实现原理
3.5.1. 解包
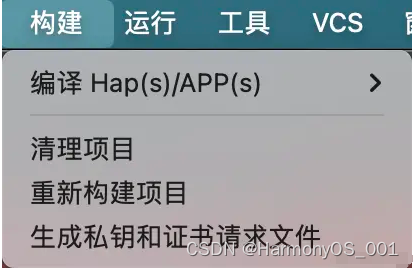
构建 Demo 项目的 entry 模块:
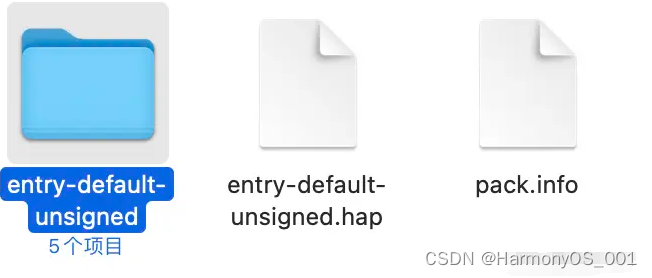
构建成功后,找到 outputs 目录下的 hap 文件:
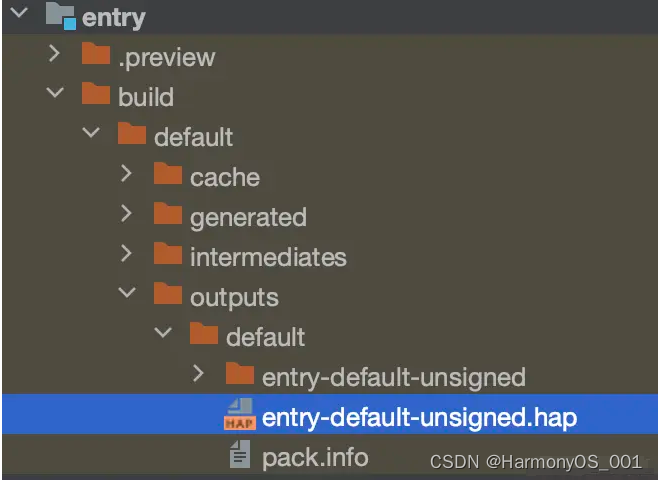
在 Finder 中找到对应的 hap 文件,用解压缩工具解压,可以得到编译后的文件:

找到 .abc 文件,即编译后的方舟字节码文件:
3.5.2. 方舟字节码
ArkUI 源码为:
@Entry
@Component
struct Index {build() {Row() {Column() {Button('test').onClick(() => {const hud = new HUD({text: 'test'})hud.showToast()})}.width('100%')}.height('100%')}
}@Component
struct HUD {@Prop text: string = ''showToast() {console.log('showToast: ', this.text)}build() {Text('toast')}
}
编译后对应的方舟字节码核心部分如下,可以看到其本质还是 TS 语言:
interface HUD_Params {text?: string;
}
interface Index_Params {
}
class Index extends ViewPU {constructor(parent, params, __localStorage, elmtId = -1, paramsLambda = undefined, extraInfo) {super(parent, __localStorage, elmtId, extraInfo);if (typeof paramsLambda === "function") {this.paramsGenerator_ = paramsLambda;}this.setInitiallyProvidedValue(params);}setInitiallyProvidedValue(params: Index_Params) {}updateStateVars(params: Index_Params) {}purgeVariableDependenciesOnElmtId(rmElmtId) {}aboutToBeDeleted() {SubscriberManager.Get().delete(this.id__());this.aboutToBeDeletedInternal();}initialRender() {this.observeComponentCreation2((elmtId, isInitialRender) => {Row.create();Row.height('100%');}, Row);this.observeComponentCreation2((elmtId, isInitialRender) => {Column.create();Column.width('100%');}, Column);this.observeComponentCreation2((elmtId, isInitialRender) => {Button.createWithLabel('test');Button.onClick(() => {const hud = new HUD({text: 'test'});hud.showToast();});}, Button);Button.pop();Column.pop();Row.pop();}rerender() {this.updateDirtyElements();}static getEntryName(): string {return "Index";}
}
class HUD extends ViewPU {constructor(parent, params, __localStorage, elmtId = -1, paramsLambda = undefined, extraInfo) {super(parent, __localStorage, elmtId, extraInfo);if (typeof paramsLambda === "function") {this.paramsGenerator_ = paramsLambda;}this.__text = new SynchedPropertySimpleOneWayPU(params.text, this, "text");this.setInitiallyProvidedValue(params);}setInitiallyProvidedValue(params: HUD_Params) {if (params.text === undefined) {this.__text.set('');}}updateStateVars(params: HUD_Params) {this.__text.reset(params.text);}purgeVariableDependenciesOnElmtId(rmElmtId) {this.__text.purgeDependencyOnElmtId(rmElmtId);}aboutToBeDeleted() {this.__text.aboutToBeDeleted();SubscriberManager.Get().delete(this.id__());this.aboutToBeDeletedInternal();}private __text: SynchedPropertySimpleOneWayPU<string>;get text() {return this.__text.get();}set text(newValue: string) {this.__text.set(newValue);}showToast() {console.log('showToast: ', this.text);}initialRender() {this.observeComponentCreation2((elmtId, isInitialRender) => {Text.create('toast');}, Text);Text.pop();}rerender() {this.updateDirtyElements();}
}3.5.3. 去除 @Porp
去掉源码中的 @Prop:
TypeScript复制代码@Component
struct HUD {text: string = ''showToast() {console.log('showToast: ', this.text)}build() {Text('toast')}
}编译后:
TypeScript复制代码interface HUD_Params {text?: string;
}
class HUD extends ViewPU {constructor(parent, params, __localStorage, elmtId = -1, paramsLambda = undefined, extraInfo) {super(parent, __localStorage, elmtId, extraInfo);if (typeof paramsLambda === "function") {this.paramsGenerator_ = paramsLambda;}this.text = '';this.setInitiallyProvidedValue(params);}setInitiallyProvidedValue(params: HUD_Params) {if (params.text !== undefined) {this.text = params.text;}}updateStateVars(params: HUD_Params) {}purgeVariableDependenciesOnElmtId(rmElmtId) {}aboutToBeDeleted() {SubscriberManager.Get().delete(this.id__());this.aboutToBeDeletedInternal();}private text: string;showToast() {console.log('showToast: ', this.text);}initialRender() {this.observeComponentCreation2((elmtId, isInitialRender) => {Text.create('toast');}, Text);Text.pop();}rerender() {this.updateDirtyElements();}
}
这里只有 SynchedPropertySimpleOneWayPU 部分的差异,这应该是参数响应式的逻辑部分,并不影响。
3.5.4. 组件类的 constructor
报错是类型错误,具体类型应该是组件类的构造函数处导致的,因为在编译后的字节码中,可以看到这样一句代码,这是 Index 组件路由注册相关的逻辑:
registerNamedRoute(() => new Index(undefined, {}), "", { bundleName: "com.example.viewpudemo", moduleName: "entry", pagePath: "pages/Index" });这里可以看到页面默认的 Index 组件初始化时,是传了两个参数的,而我们调用 HUD 初始化,只传了属性参数部分,这应该是导致 TypeError: is not callable 错误的直接原因。
TypeScript复制代码constructor(parent, params, __localStorage, elmtId = -1, paramsLambda = undefined, extraInfo) {super(parent, __localStorage, elmtId, extraInfo);if (typeof paramsLambda === "function") {this.paramsGenerator_ = paramsLambda;}this.text = '';this.setInitiallyProvidedValue(params);}其实更直观的验证方式是,用常规的方式去挂载组件:
TypeScript复制代码@Entry
@Component
struct Index {build() {Row() {Column() {HUD()HUD({text: 'test'})}.width('100%')}.height('100%')}
}编译后:
TypeScript复制代码class Index extends ViewPU {constructor(parent, params, __localStorage, elmtId = -1, paramsLambda = undefined, extraInfo) {super(parent, __localStorage, elmtId, extraInfo);if (typeof paramsLambda === "function") {this.paramsGenerator_ = paramsLambda;}this.setInitiallyProvidedValue(params);}setInitiallyProvidedValue(params: Index_Params) {}updateStateVars(params: Index_Params) {}purgeVariableDependenciesOnElmtId(rmElmtId) {}aboutToBeDeleted() {SubscriberManager.Get().delete(this.id__());this.aboutToBeDeletedInternal();}initialRender() {this.observeComponentCreation2((elmtId, isInitialRender) => {Row.create();Row.height('100%');}, Row);this.observeComponentCreation2((elmtId, isInitialRender) => {Column.create();Column.width('100%');}, Column);{this.observeComponentCreation2((elmtId, isInitialRender) => {if (isInitialRender) {let componentCall = new HUD(this, {}, undefined, elmtId, () => { }, { page: "entry/src/main/ets/pages/Index.ets", line: 7 });ViewPU.create(componentCall);let paramsLambda = () => {return {};};componentCall.paramsGenerator_ = paramsLambda;}else {this.updateStateVarsOfChildByElmtId(elmtId, {});}}, { name: "HUD" });}{this.observeComponentCreation2((elmtId, isInitialRender) => {if (isInitialRender) {let componentCall = new HUD(this, {text: 'test'}, undefined, elmtId, () => { }, { page: "entry/src/main/ets/pages/Index.ets", line: 8 });ViewPU.create(componentCall);let paramsLambda = () => {return {text: 'test'};};componentCall.paramsGenerator_ = paramsLambda;}else {this.updateStateVarsOfChildByElmtId(elmtId, {text: 'test'});}}, { name: "HUD" });}Column.pop();Row.pop();}rerender() {this.updateDirtyElements();}static getEntryName(): string {return "Index";}
}
核心这两段代码,可以看出,HUD 组件初始化时,首参传的是 this ,也就是当前组件(父组件)。
let componentCall = new HUD(this, {}, undefined, elmtId, () => { }, { page: "entry/src/main/ets/pages/Index.ets", line: 7 });
let componentCall = new HUD(this, {text: 'test'}, undefined, elmtId, () => { }, { page: "entry/src/main/ets/pages/Index.ets", line: 8 });
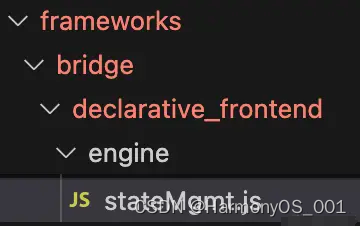
3.5.5. ViewPU - View for Partial Update
再次查看arkui_ace_engine源码,可知 ViewPU 的意思是 View for Partial Update。
ViewPU 源码参考 pu_view.ts 和 stateMgmt.js 两个文件:
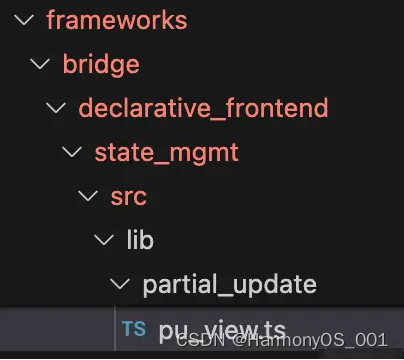
核心源码如下:
class ViewPU extends PUV2ViewBase {/*** Create a View** 1. option: top level View, specify*    - compilerAssignedUniqueChildId must specify*    - parent=undefined*    - localStorage  must provide if @LocalSTorageLink/Prop variables are used*      in this View or descendant Views.** 2. option: not a top level View*    - compilerAssignedUniqueChildId must specify*    - parent must specify*    - localStorage do not specify, will inherit from parent View.**/constructor(parent, localStorage, elmtId = UINodeRegisterProxy.notRecordingDependencies, extraInfo = undefined) {var _a;super(parent, elmtId, extraInfo);...}
}
这里的第一个参数 parent 应该传父组件。
再看其父类 PUV2ViewBase 的核心代码:
class PUV2ViewBase extends NativeViewPartialUpdate {constructor(parent, elmtId = UINodeRegisterProxy.notRecordingDependencies, extraInfo = undefined) {super();...if (parent) {// this View is not a top-level Viewthis.setCardId(parent.getCardId());// Call below will set this parent_ to parent as wellparent.addChild(this); // FIXME} }
假如我们的 HUD 组件在构造时,首参数传的是参数对象,那么就会执行 this.setCardId(parent.getCardId()),这必定会导致之前对应的类型错误报错。
3.6. 解决自定义组件带属性构造时的报错问题
我们在逻辑中构造自定义组件时,并不需要父组件,所以可以传 undefined:
@Component
struct HUD {@Prop text: string = ''showToast() {console.log('showToast: ', this.text)}build() {Text('toast')}
}Button('show toast').onClick(() => {const hud = new HUD(undefined, {text: 'test'})hud.showToast()})
这么写会报错:
Expected 0-1 arguments, but got 2.
此时需要覆写自定义组件的 constructor 函数,注意这里定义了两个形参,但是回调 super 时,没有传参数:
@Component
struct HUD {@Prop text: string = ''constructor(parent, params) {super()}showToast() {console.log('showToast: ', this.text)}build() {Text('toast')}
}
这是因为 ArkUI 组件对开发者暴露的基类的构造函数是无参数的,super() 传参会报错:
declare class CommonMethod<T> {/*** constructor.** @syscap SystemCapability.ArkUI.ArkUI.Full* @systemapi* @since 9* @form*/constructor();
}
经过编译后,可以对比看出,HUD 组件并没有任何变化,我们覆写的 constructor 也被丢弃了,覆写 constructor 唯一的作用就是规避了组件实例化时的传参报错和执行报错问题。
class HUD extends ViewPU {constructor(parent, params, __localStorage, elmtId = -1, paramsLambda = undefined, extraInfo) {super(parent, __localStorage, elmtId, extraInfo);if (typeof paramsLambda === "function") {this.paramsGenerator_ = paramsLambda;}this.__text = new SynchedPropertySimpleOneWayPU(params.text, this, "text");this.setInitiallyProvidedValue(params);}setInitiallyProvidedValue(params: HUD_Params) {if (params.text === undefined) {this.__text.set('');}}updateStateVars(params: HUD_Params) {this.__text.reset(params.text);}purgeVariableDependenciesOnElmtId(rmElmtId) {this.__text.purgeDependencyOnElmtId(rmElmtId);}aboutToBeDeleted() {this.__text.aboutToBeDeleted();SubscriberManager.Get().delete(this.id__());this.aboutToBeDeletedInternal();}private __text: SynchedPropertySimpleOneWayPU<string>;get text() {return this.__text.get();}set text(newValue: string) {this.__text.set(newValue);}showToast() {console.log('showToast: ', this.text);}initialRender() {this.observeComponentCreation2((elmtId, isInitialRender) => {Text.create('toast');}, Text);Text.pop();}rerender() {this.updateDirtyElements();}
}
3.7. 怎么做才比较合理
虽然上述方式可以解决自定义组件构造时的报错问题,但总是觉得不太踏实,毕竟这是非常规的用法,如果后续系统底层 API 发生变更,对应的 constructor 构造器函数可能还会再次出问题,毕竟对开发者暴露的组件构造器函数,本身也是无参数的,其内部实现细节都是封闭的。
另一种方式就是放弃自定义组件的属性的使用,仅通过方法去交互,实际上也确实有这样的三方库的实现:@lyb/loading-dialog (V2.0.0),该三方库使用简单,但问题就是,对应的 Dialog 实例会多次重复构建,相对来说性能开销会大一些。
总体来说,还是用常规的组件挂载方式比较靠谱。
只不过,作为 HUD 这类全局性的组件,挂载时机需要很早,且必须保证全局业务均可触发到,那么最好的挂载时机就是在 App 的入口组件或者是可能存在的根组件中进行,这也是 xt_hud 使用时要求的做法:
import {XTHUDLoadingOptions,XTHUDLoading
} from '@jxt/xt_hud'// 假设这里是 App 的入口组件
@Entry
@Component
struct Index {build() {Column({ space: 2 }) {// loading组件挂载,可以不做任何配置XTHUDLoading()// 也可以做全局默认样式的总体配置XTHUDLoading({globalOptions: (options: XTHUDLoadingOptions) => {options.iconSize = {width: 100, height: 100}options.maskColor = '#33000000'}})}}
}
使用时:
import { XTHUDManager } from '@jxt/xt_hud'// 其他组件内或者任意业务逻辑代码内
@Entry
@Component
struct Other {build() {Column({ space: 2 }) {Button('show harmony style loading').onClick(() => {XTHUDManager.showLoading('加载中...')setTimeout(() => {XTHUDManager.hideLoading()}, 3000)})}}
}
4. HUDManager 和 HUD 组件的解耦
HUD 组件在挂载后,会在 App 不同页面甚至不同的业务代码中执行显示控制逻辑,此时需要将执行阶段的属性设置,回传给已经挂载的 HUD 组件,实际对应的 HUD 组件在挂载阶段,只做了组件实例化,因为其内部关联了 Dialog 实例,对应的 HUD 并不会直接显示。
那么,就需要做一个桥接层,负责 Manager 和 HUD 组件的通信逻辑。
4.1. 单例
考虑到 HUD 组件的全局性和唯一性,这里可以使用单例作为桥接层的实例对象。
具体做法如下:
class _XTHUDManager {// 单例对象static _instance: _XTHUDManager// 获取单例对象static getInstance(): _XTHUDManager {if (!_XTHUDManager._instance) {_XTHUDManager._instance = new _XTHUDManager()}return _XTHUDManager._instance}
}/// 单例对象
const _HUDManager = _XTHUDManager.getInstance()
export default _HUDManager
4.2. 代理
有了桥接层,HUD 组件和管理类 Manager 之间就需要一种特殊的通信模式,Manager 实际更像是对应 HUD 组件的一个代理。在 iOS 开发中,实现代理模式,可以用 Delegate 或者 block 去做,对应的,在 TS 中,最简单的方式就是利用闭包。
_XTHUDManager 类中实现对应的闭包类型的属性,其本身只是空实现:
class _XTHUDManager {/// Toast,默认不屏蔽用户交互/// 常规纯文本toast,自定义图标需要实现options.iconSrcshowToast: (text: string, options?: XTHUDToastOptions) => void = (text: string) => {throw new Error('XTHUDToast components must be mounted first!')}/// Loading,默认屏蔽用户交互/// 默认样式loading,使用了鸿蒙默认的loading样式,也就是原生LoadingProgress组件showLoading: (text?: string, options?: XTHUDLoadingOptions) => void = () => {throw new Error('XTHUDLoading components must be mounted first!')}
}
具体的闭包属性需要在 HUD 组件内部实现,实现的最佳时机就是组件实例化之后,也就是在 aboutToAppear 这个生命周期函数中,如果组件多次挂载(实际并不推荐),则因为 Manager 是单例,就会以最后一次的组件实例关联上对应的代理实现,之前的都会失效:
// 导入 Manager 单例对象
import HUDManager from './XTHUDManager'// HUD 组件实现
@Component
export struct XTHUDToast {// 组件挂载aboutToAppear() {// manager方法代理HUDManager.showToast = (text: string, options?: XTHUDToastOptions) => {// 这里触发组件内部方法this.showToast(text, options)}}
}// HUD 组件实现
@Component
export struct XTHUDLoading {// 组件挂载aboutToAppear() {// manager方法代理HUDManager.showLoading = (text?: string, options?: XTHUDLoadingOptions) => {// 这里触发组件内部方法this.showLoading(text, options)}}
}
4.3. 封装
上述虽然做到了最终想要的结果,但是 _XTHUDManager 直接暴露给使用者的话,总归不太优雅,可以再做一层简单的封装:
/// XTHUD管理类
export class XTHUDManager {/*** Toast,默认不屏蔽用户交互* 常规纯文本toast,自定义图标需要实现options.iconSrc** @param { string } text 显示文本,必填,不能为空串* @param { XTHUDToastOptions? } options 可选自定义样式*/static showToast(text: string, options?: XTHUDToastOptions): void {_HUDManager.showToast(text, options)}/*** Loading,默认屏蔽用户交互* 默认样式loading,使用了鸿蒙默认的loading样式,也就是原生LoadingProgress组件** @param { string? } text 显示文本,可选* @param { XTHUDLoadingOptions? } options 可选自定义样式*/static showLoading(text?: string, options?: XTHUDLoadingOptions): void {_HUDManager.showLoading(text, options)}
}
5. 自定义 Dialog
关于 CustomDialog 的方法,具体可以参考官方文档:
●UI开发 (ArkTS声明式开发范式) > 添加组件 > 添加常用组件 > 自定义弹窗 (CustomDialog)
●ArkTS组件 > 基于ArkTS的声明式开发范式 > 全局UI方法 > 弹窗 > 自定义弹窗 (CustomDialog)
5.1. 最佳实践
这里以 LoadingHUD 为例,核心代码如下:
// 自定义 Dialog 组件视图
@CustomDialog
struct XTLoadingCustomDialogView {// 这里可以不用初始化,但是必须声明// @CustomDialog component should have a property of the CustomDialogController type.controller: CustomDialogController// 显示文本,可动态响应更新@Prop text: string = ''// 样式@Prop type: XTLoadingType = XTLoadingType.normal// 动态响应配置@Prop options: XTHUDLoadingOptions = defaultLoadingOptionsbuild() {Text('loading') }
}// 自定义 HUD 组件
@Component
export struct XTHUDLoading {// 自定义全局配置项回调函数globalOptions?: ((options: XTHUDLoadingOptions) => void) | null = null/// 弹窗控制器private _dialogController: CustomDialogController | null = null/// loading视图构造器@Builder private loadingCustomDialogView() {XTLoadingCustomDialogView({text: this._currentText,type: this._currentType,options: this._currentOptions,})}private showLoading(text?: string,options?: XTHUDLoadingOptions): void {// show}private hide(): void {// hide}// 组件挂载aboutToAppear() {// 更新默认值设置if (this.globalOptions) {this.globalOptions(defaultLoadingOptions)}// 初始化controllerthis._dialogController = new CustomDialogController({// 这里使用 @Builder 构造器,避免 Dailog 视图关联的属性响应式失效builder: () => {this.loadingCustomDialogView()},alignment: this._currentOptions?.alignment ?? defaultLoadingOptions.alignment,// 是否可以点击背景关闭autoCancel: false,// 偏移量offset: this._currentOptions?.offset ?? defaultLoadingOptions.offset,// 自定义样式,默认就是白色圆角弹窗背景customStyle: true,maskColor: this._currentOptions?.maskColor ?? defaultLoadingOptions.maskColor,openAnimation: this._currentOptions?.openAnimation ?? defaultLoadingOptions.openAnimation,closeAnimation: this._currentOptions?.closeAnimation ?? defaultLoadingOptions.closeAnimation,// 默认true,是否全屏展示,false只有弹窗区域UIisModal: this._currentOptions?.isModal ?? defaultLoadingOptions.isModal,// 物理返回出发的关闭回调,无法屏蔽cancel: () => {// console.log('返回触发关闭loading')this._isCancelled = truethis._loadingCount = 0// toast正在显示,才需要取消回调if (this._isLoadingOnShow && this._currentOptions?.cancelCallback) {this._currentOptions?.cancelCallback()}}})// manager方法代理HUDManager.showLoading = (text?: string, options?: XTHUDLoadingOptions) => {this.showLoading(text, options)}HUDManager.hideLoading = () => {this.hide()}}// 空实现build() {}
}
5.2. Dailog 的 cancel 关闭问题
Dialog 组件有一个容易被忽略的特性,那就是触发系统的物理返回事件时,弹出的 Dailog 会被迫关闭,这和安卓系统的特性类似,目前鸿蒙并未提供屏蔽该特性的方法,但我们可以监听到对应的返回关闭事件:
这里将取消回调做事件抛出:
// 初始化controller
this._dialogController = new CustomDialogController({// 这里使用 @Builder 构造器,避免 Dailog 视图关联的属性响应式失效builder: () => {this.loadingCustomDialogView()},// 是否可以点击背景关闭autoCancel: false,// 物理返回出发的关闭回调,无法屏蔽cancel: () => {// console.log('返回触发关闭loading')// 正在显示,才需要取消回调if (this._isLoadingOnShow && this._currentOptions?.cancelCallback) {this._currentOptions?.cancelCallback()}}
})
用户可以监听对应的 cancel 关闭事件,并做逻辑处理,这里可以在 cancelCallback 中,通过逻辑判断再次开启loading,或者做其他提示,因为 loading 一般在 App 开发中的一个重要作用就是临时屏蔽用户交互,这里做下特殊处理可以避免 loading 提前关闭导致的其他逻辑问题。
Button('show ring loading').onClick(() => {XTHUDManager.showLoading('加载中...', {completionCallback: () => {console.log('loading complete')},cancelCallback: () => {console.log('loading canceled')}})setTimeout(() => {XTHUDManager.hideLoading()}, 3000)})
6. HUD 的计数器思想
上面有提到,任一类型的 HUD ,全局只会挂载(初始化)一个实例,那么 Manager 实际控制的只是对应 Dailog 的 open 和 close 动作。
在实际业务场景中,loading 这样的组件,一般是用于网络请求阶段临时屏蔽用户交互的作用的,但是网络请求可能存在嵌套多层的情况,此时就可能会需要开启多个 loading ,如果每次都执行 loading 的开关操作,就可能导致 UI 显示层的闪烁问题,而且针对复杂的嵌套操作,很容易导致 loading 提前关闭或者最终没有关闭的 bug 问题。
Button('multi loading conflict flicker').onClick(() => {XTHUDManager.showLoading('加载中1...')setTimeout(() => {XTHUDManager.hideLoading()XTHUDManager.showLoading('加载中2...')setTimeout(() => {XTHUDManager.hideLoading()}, 2000)}, 1000)})
最简单的解决方式就是利用计数器,实际上 xt_hud 的三大类 HUD 都在内部维护了一个计数器,去控制 HUD 的显示计数,而不是重复执行开关操作。
private _showLoading(type: XTLoadingType,text?: string,options?: XTHUDLoadingOptions
): void {// 标记显示this._isLoadingOnShow = truethis._isCancelled = false// hud计数器this._loadingCount ++// 避免重复创建if (this._loadingCount > 1) {return}// 打开this._dialogController?.open()
}private hide(): void {// 标记显示结束this._isLoadingOnShow = false// 多次展示,仅作计数变更if (this._loadingCount > 1) {this._loadingCount --// console.log('this._loadingCount--', this._loadingCount)// 没被取消,才执行结束if (!this._isCancelled && this._currentOptions?.completionCallback) {this._currentOptions?.completionCallback()}return}if (this._loadingCount === 1) {this._loadingCount = 0this._dialogController?.close()// 没被取消,才执行结束if (!this._isCancelled && this._currentOptions?.completionCallback) {this._currentOptions?.completionCallback()}}
}
private hideAll(): void {this._loadingCount = 1this.hide()
}
实际使用时,loading开启时机随意,最终结束阶段直接执行 hideAllLoading 即可。
Button('multi loading smooth').onClick(() => {XTHUDManager.showLoading('加载中1...')setTimeout(() => {XTHUDManager.showLoading('加载中2...')setTimeout(() => {XTHUDManager.showLoading('加载中3...')setTimeout(() => {XTHUDManager.hideAllLoading()}, 1000)}, 1000)}, 1000)})
写在最后
有很多小伙伴不知道该从哪里开始学习鸿蒙开发技术?也不知道鸿蒙开发的知识点重点掌握的又有哪些?自学时频繁踩坑,导致浪费大量时间。结果还是一知半解。所以有一份实用的鸿蒙(HarmonyOS NEXT)全栈开发资料用来跟着学习是非常有必要的。
获取完整版高清学习资料,请点击→鸿蒙全栈开发学习资料(安全链接,请放心点击)
这份鸿蒙(HarmonyOS NEXT)资料包含了鸿蒙开发必掌握的核心知识要点,内容包含了
最新鸿蒙全栈开发学习线路
鸿蒙HarmonyOS开发教学视频
大厂面试真题
鸿蒙OpenHarmony源码剖析