https://github.com/DLR-RM/BlenderProc/tree/main/examples/datasets/bop_challenge
目录
1.3d渲染原理
2.步骤
3.代码
生成mask_all
4.难例渲染
物体高反光编辑编辑强弱灯光(明暗)编辑编辑编辑物体xyz范围缩小
物体重复
干扰物(自定义干扰物遮挡)
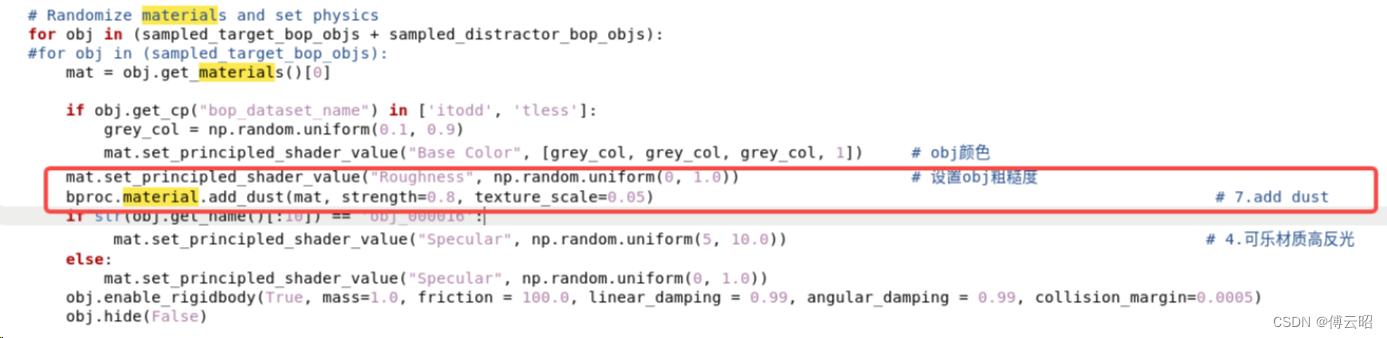
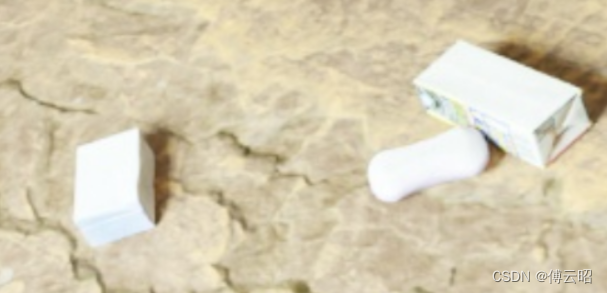
物体添加dust
指定遮挡
模糊
1.3d渲染原理
https://zhuanlan.zhihu.com/p/616649293
1.几何计算
将3D模型转化为计算机可处理的数据结构,例如三角网格,为后续计算做准备
2.光照计算
根据光源的位置、颜色和光照强度等参数,计算每个像素的颜色和亮度。这个过程需要考虑光照的反射、漫反射、高光反射等多种因素,以模拟真实世界的光照效果
3.映射: 将2D纹理贴到3D模型表面上,使其更加真实。这个过程需要将2D 纹理坐标与3D模型表面坐标进行映射,以便将纹理正确地贴到3D模型表面上。
4.像素渲染:
将计算得到的颜色和亮度信息应用到每个像素上,生成最终的2D 图像。这个过程需要将计算得到的颜色值经过抗锯齿等处理,以消除锯齿和模糊等现象,使得图像更加真实。
2.步骤
-
使用 3D 建模软件创建 3D 对象或模型。
有多种方法可以创建 3D 模型或整个场景。一些雕刻应用程序允许您创建和塑造多边形,最终形成 3D 资产。例如,这种类型的建模可能特别适合创建有机资产(例如植物或人物),因为它非常适合对有些不规则的形状进行艺术诠释。
存在这种方法的替代方法。其他建模工具专注于在三维空间中创建边和表面,而不是多边形。以这种方式创建 3D 资产可实现极高的数学精度,此类工具通常用于工业设计或计算机辅助设计 (CAD) 建模。
或者,您可能会选择使用专用工具“扫描”现有的现实生活中的对象——从此类扫描中捕获的数据将使您能够在 3D 空间中重新创建对象。或者您可能更喜欢走程序生成路线,在这种路线中,您的软件会根据一组先前建立的数学规则为您塑造一个模型。
无论您如何创建 3D 模型,下一步都是纹理化。
2.为3D物体添加材质。
多边形定义 3D 对象的形状,但它们本身缺乏颜色或表面细节。艺术家能够为 3D 对象中的每个多边形分配纹理。纹理可以是简单的单色,也可以模拟任何表面的外观,从岩石或木材等天然材料到工业金属或塑料表面。
一个 3D 对象可以由数千个(如果不是数百万个)多边形组成。该对象可能看起来具有厨房搅拌机的现代工业光滑度或大象的粗糙皮肤,但其核心仍然是一个由多边形和有些空白的表面组成的对象。然而,使用正确的 3D 材料,可以创建 3D 深度的错觉。这些纹理远不止简单地为物体添加反射率或颜色——纹理可以添加精细的细节,例如服装面料的缝合,或工业金属表面边缘的铆钉排。如果您要手动将它们添加到对象的几何体中,那么创建这些细节将非常耗时。
3. 为 3D 环境添加照明。
3D 对象需要看起来像是存在于现实世界中。对于建筑渲染和建筑可视化等常见用例尤其如此,它们可以将基本的平面图变成对未来的清晰愿景。
逼真的光源在将多边形对象的集合变成看起来真实的空间方面发挥着重要作用。但是 3D 艺术家通常不会自己在光线或阴影中作画。相反,3D 场景包括照亮各种对象的方向、强度和光源类型的设置。
-
渲染 3D 图像。
一旦创建了 3D 对象并对其进行了纹理处理,并且照亮了环境,3D 渲染过程就开始了。这是一个计算机驱动的过程,本质上是从您定义的角度拍摄场景的“快照”。结果是 3D 场景的 2D 图像。
渲染软件可以创建单个图像,也可以快速连续地渲染多个图像以创建实时运动的错觉。
渲染不是一个统一的过程——有许多方法可以使用,例如实时、光线追踪等,它们会影响渲染的质量。、
3.代码

blenderproc run examples/datasets/bop_challenge/main_lm_upright.py
/media/px_dataset1/fuzhao_datasets/paxini_model
/home/fuzhao/poseEstimate/FFB6D/ffb6d/blender_project/BlenderProc/cc_texture_dataset
/home/fuzhao/blender/out2 --num_scenes=500
生成mask_all
需要指定场景,修改bop渲染后数据的目录,和模型文件名id对应的图片名id
Write mask: https://github.com/DLR-RM/BlenderProc/blob/main/blenderproc/python/writer/BopWriterUtility.py
https://github.com/thodan/bop_toolkit/blob/master/scripts/calc_gt_masks.py
if calc_mask_info_coco:# Set up the bop toolkitSetupUtility.setup_pip(["git+https://github.com/thodan/bop_toolkit", "PyOpenGL==3.1.0"])# determine which objects to add to the vsipy renderer# for numpy>=1.20, np.float is deprecated: https://numpy.org/doc/stable/release/1.20.0-notes.html#deprecationsnp.float = float# Determine for which directories mask_info_coco has to be calculatedchunk_dirs = sorted(glob.glob(os.path.join(chunks_dir, '*')))chunk_dirs = [d for d in chunk_dirs if os.path.isdir(d)]chunk_dir_ids = [d.split('/')[-1] for d in chunk_dirs]chunk_dirs = chunk_dirs[chunk_dir_ids.index(f"{starting_chunk_id:06d}"):]# convert all objects to trimesh objectstrimesh_objects = {}for obj in dataset_objects:if obj.get_cp('category_id') in trimesh_objects:continueif isinstance(obj, Link):if not obj.visuals:continueif len(obj.visuals) > 1:warnings.warn('BOP Writer only supports saving annotations of one visual mesh per Link')trimesh_obj = obj.mesh_as_trimesh()# we need to create a double-sided material to be able to render non-watertight meshes# the other parameters are defaults, see# https://github.com/mmatl/pyrender/blob/master/pyrender/mesh.py#L216-L223material = pyrender.MetallicRoughnessMaterial(alphaMode='BLEND', baseColorFactor=[0.3, 0.3, 0.3, 1.0],metallicFactor=0.2, roughnessFactor=0.8, doubleSided=True)# here we also add the scale factor of the objects. the position of the pyrender camera will change based# on the initial scale factor of the objects and the saved annotation formatif not np.all(np.isclose(np.array(obj.blender_obj.scale), obj.blender_obj.scale[0])):print("WARNING: the scale is not the same across all dimensions, writing bop_toolkit annotations with ""the bop writer will fail!")trimesh_objects[obj.get_cp('category_id')] = pyrender.Mesh.from_trimesh(mesh=trimesh_obj, material=material)_BopWriterUtility.calc_gt_masks(chunk_dirs=chunk_dirs, starting_frame_id=starting_frame_id,dataset_objects=trimesh_objects, annotation_scale=annotation_scale,delta=delta)_BopWriterUtility.calc_gt_info(chunk_dirs=chunk_dirs, starting_frame_id=starting_frame_id,dataset_objects=trimesh_objects, annotation_scale=annotation_scale,delta=delta)_BopWriterUtility.calc_gt_coco(chunk_dirs=chunk_dirs, dataset_objects=dataset_objects,starting_frame_id=starting_frame_id)def calc_gt_masks(chunk_dirs: List[str], dataset_objects: Dict[int, pyrender.Mesh], starting_frame_id: int = 0,annotation_scale: float = 1000., delta: float = 0.015):""" Calculates the ground truth masks.From the BOP toolkit (https://github.com/thodan/bop_toolkit), with the difference of using pyrender for depthrendering.:param chunk_dirs: List of directories to calculate the gt masks for.:param dataset_objects: Dict containing all objects to save the annotations for.:param starting_frame_id: The first frame id the writer has written during this run.:param annotation_scale: The scale factor applied to the calculated annotations (in [m]) to get them into thespecified format (see `annotation_format` in `write_bop` for further details).:param delta: Tolerance used for estimation of the visibility masks."""# This import is done inside to avoid having the requirement that BlenderProc depends on the bop_toolkit# pylint: disable=import-outside-toplevelfrom bop_toolkit_lib import inout, misc, visibility# pylint: enable=import-outside-toplevelwidth = bpy.context.scene.render.resolution_xheight = bpy.context.scene.render.resolution_yrenderer = pyrender.OffscreenRenderer(viewport_width=width, viewport_height=height)for dir_counter, chunk_dir in enumerate(chunk_dirs):last_chunk_gt_fpath = os.path.join(chunk_dir, 'scene_gt.json')last_chunk_camera_fpath = os.path.join(chunk_dir, 'scene_camera.json')scene_gt = _BopWriterUtility.load_json(last_chunk_gt_fpath, keys_to_int=True)scene_camera = _BopWriterUtility.load_json(last_chunk_camera_fpath, keys_to_int=True)# Create folders for the output masks (if they do not exist yet).mask_dir_path = os.path.dirname(os.path.join(chunk_dir, 'mask', '000000_000000.png'))misc.ensure_dir(mask_dir_path)mask_visib_dir_path = os.path.dirname(os.path.join(chunk_dir, 'mask_visib', '000000_000000.png'))misc.ensure_dir(mask_visib_dir_path)im_ids = sorted(scene_gt.keys())# append to existing outputif dir_counter == 0:im_ids = im_ids[starting_frame_id:]for im_counter, im_id in enumerate(im_ids):if im_counter % 100 == 0:misc.log(f'Calculating GT masks - {chunk_dir}, {im_counter}')K = np.array(scene_camera[im_id]['cam_K']).reshape(3, 3)fx, fy, cx, cy = K[0, 0], K[1, 1], K[0, 2], K[1, 2]camera = pyrender.IntrinsicsCamera(fx=fx, fy=fy, cx=cx, cy=cy, znear=0.1, zfar=100000)# Load depth image.depth_path = os.path.join(chunk_dir, 'depth', '{im_id:06d}.png').format(im_id=im_id)depth_im = inout.load_depth(depth_path)depth_im *= scene_camera[im_id]['depth_scale'] # to [mm]depth_im /= 1000. # to [m]dist_im = misc.depth_im_to_dist_im_fast(depth_im, K)for gt_id, gt in enumerate(scene_gt[im_id]):# create a new scenescene = pyrender.Scene()# add camera and current objectscene.add(camera)t = np.array(gt['cam_t_m2c'])# rescale translation depending on initial saving formatt /= annotation_scalepose = bop_pose_to_pyrender_coordinate_system(cam_R_m2c=np.array(gt['cam_R_m2c']).reshape(3, 3),cam_t_m2c=t)scene.add(dataset_objects[gt['obj_id']], pose=pose)# Render the depth image._, depth_gt = renderer.render(scene=scene)# Convert depth image to distance image.dist_gt = misc.depth_im_to_dist_im_fast(depth_gt, K)# Mask of the full object silhouette.mask = dist_gt > 0# Mask of the visible part of the object silhouette.mask_visib = visibility.estimate_visib_mask_gt(dist_im, dist_gt, delta, visib_mode='bop19')# Save the calculated masks.mask_path = os.path.join(chunk_dir, 'mask', '{im_id:06d}_{gt_id:06d}.png').format(im_id=im_id, gt_id=gt_id)inout.save_im(mask_path, 255 * mask.astype(np.uint8))mask_visib_path = os.path.join(chunk_dir, 'mask_visib','{im_id:06d}_{gt_id:06d}.png').format(im_id=im_id, gt_id=gt_id)inout.save_im(mask_visib_path, 255 * mask_visib.astype(np.uint8))4.难例渲染
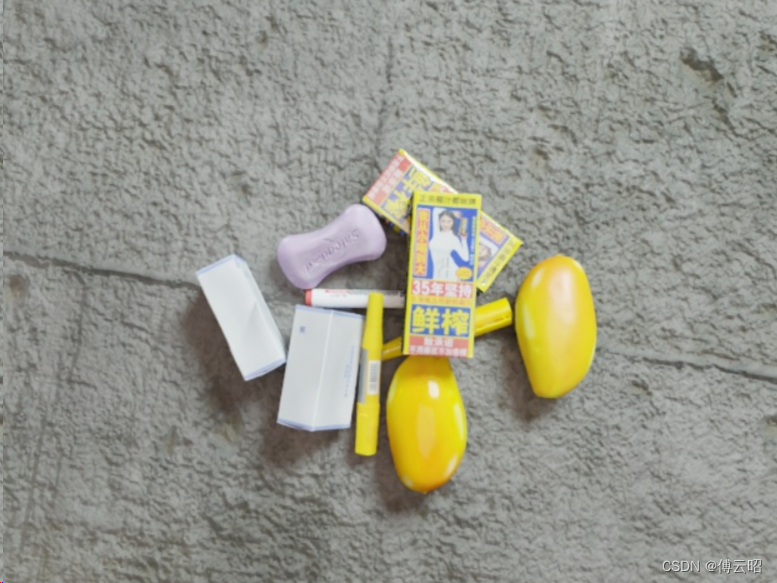
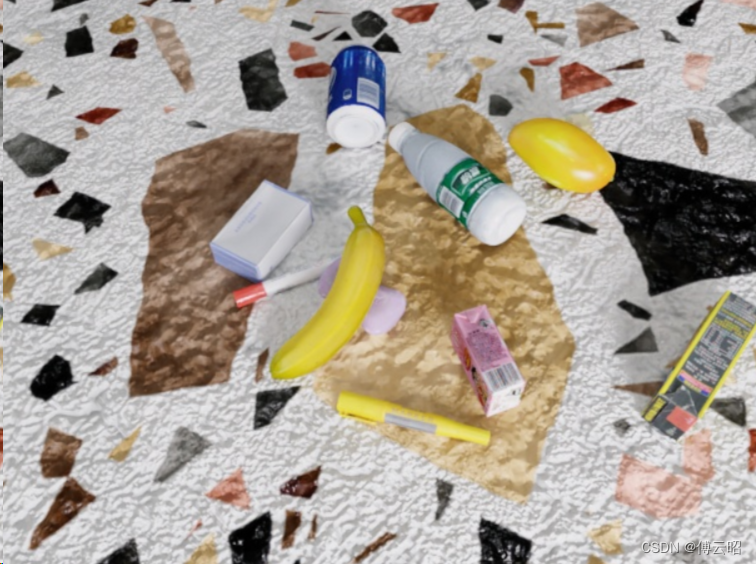
手抓遮挡,纹理背景复杂
一个场景多个椰汁(【model list】又放回抽样模型)
https://github.com/DLR-RM/BlenderProc/blob/main/examples/basics/camera_sampling/README.md
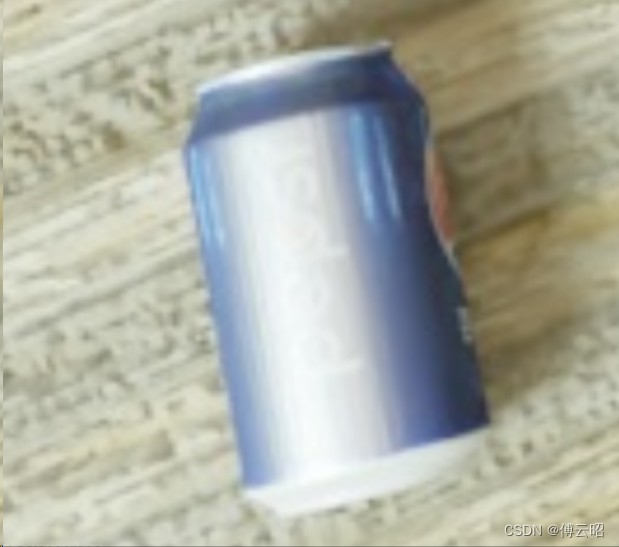
物体高反光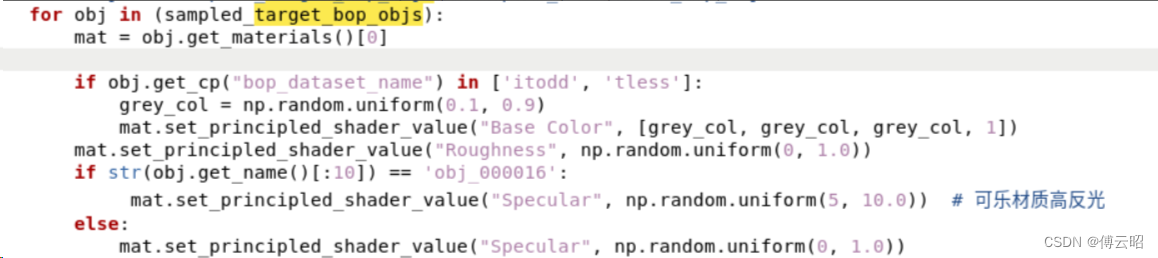
 强弱灯光(明暗)

 物体xyz范围缩小
为了产生遮挡
注意:太小,碰撞检测会不过关,需要很多次采样,但都不一定能成功,耗时


物体重复

干扰物(自定义干扰物遮挡)

需要修改函数,传入obj和干扰物
获取obj的xyz,同时限定干扰物的xyz和obj的xyz高度接近,xy接近,z不接近,避免碰撞检测不过关
物体添加dust
指定遮挡

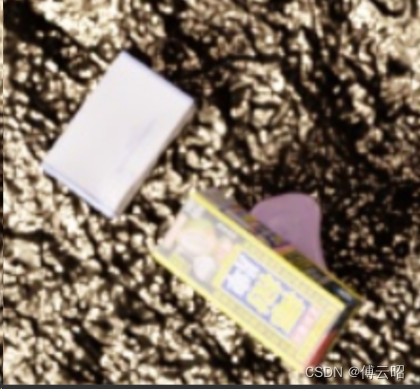
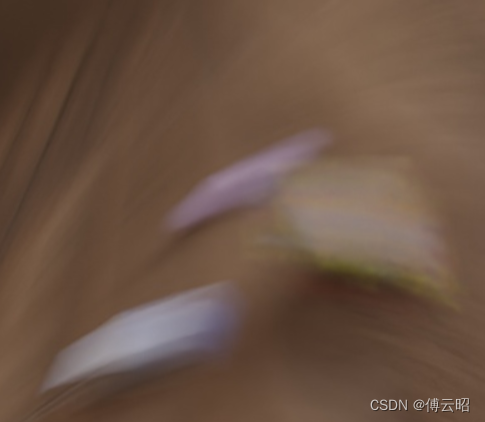
模糊


![[SpringCloud] Feign Client 的创建 (二) (五)](https://img-blog.csdnimg.cn/direct/55d963f193374131acba6a7bdf855588.png)