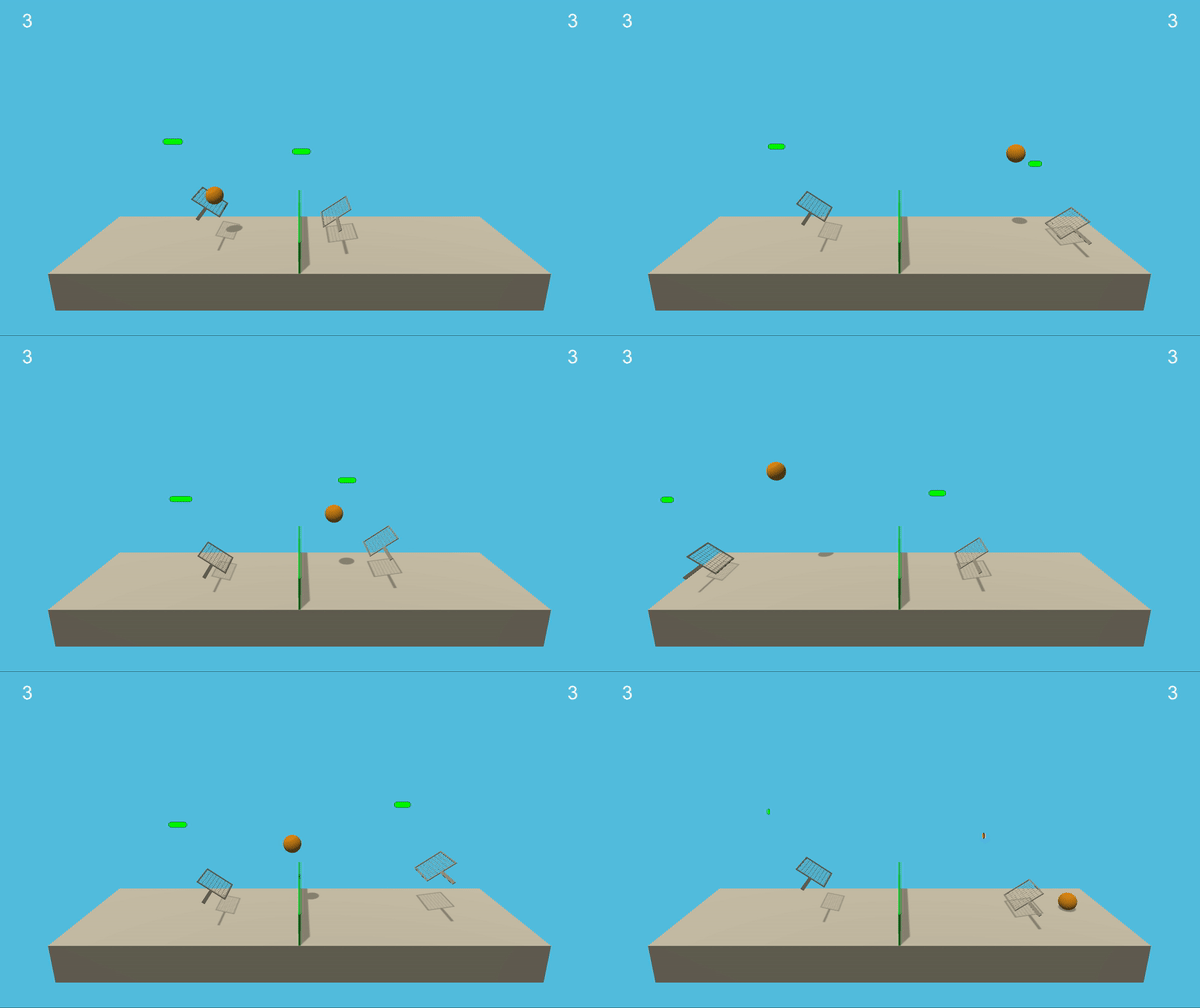
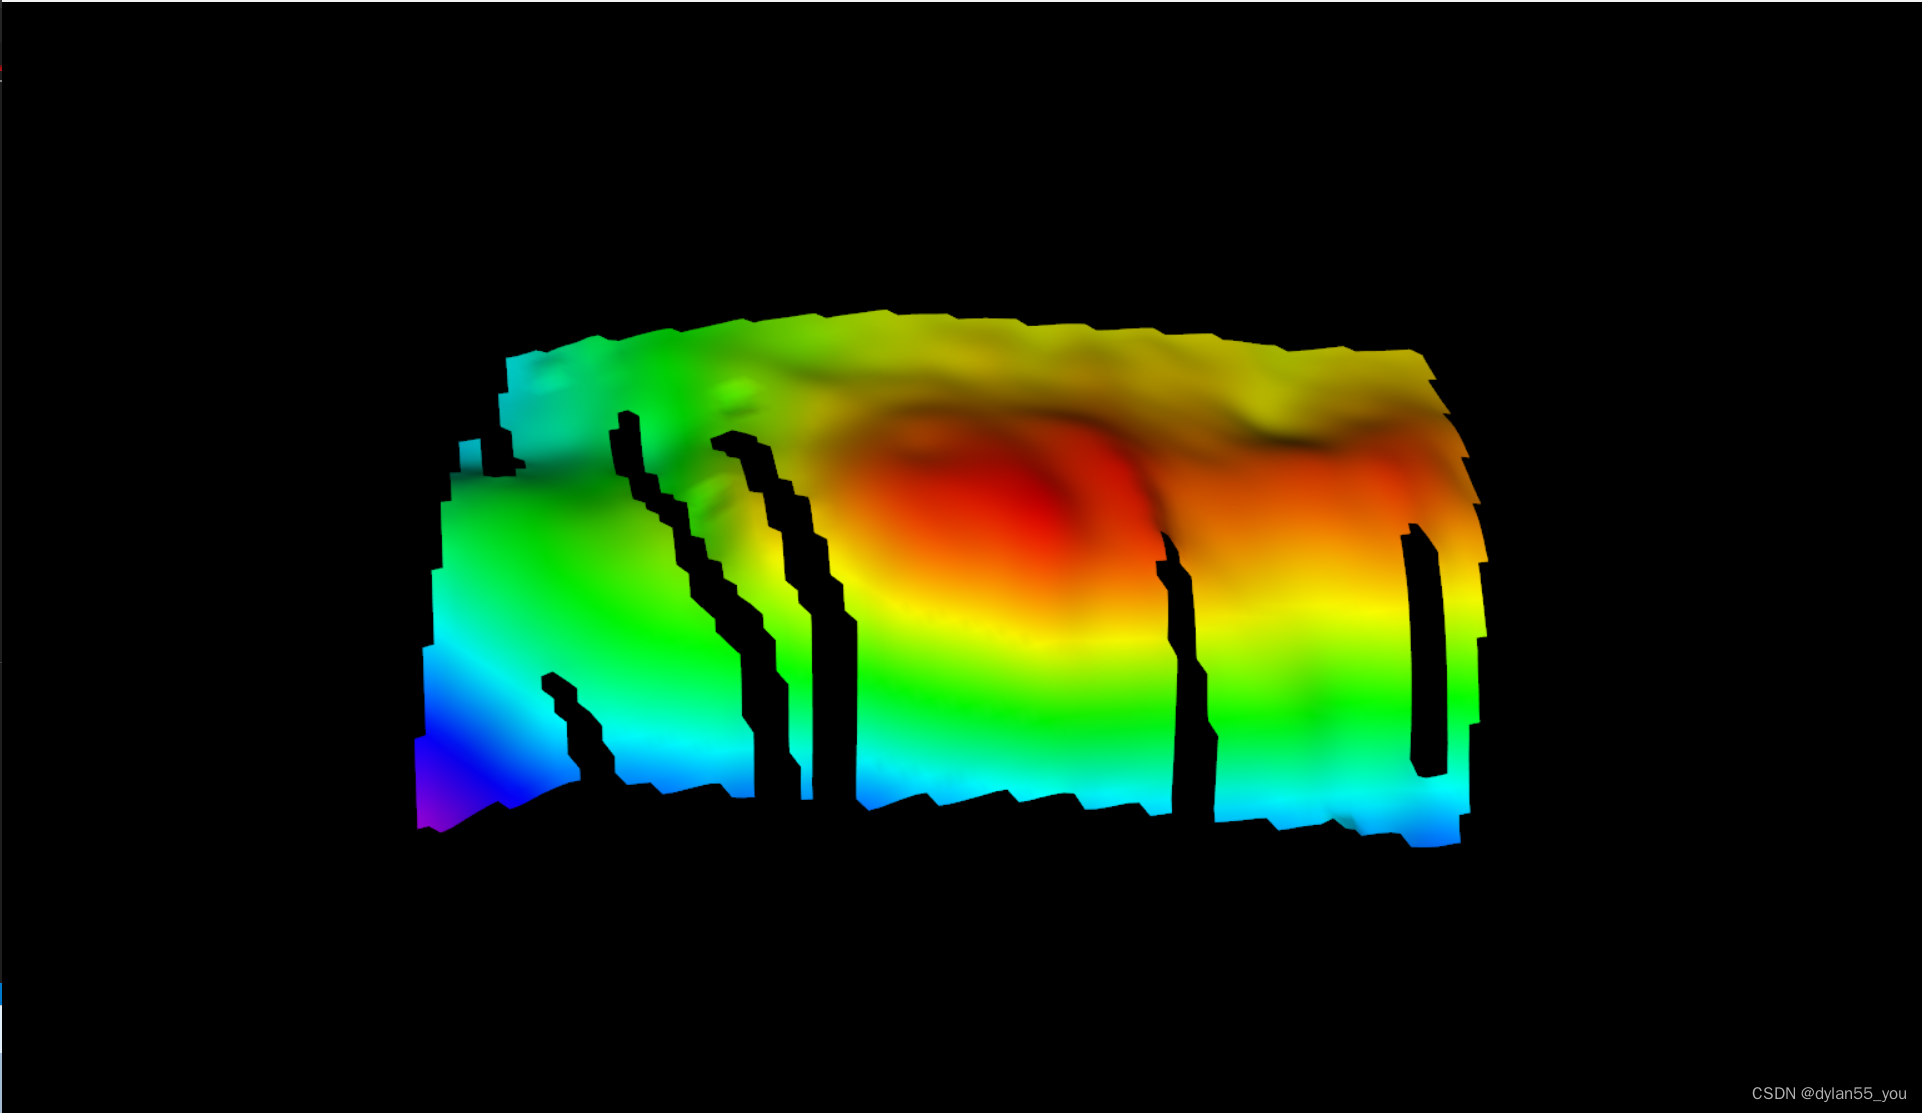
下面三张图均是用VTK实现的,从中很容易看出它们渲染的效果是有区别的:
第一张图:过于明亮,看不到阴影,颜色过渡也不平缓;
第二张图:阴影过于明显,图整体不够明亮;
第三张图:明亮适中同时保留了阴影。
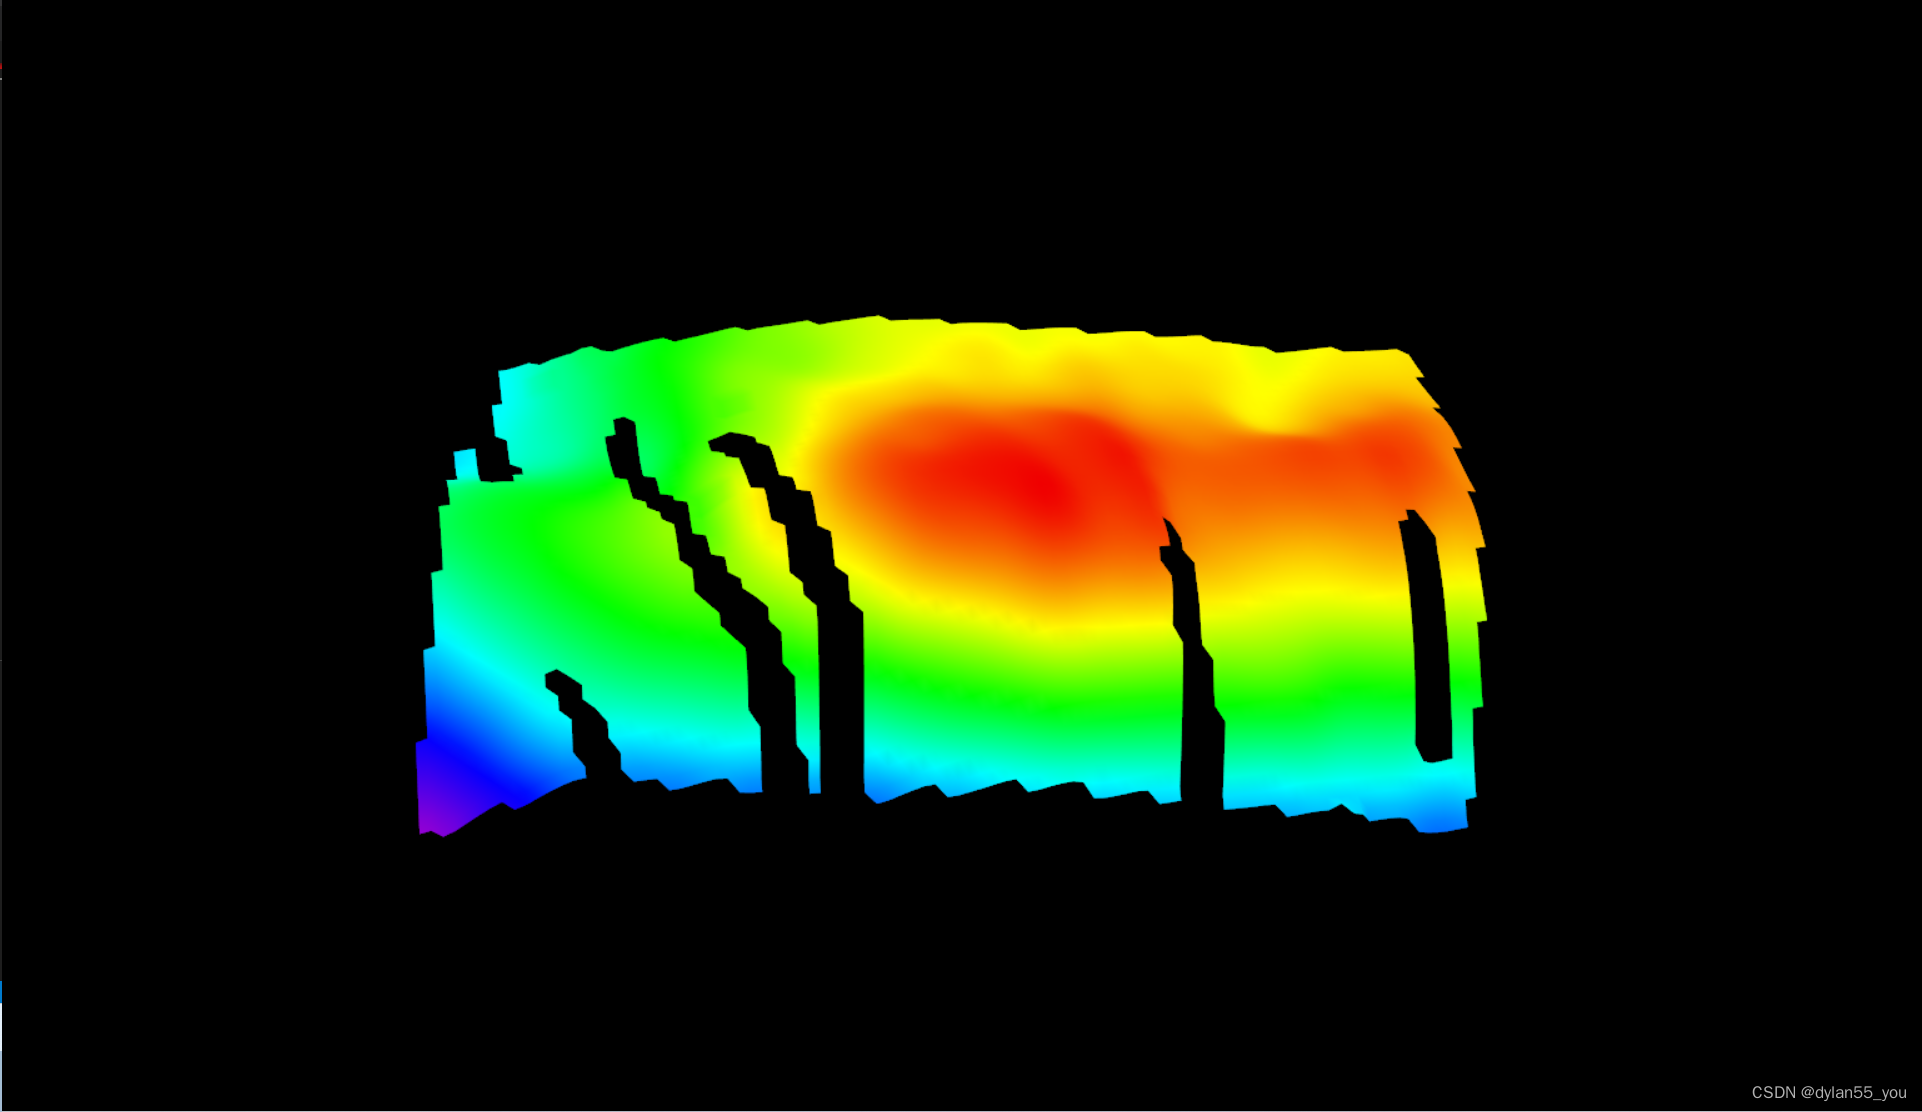

VTK是如何实现不同效果的渲染的?我们又能通过什么方式去控制渲染效果?
VTK如何实现渲染?
了解OpenGL的都知道,一个模型想要在三维视图中显示出来并控制显示效果,至少需要顶点着色器和片段着色器,VTK的底层就是用OpenGL在进行渲染,所以它也少不了这两个着色器。那么,要知道VTK如何实现渲染,实际上是要知道着色器在VTK内部是如何工作的。
着色器在VTK内部的工作流程主要包括以下几步:
- 创建着色器
- 生成着色器代码
- 设置着色器参数
在说明着色器的工作流程之前,需要先了解VTK的工作机制,这样才能知道着色器每个流程具体在哪里实现的。
一个模型(以球为例)要在VTK中显示出来,至少需要创建一下几个对象:
- vtkRenderWindow——窗口
- vtkRenderer——渲染器,控制对象渲染过程
- vtkSphereSource——球模型
- vtkPolyDataMapper——将模型数据映射为几何图元
- vtkActor——表示渲染场景中的实体
绘制接口调用顺序(以windows为例)如下:
vtkRenderWindow::Render() -> vtkRenderer::Render() -> vtkOpenGLRenderer::DeviceRender() -> vtkActor::Render() -> vtkOpenGLActor::Render() -> vtkPolyDataMapper::Render() -> vtkOpenGLPolyDataMapper::RenderPieceDraw()
着色器基本是在vtkOpenGLPolyDataMapper类中进行工作,流程包括以下几步:
1. 创建着色器
void vtkOpenGLPolyDataMapper::UpdateShaders(vtkOpenGLHelper& cellBO, vtkRenderer* ren, vtkActor* actor)
{...// build the shader source codestd::map<vtkShader::Type, vtkShader*> shaders;vtkShader* vss = vtkShader::New();vss->SetType(vtkShader::Vertex);shaders[vtkShader::Vertex] = vss;vtkShader* gss = vtkShader::New();gss->SetType(vtkShader::Geometry);shaders[vtkShader::Geometry] = gss;vtkShader* fss = vtkShader::New();fss->SetType(vtkShader::Fragment);shaders[vtkShader::Fragment] = fss;this->BuildShaders(shaders, ren, actor);...}
从上面的代码可以看到总共创建了三种着色器:顶点着色器,几何着色器和片段着色器。
2. 生成着色器代码
void vtkOpenGLPolyDataMapper::BuildShaders(std::map<vtkShader::Type, vtkShader*> shaders, vtkRenderer* ren, vtkActor* actor)
{
...this->ReplaceShaderValues(shaders, ren, actor);
...
}
void vtkOpenGLPolyDataMapper::ReplaceShaderValues(std::map<vtkShader::Type, vtkShader*> shaders, vtkRenderer* ren, vtkActor* actor)
{this->ReplaceShaderRenderPass(shaders, ren, actor, true);this->ReplaceShaderCustomUniforms(shaders, actor);this->ReplaceShaderColor(shaders, ren, actor);this->ReplaceShaderEdges(shaders, ren, actor);this->ReplaceShaderNormal(shaders, ren, actor);this->ReplaceShaderLight(shaders, ren, actor);this->ReplaceShaderTCoord(shaders, ren, actor);this->ReplaceShaderPicking(shaders, ren, actor);this->ReplaceShaderClip(shaders, ren, actor);this->ReplaceShaderPrimID(shaders, ren, actor);this->ReplaceShaderPositionVC(shaders, ren, actor);this->ReplaceShaderCoincidentOffset(shaders, ren, actor);this->ReplaceShaderDepth(shaders, ren, actor);this->ReplaceShaderRenderPass(shaders, ren, actor, false);// cout << "VS: " << shaders[vtkShader::Vertex]->GetSource() << endl;// cout << "GS: " << shaders[vtkShader::Geometry]->GetSource() << endl;// cout << "FS: " << shaders[vtkShader::Fragment]->GetSource() << endl;
}下面的顶点着色器和片段着色器代码是完成ReplaceShaderValues()之后的生成的。
注:如需知道下面着色器代码是如何生成的,可以详细看ReplaceShaderxxx()中的流程。下面顶点着色器和片段着色器代码对应的是最上面三张图。
顶点着色器代码:
//VTK::System::Dec/*=========================================================================Program:   Visualization ToolkitModule:    vtkPolyDataVS.glslCopyright (c) Ken Martin, Will Schroeder, Bill LorensenAll rights reserved.See Copyright.txt or http://www.kitware.com/Copyright.htm for details.This software is distributed WITHOUT ANY WARRANTY; without eventhe implied warranty of MERCHANTABILITY or FITNESS FOR A PARTICULARPURPOSE.  See the above copyright notice for more information.=========================================================================*/in vec4 vertexMC;// frag position in VC
out vec4 vertexVCVSOutput;// optional normal declaration
//VTK::Normal::Dec
in vec3 normalMC;
uniform mat3 normalMatrix;
out vec3 normalVCVSOutput;// extra lighting parameters
//VTK::Light::Dec// Texture coordinates
//VTK::TCoord::Dec// material property values
in vec4 scalarColor;
out vec4 vertexColorVSOutput;// clipping plane vars
//VTK::Clip::Dec// camera and actor matrix values
uniform mat4 MCDCMatrix;
uniform mat4 MCVCMatrix;// Apple Bug
//VTK::PrimID::Dec// Value raster
//VTK::ValuePass::Dec// picking support
//VTK::Picking::Decvoid main()
{//VTK::CustomBegin::ImplvertexColorVSOutput = scalarColor;normalVCVSOutput = normalMatrix * normalMC;
//VTK::Normal::Impl//VTK::TCoord::Impl//VTK::Clip::Impl//VTK::PrimID::ImplvertexVCVSOutput = MCVCMatrix * vertexMC;gl_Position = MCDCMatrix * vertexMC;//VTK::ValuePass::Impl//VTK::Light::Impl//VTK::Picking::Impl//VTK::CustomEnd::Impl
}
vertexColorVSOutput = scalarColor; 说明顶点着色器输出的颜色是每个点对应的标量的颜色。
片段着色器代码:
//VTK::System::Dec/*=========================================================================Program:   Visualization ToolkitModule:    vtkPolyDataFS.glslCopyright (c) Ken Martin, Will Schroeder, Bill LorensenAll rights reserved.See Copyright.txt or http://www.kitware.com/Copyright.htm for details.This software is distributed WITHOUT ANY WARRANTY; without eventhe implied warranty of MERCHANTABILITY or FITNESS FOR A PARTICULARPURPOSE.  See the above copyright notice for more information.=========================================================================*/
// Template for the polydata mappers fragment shaderuniform int PrimitiveIDOffset;// VC position of this fragment
in vec4 vertexVCVSOutput;// Camera prop
uniform int cameraParallel;// optional color passed in from the vertex shader, vertexColor
uniform float ambientIntensity; // the material ambient
uniform float diffuseIntensity; // the material diffuse
uniform float opacityUniform; // the fragment opacity
uniform vec3 ambientColorUniform; // ambient color
uniform vec3 diffuseColorUniform; // diffuse color
uniform float specularIntensity; // the material specular intensity
uniform vec3 specularColorUniform; // intensity weighted color
uniform float specularPowerUniform;
in vec4 vertexColorVSOutput;// optional surface normal declaration
//VTK::Normal::Dec
uniform mat3 normalMatrix;
in vec3 normalVCVSOutput;// extra lighting parameters
uniform vec3 lightColor0;// Texture maps
//VTK::TMap::Dec// Texture coordinates
//VTK::TCoord::Dec// picking support
//VTK::Picking::Dec// Depth Peeling Support
//VTK::DepthPeeling::Dec// clipping plane vars
//VTK::Clip::Dec// the output of this shader
//VTK::Output::Dec// Apple Bug
//VTK::PrimID::Dec// handle coincident offsets
//VTK::Coincident::Dec// Value raster
//VTK::ValuePass::Dec// surface with edges
//VTK::Edges::Decvoid main()
{// VC position of this fragment. This should not branch/return/discard.vec4 vertexVC = vertexVCVSOutput;// Place any calls that require uniform flow (e.g. dFdx) here.//VTK::UniformFlow::Impl// Set gl_FragDepth here (gl_FragCoord.z by default)//VTK::Depth::Impl// Early depth peeling abort://VTK::DepthPeeling::PreColor// Apple Bug//VTK::PrimID::Impl//VTK::Clip::Impl//VTK::ValuePass::Implvec3 specularColor = specularIntensity * specularColorUniform;float specularPower = specularPowerUniform;vec3 ambientColor = ambientIntensity * vertexColorVSOutput.rgb;vec3 diffuseColor = diffuseIntensity * vertexColorVSOutput.rgb;float opacity = opacityUniform * vertexColorVSOutput.a;//VTK::Edges::Impl// Generate the normal if we are not passed in onevec3 normalVCVSOutput = normalize(normalVCVSOutput);if (gl_FrontFacing == false) { normalVCVSOutput = -normalVCVSOutput; }//VTK::Normal::Implfloat df = max(0.000001, normalVCVSOutput.z);float sf = pow(df, specularPower);vec3 diffuse = df * diffuseColor * lightColor0;vec3 specular = sf * specularColor * lightColor0;gl_FragData[0] = vec4(ambientColor + diffuse + specular, opacity);//VTK::Light::Impl//VTK::TCoord::Implif(gl_FragData[0].a <= 0.0){discard;}//VTK::DepthPeeling::Impl//VTK::Picking::Impl// handle coincident offsets//VTK::Coincident::Impl
}
3. 设置着色器参数
在第2步的片段着色器代码中,我们能看到很多输入变量,这些变量是在哪里设置呢?
void vtkOpenGLPolyDataMapper::SetPropertyShaderParameters(vtkOpenGLHelper& cellBO, vtkRenderer*, vtkActor* actor)
{
...program->SetUniformf("opacityUniform", opacity);program->SetUniformf("ambientIntensity", aIntensity);program->SetUniformf("diffuseIntensity", dIntensity);
...// handle specularif (this->PrimitiveInfo[this->LastBoundBO].LastLightComplexity){program->SetUniformf("specularIntensity", sIntensity);program->SetUniform3f("specularColorUniform", sColor);program->SetUniformf("specularPowerUniform", specularPower);}
...}
opacityUniform——透明度
ambientIntensity——环境光的强度
diffuseIntensity——漫反射光的强度
ambientColorUniform——环境光颜色
diffuseColorUniform——漫反射光颜色
specularIntensity——镜面光强度
specularColorUniform——镜面光颜色
specularPowerUniform——镜面光高光强度
void vtkOpenGLRenderer::UpdateLightingUniforms(vtkShaderProgram* program)
{
...double* dColor = light->GetDiffuseColor();double intensity = light->GetIntensity();
...{lightColor[0] = dColor[0] * intensity;lightColor[1] = dColor[1] * intensity;lightColor[2] = dColor[2] * intensity;}program->SetUniform3f((lcolor + count).c_str(), lightColor);
...}
lightColor0——灯光颜色,0代表的是灯光的序号。
用户如何控制渲染效果?
渲染效果的控制是通过设置着色器参数完成,但这些参数是内部参数,需要在用户能访问的对象(例如:vtkActor、vtkLight)中提供接口给用户来设置这些参数。
vtkActor属性设置:
以最前面的三张图的效果为例:
第一张图的设置为:
actor->GetProperty()->SetAmbient(1.0);
actor->GetProperty()->SetDiffuse(0.0);
actor->GetProperty()->SetSpecular(0.0);
第二张图的设置为:
actor->GetProperty()->SetAmbient(0.0);
actor->GetProperty()->SetDiffuse(1.0);
actor->GetProperty()->SetSpecular(0.0);
第三张图的设置为:
actor->GetProperty()->SetAmbient(0.5);
actor->GetProperty()->SetDiffuse(0.5);
actor->GetProperty()->SetSpecular(0.0);
可以看出,三张图不同的效果是通过改变环境光和漫反射光的强度实现的。
灯光设置
我们都知道,灯光对于渲染是非常重要的,为什么上面不需要对灯光进行设置?
class vtkRenderer : public vtkViewport
{
...vtkLight* CreatedLight;vtkLightCollection* Lights;
...vtkTypeBool TwoSidedLighting;vtkTypeBool AutomaticLightCreation;
...
};vtkRenderer::vtkRenderer()
{
...this->CreatedLight = nullptr;this->AutomaticLightCreation = 1;this->TwoSidedLighting = 1;
...this->Lights = vtkLightCollection::New();
...
}
void vtkOpenGLRenderer::DeviceRender()
{
...this->UpdateLights();
...
}int vtkOpenGLRenderer::UpdateLights()
{
...// create alight if neededif (!lightingCount){if (this->AutomaticLightCreation){vtkDebugMacro(<< "No lights are on, creating one.");this->CreateLight();lc->InitTraversal(sit);light = lc->GetNextLight(sit);ltime = lc->GetMTime();lightingCount = 1;lightingComplexity = light->GetLightType() == VTK_LIGHT_TYPE_HEADLIGHT ? 1 : 2;ltime = vtkMath::Max(ltime, light->GetMTime());}}
...
}void vtkRenderer::CreateLight()
{if (!this->AutomaticLightCreation){return;}if (this->CreatedLight){this->RemoveLight(this->CreatedLight);this->CreatedLight->UnRegister(this);this->CreatedLight = nullptr;}// I do not see why UnRegister is used on CreatedLight, but lets be// consistent.vtkLight* l = this->MakeLight();this->CreatedLight = l;this->CreatedLight->Register(this);this->AddLight(this->CreatedLight);l->Delete();this->CreatedLight->SetLightTypeToHeadlight();// set these values just to have a good default should LightFollowCamera// be turned off.this->CreatedLight->SetPosition(this->GetActiveCamera()->GetPosition());this->CreatedLight->SetFocalPoint(this->GetActiveCamera()->GetFocalPoint());
}
从上面的代码可以看出,当用户没有自己创建灯光时,VTK会自动创建一个灯光,并且灯光类型为HeadLight。
- HeadLight:位于相机位置并指向焦点。
- CameraLight:与HeadLight类似,但它不一定在相机位置。它定义在一个相机位于(0,0,1),朝向(0,0,0),距离为1,up方向为(0,1,0)的坐标空间中。
- SceneLight:位于世界坐标空间中的光源。
class vtkLight : public vtkObject
{
...double Intensity;double AmbientColor[3];double DiffuseColor[3];double SpecularColor[3];
...
};vtkLight::vtkLight()
{
...this->DiffuseColor[0] = 1.0;this->DiffuseColor[1] = 1.0;this->DiffuseColor[2] = 1.0;
...this->Intensity = 1.0;
...
}
从上面的代码可以看到,自动创建的灯光的颜色为白光,强度为1。
要想控制灯光的强度,需要自己创建一个灯光,并关闭自动创建灯光开关,代码如下:
int main(int, char*[])
{
...vtkNew<vtkRenderer> renderer;renderer->SetAutomaticLightCreation(false);renderWindow->AddRenderer(renderer);vtkNew<vtkLight> light;light->SetLightTypeToHeadlight();light->SetDiffuseColor(1, 1, 1);light->SetIntensity(0.5);light->SetPosition(0, 0, 1);light->SetFocalPoint(0, 0, 0);renderer->AddLight(light);...
}
基于上面第三张图的设置加上光照强度之后的效果图如下:
actor->GetProperty()->SetAmbient(0.5);
actor->GetProperty()->SetDiffuse(0.5);
actor->GetProperty()->SetSpecular(0.0);
light->SetIntensity(0.5);
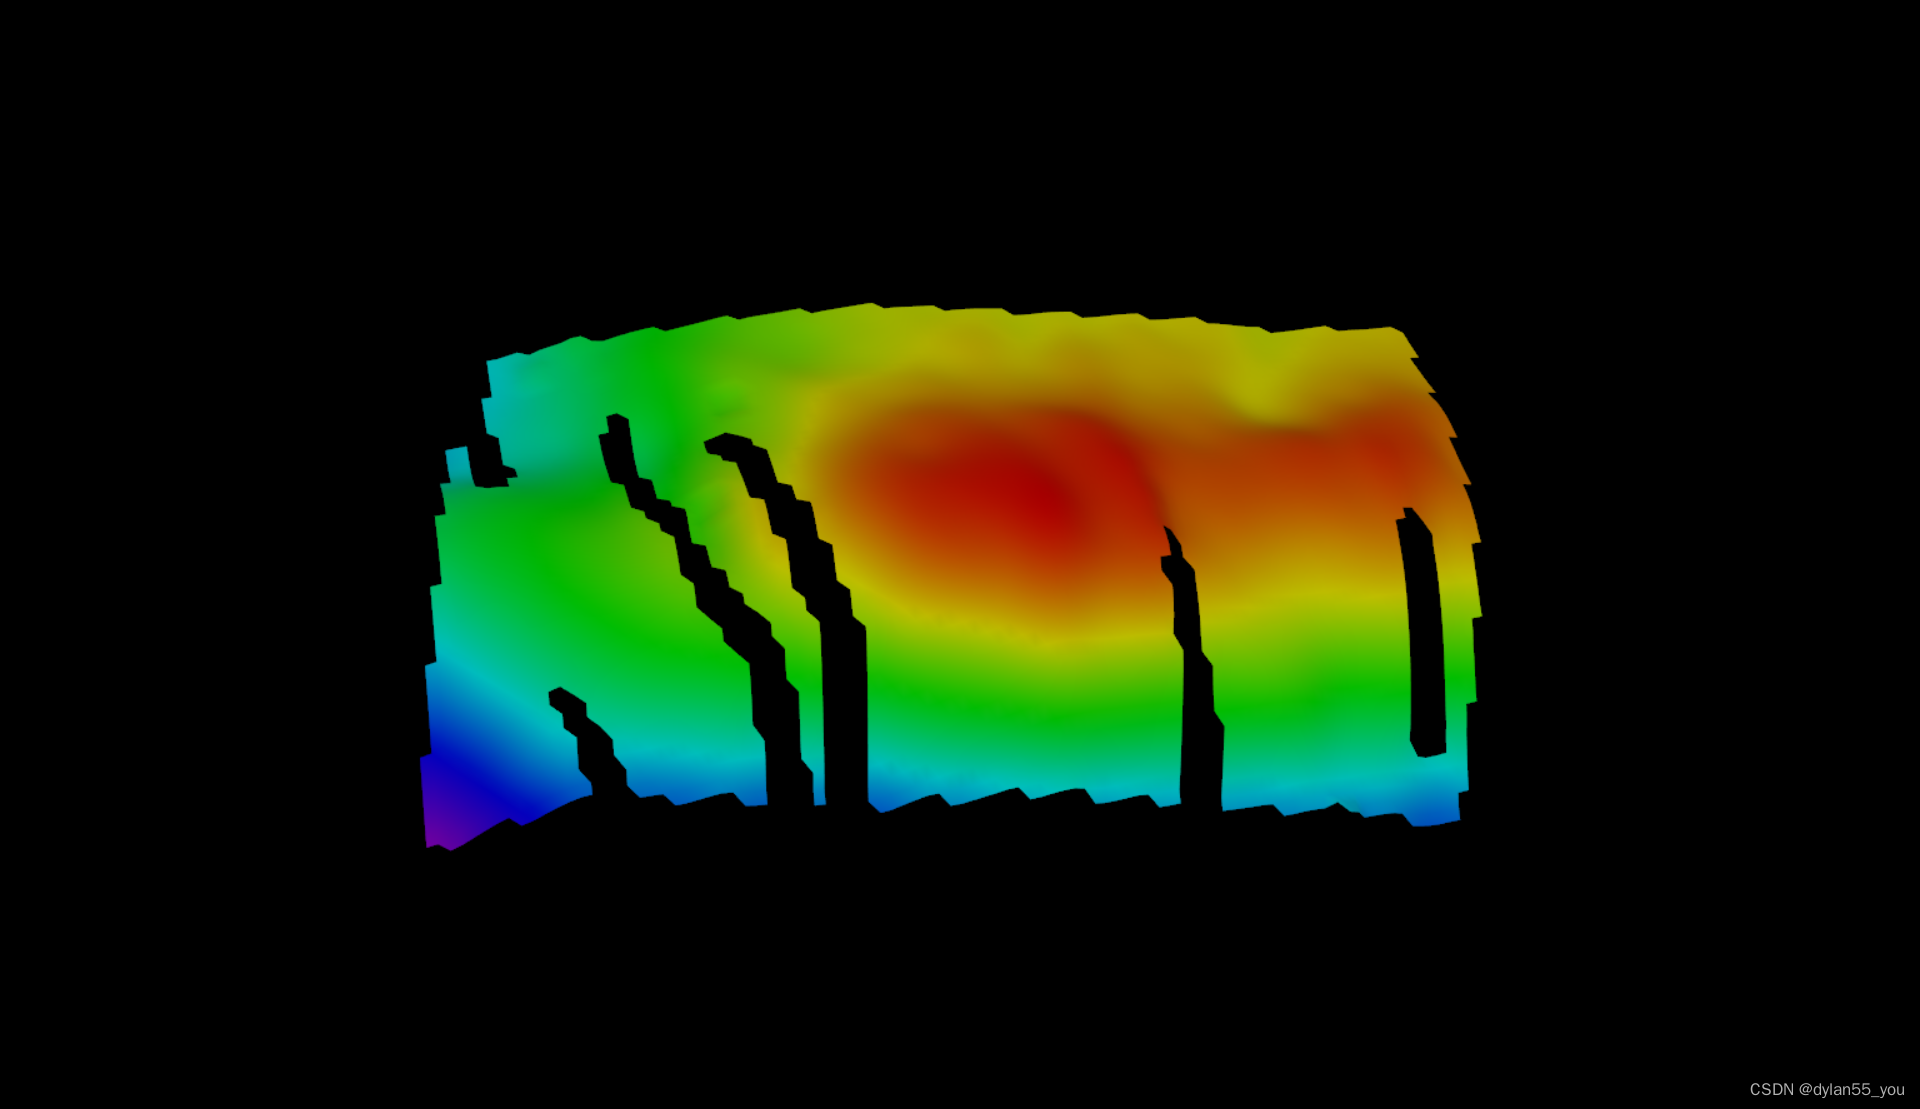
可以看到图相比之前变暗了。为什么会变暗呢?
下面是片段着色器的部分代码:
vec3 specularColor = specularIntensity * specularColorUniform;
float specularPower = specularPowerUniform;
vec3 ambientColor = ambientIntensity * vertexColorVSOutput.rgb;
vec3 diffuseColor = diffuseIntensity * vertexColorVSOutput.rgb;
float opacity = opacityUniform * vertexColorVSOutput.a;
//VTK::Edges::Impl
// Generate the normal if we are not passed in one
vec3 normalVCVSOutput = normalize(normalVCVSOutput);
if (gl_FrontFacing == false) { normalVCVSOutput = -normalVCVSOutput; }
//VTK::Normal::Impl
float df = max(0.000001, normalVCVSOutput.z);
float sf = pow(df, specularPower);
vec3 diffuse = df * diffuseColor * lightColor0;
vec3 specular = sf * specularColor * lightColor0;
gl_FragData[0] = vec4(ambientColor + diffuse + specular, opacity);
从片段着色器的代码可以看到,调整光照强度,改变的是lightColor0的值,其会影响到漫反射颜色,但不会影响到环境光的颜色。
原先光照强度为1.0时,lightColor0 = (1, 1, 1)
后调整光照强度为0.5时,lightColor0 = (0.5, 0.5, 0.5)
vec3 diffuse = df * diffuseColor * lightColor0; 所以漫反射光的值变小,图就变暗了。另外,可以看出在这种片段着色器代码情况下,改变光照强度实际上与改变vtkActor属性的漫反射光强度是一致的,本质都是改变漫反射光的颜色。
