CP04大语言模型ChatGLM3-6B特性代码解读(2)
文章目录
- CP04大语言模型ChatGLM3-6B特性代码解读(2)
- 构建对话demo_chat.py
- 定义client对象
- 与LLM进行对话
- 构建工具调用demo_tool.py
- 定义client对象
- 定义工具调用提示词
- 定义main,传递参数
- 在main方法中,实现一个for循环,只循环5次,以完成工具调用Role之间的一轮对话
- 在`for response in client.generate_stream`循环内对response按条件处理
- 构建代码解释器demo_ci.py
- 定义代码解释器提示词
- 定义IPY内核以及client对象
- 在main方法中,实现一个for循环,只循环5次,以完成工具调用Role之间的一轮对话
- 在`for response in client.generate_stream`循环内对response按条件处理
- 代码解释器调用的提示词过程
对话模式、工具模式、代码解释器模式例程阅读理解。
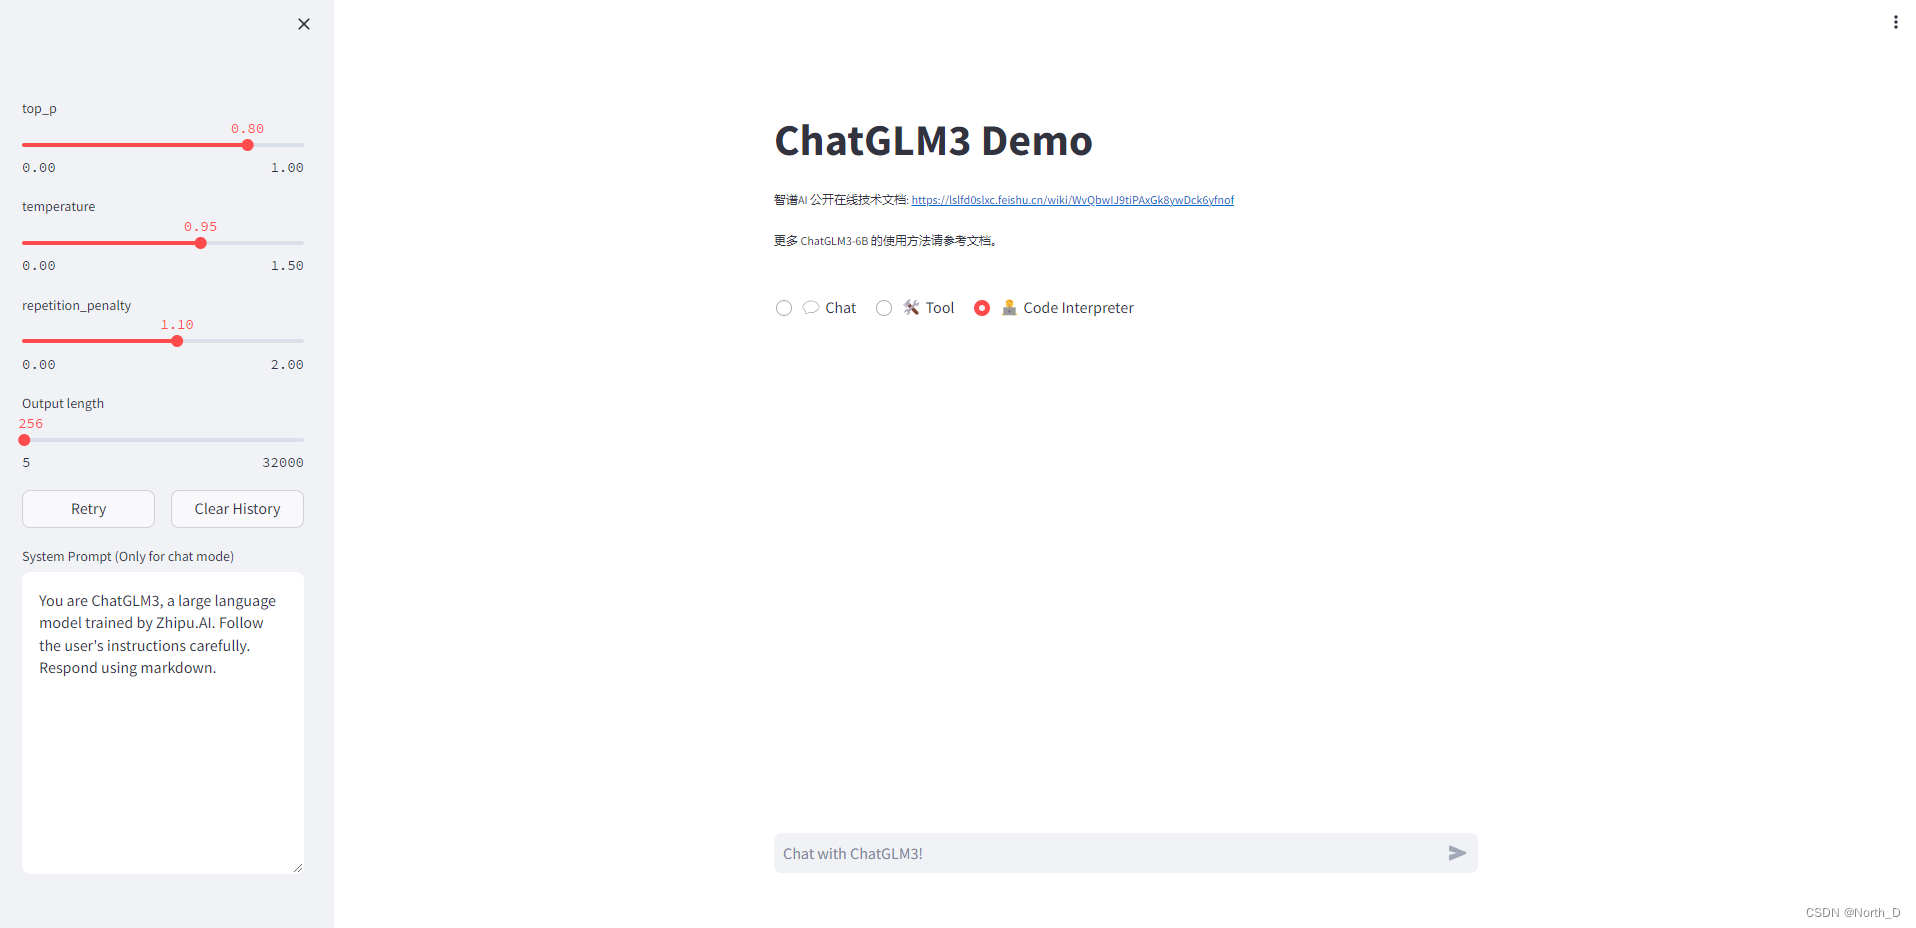
ChatGLM3-6B已经进行了中文场景的训练,可以直接运用于中文场景。在生成模型中使用自定义LogitsProcessor中怎样使用logits processor来改变生成过程中的概率,进而改变生成的结果。
CLI代码包括:
conversation.py
demo_ci.py
main.py
client.py
demo_chat.py
demo_tool.py
tool_registry.py
上一篇解读了client.py和conversation.py,本篇解读完其他代码。
构建对话demo_chat.py
首先定义client对象,然后调用client.generate_stream()方法获得response。
定义client对象
from client import get_client
from conversation import postprocess_text, preprocess_text, Conversation, Roleclient = get_client()
与LLM进行对话
- 定义main,输入参数
def main(prompt_text: str,system_prompt: str,top_p: float = 0.8,temperature: float = 0.95,repetition_penalty: float = 1.0,max_new_tokens: int = 1024,retry: bool = False
):
- 在for循环中进行对话
for response in client.generate_stream(system_prompt,tools=None,history=history,do_sample=True,max_new_tokens=max_new_tokens,temperature=temperature,top_p=top_p,stop_sequences=[str(Role.USER)],repetition_penalty=repetition_penalty,):
构建工具调用demo_tool.py
之前的文章《CP01大语言模型ChatGLM3-6B使用CLI代码进行代码调用初体验》介绍了工具调用,可以发现一个完整的工具调用需要在<|system|><|user|><|assistant|><|observation|>这几个Role之间进行一轮对话,才能完成。demo_tool.py中也是用for response in client.generate_stream来完成一轮对话,以实现工具调用。
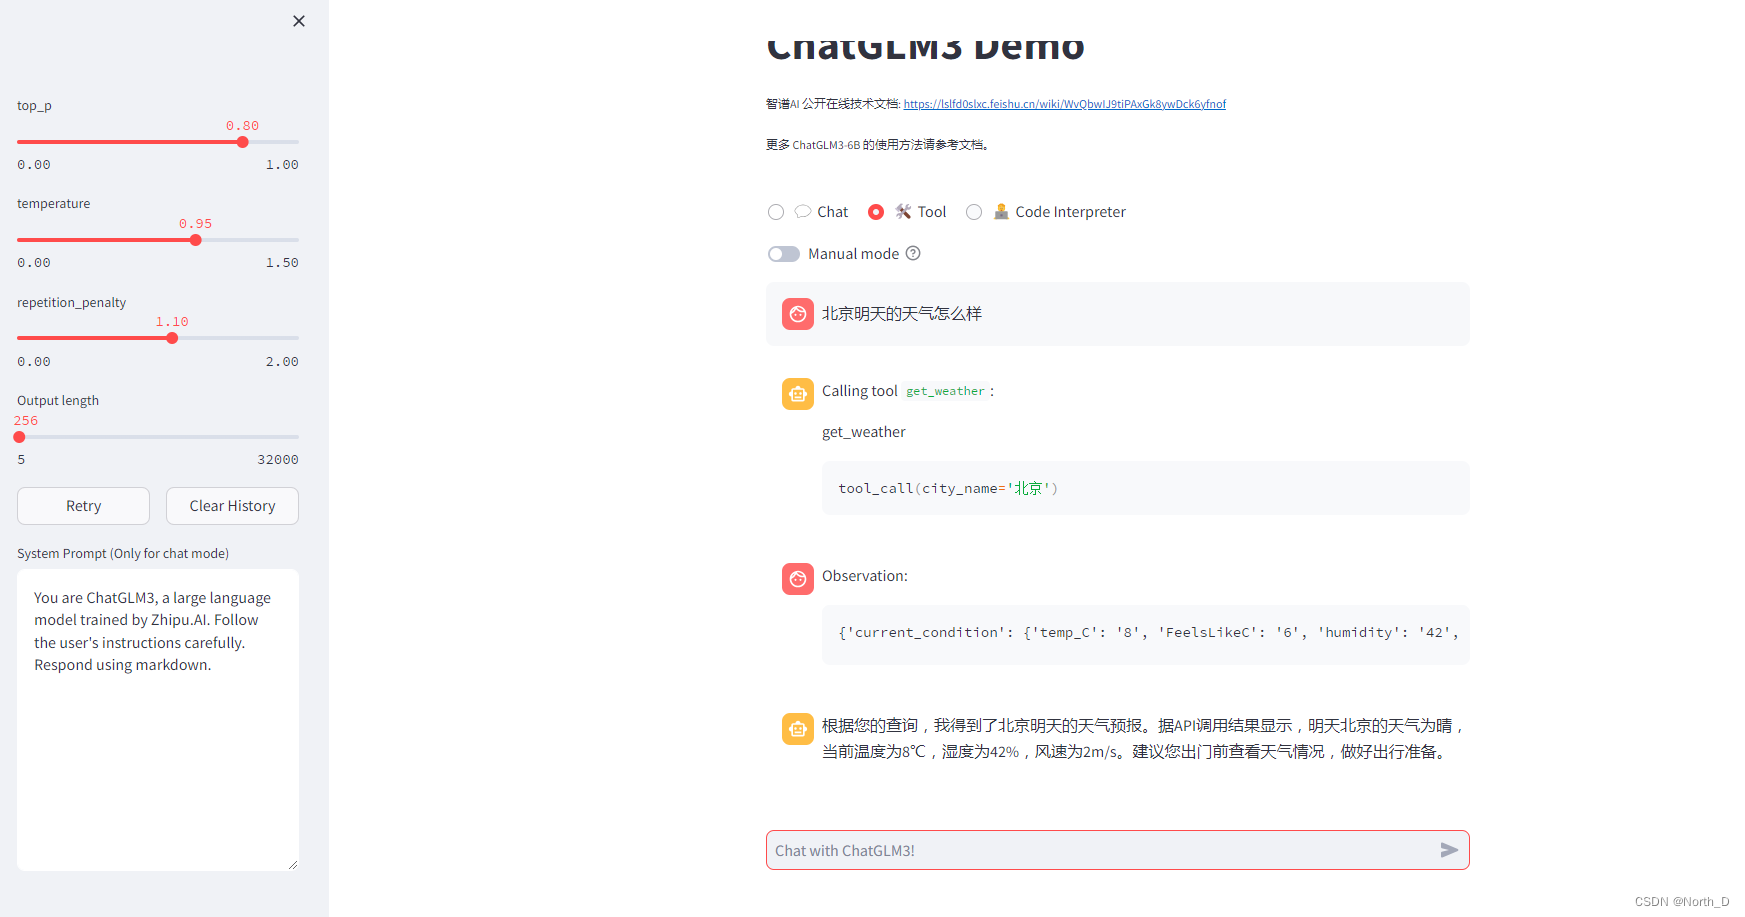
当前8℃,百度查询今天是3-8℃:

定义client对象
client = get_client()
定义工具调用提示词
按照json结构定义一个变量,定义名为get_current_weather的工具:
EXAMPLE_TOOL = {"name": "get_current_weather","description": "Get the current weather in a given location","parameters": {"type": "object","properties": {"location": {"type": "string","description": "The city and state, e.g. San Francisco, CA",},"unit": {"type": "string", "enum": ["celsius", "fahrenheit"]},},"required": ["location"],}
}
定义main,传递参数
def main(prompt_text: str,top_p: float = 0.2,temperature: float = 0.1,repetition_penalty: float = 1.1,max_new_tokens: int = 1024,truncate_length: int = 1024,retry: bool = False
):
在main方法中,实现一个for循环,只循环5次,以完成工具调用Role之间的一轮对话
注意这里system没有传入提示词。
for _ in range(5):output_text = ''for response in client.generate_stream(system=None,tools=tools,history=history,do_sample=True,max_new_tokens=max_new_tokens,temperature=temperature,top_p=top_p,stop_sequences=[str(r) for r in (Role.USER, Role.OBSERVATION)],repetition_penalty=repetition_penalty,):
在for response in client.generate_stream循环内对response按条件处理
token = response.tokenif response.token.special:print("\n==Output:==\n", output_text)match token.text.strip():case '<|user|>':append_conversation(Conversation(Role.ASSISTANT,postprocess_text(output_text),), history, markdown_placeholder)return# Initiate tool callcase '<|assistant|>':append_conversation(Conversation(Role.ASSISTANT,postprocess_text(output_text),), history, markdown_placeholder)output_text = ''message_placeholder = placeholder.chat_message(name="tool", avatar="assistant")markdown_placeholder = message_placeholder.empty()continuecase '<|observation|>':tool, *call_args_text = output_text.strip().split('\n')call_args_text = '\n'.join(call_args_text)append_conversation(Conversation(Role.TOOL,postprocess_text(output_text),tool,), history, markdown_placeholder)message_placeholder = placeholder.chat_message(name="observation", avatar="user")markdown_placeholder = message_placeholder.empty()try:code = extract_code(call_args_text)args = eval(code, {'tool_call': tool_call}, {})except:st.error('Failed to parse tool call')returnoutput_text = ''if manual_mode:st.info('Please provide tool call results below:')returnelse:with markdown_placeholder:with st.spinner(f'Calling tool {tool}...'):observation = dispatch_tool(tool, args)if len(observation) > truncate_length:observation = observation[:truncate_length] + ' [TRUNCATED]'append_conversation(Conversation(Role.OBSERVATION, observation), history, markdown_placeholder)message_placeholder = placeholder.chat_message(name="assistant", avatar="assistant")markdown_placeholder = message_placeholder.empty()st.session_state.calling_tool = Falsebreakcase _:st.error(f'Unexpected special token: {token.text.strip()}')return构建代码解释器demo_ci.py
代码解释器与代码调用实现过程类似,是一种特殊的工具调用。也是在<|system|><|user|><|assistant|><|observation|>这几个Role之间进行一轮对话,才能完成
,在这几个Role之外,多了<|interpreter|>。
定义代码解释器提示词
SYSTEM_PROMPT = '你是一位智能AI助手,你叫ChatGLM,你连接着一台电脑,但请注意不能联网。在使用Python解决任务时,你可以运行代码并得到结果,如果运行结果有错误,你需要尽可能对代码进行改进。你可以处理用户上传到电脑上的文件,文件默认存储路径是/mnt/data/。'
定义IPY内核以及client对象
IPYKERNEL = os.environ.get('IPYKERNEL', 'chatglm3-demo')client = get_client()
在main方法中,实现一个for循环,只循环5次,以完成工具调用Role之间的一轮对话
注意这里system参入了提示词。
for _ in range(5):output_text = ''for response in client.generate_stream(system=SYSTEM_PROMPT,tools=None,history=history,do_sample=True,max_new_token=max_new_tokens,temperature=temperature,top_p=top_p,stop_sequences=[str(r) for r in (Role.USER, Role.OBSERVATION)],repetition_penalty=repetition_penalty,):
在for response in client.generate_stream循环内对response按条件处理
if response.token.special:print("\n==Output:==\n", output_text)match token.text.strip():case '<|user|>':append_conversation(Conversation(Role.ASSISTANT,postprocess_text(output_text),), history, markdown_placeholder)return# Initiate tool callcase '<|assistant|>':append_conversation(Conversation(Role.ASSISTANT,postprocess_text(output_text),), history, markdown_placeholder)message_placeholder = placeholder.chat_message(name="interpreter", avatar="assistant")markdown_placeholder = message_placeholder.empty()output_text = ''continuecase '<|observation|>':code = extract_code(output_text)display_text = output_text.split('interpreter')[-1].strip()append_conversation(Conversation(Role.INTERPRETER,postprocess_text(display_text),), history, markdown_placeholder)message_placeholder = placeholder.chat_message(name="observation", avatar="user")markdown_placeholder = message_placeholder.empty()output_text = ''with markdown_placeholder:with st.spinner('Executing code...'):try:res_type, res = execute(code, get_kernel())except Exception as e:st.error(f'Error when executing code: {e}')returnprint("Received:", res_type, res)if truncate_length:if res_type == 'text' and len(res) > truncate_length:res = res[:truncate_length] + ' [TRUNCATED]'append_conversation(Conversation(Role.OBSERVATION,'[Image]' if res_type == 'image' else postprocess_text(res),tool=None,image=res if res_type == 'image' else None,), history, markdown_placeholder)message_placeholder = placeholder.chat_message(name="assistant", avatar="assistant")markdown_placeholder = message_placeholder.empty()output_text = ''breakcase _:st.error(f'Unexpected special token: {token.text.strip()}')breakoutput_text += response.token.textdisplay_text = output_text.split('interpreter')[-1].strip()markdown_placeholder.markdown(postprocess_text(display_text + '▌'))
代码解释器调用的提示词过程
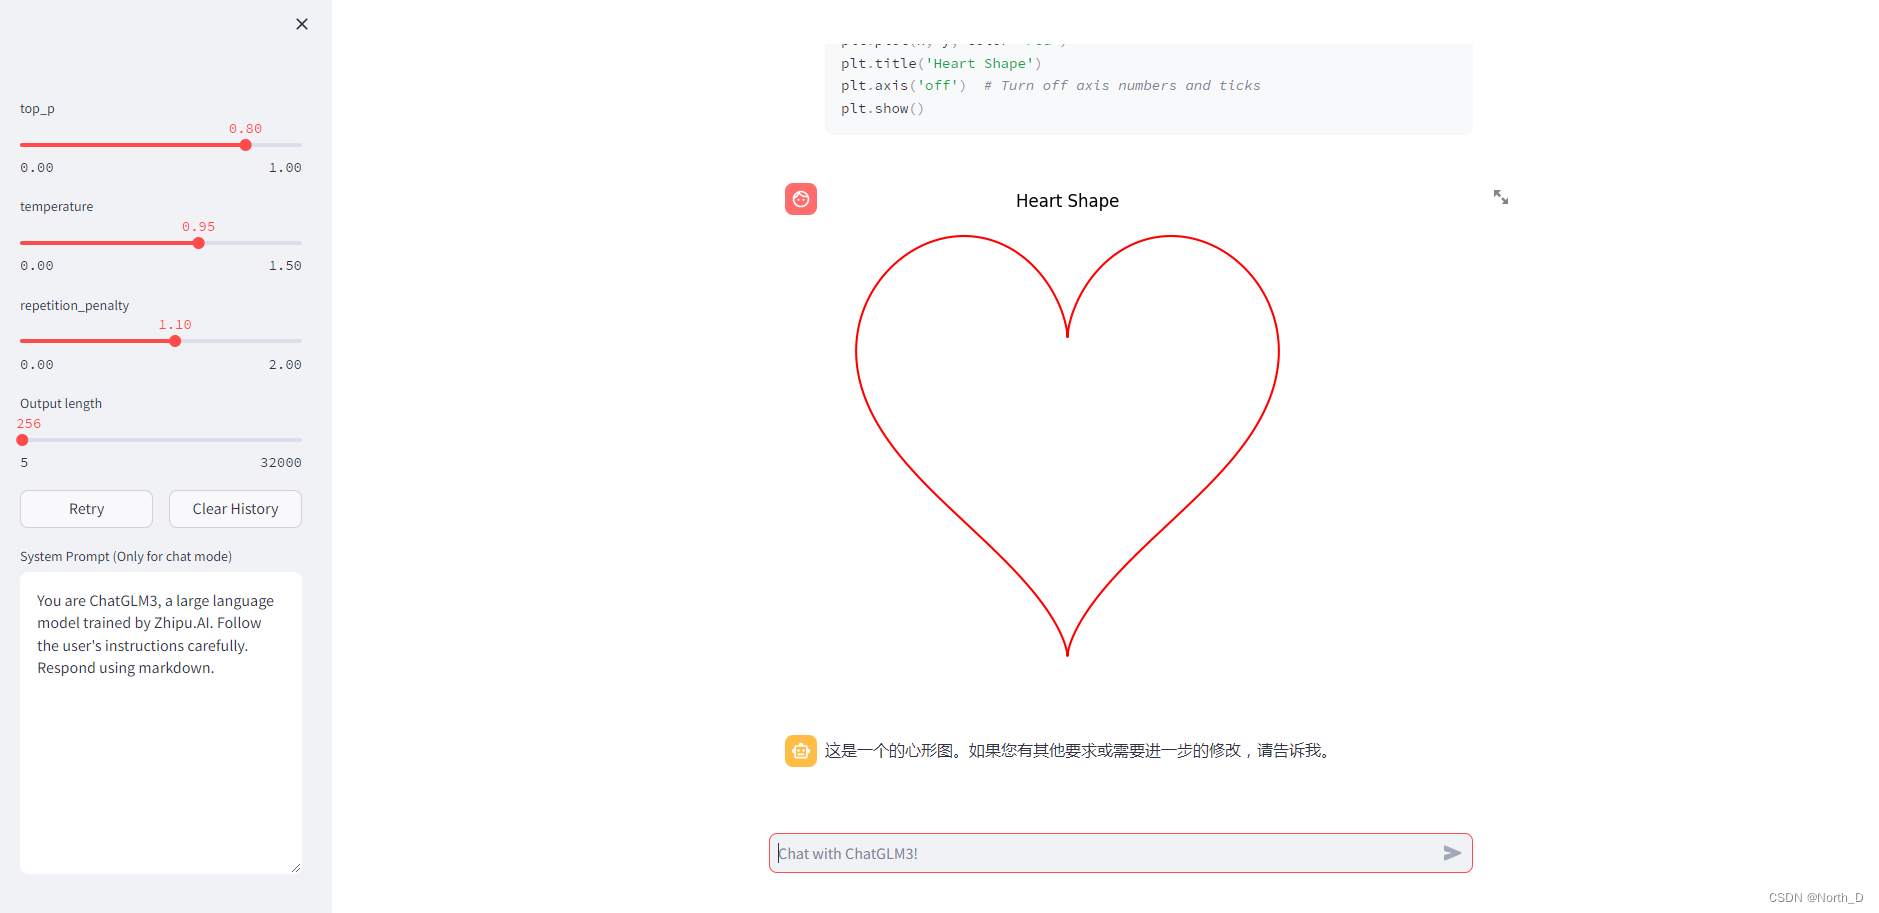
观察以下过程,发现代码解释器在运行前,先注册了一个工具[registered tool],名为’name’: ‘random_number_generator’。不难看出,代码解释器就是一个工具调用的过程。
Loading checkpoint shards: 100%|█████████████████████████████████████████████████████████████████████████| 7/7 [01:09<00:00, 9.88s/it]
[registered tool] {‘description’: ‘Generates a random number x, s.t. range[0] <= x < range[1]’,
‘name’: ‘random_number_generator’,
‘params’: [{‘description’: ‘The random seed used by the generator’,
‘name’: ‘seed’,
‘required’: True,
‘type’: ‘int’},
{‘description’: ‘The range of the generated numbers’,
‘name’: ‘range’,
‘required’: True,
‘type’: ‘tuple[int, int]’}]}
[registered tool] {‘description’: ‘Get the current weather forcity_name’,
‘name’: ‘get_weather’,
‘params’: [{‘description’: ‘The name of the city to be queried’,
‘name’: ‘city_name’,
‘required’: True,
‘type’: ‘str’}]}
[registered tool] {‘description’: ‘Use shell to run command’,
‘name’: ‘get_shell’,
‘params’: [{‘description’: ‘The command should run in Linux shell’,
‘name’: ‘query’,
‘required’: True,
‘type’: ‘str’}]}== Input ==
请生成一个代码,实现心形,并绘制History
[{‘role’: ‘system’, ‘content’: ‘你是一位智能AI助手,你叫ChatGLM,你连接着一台电脑,但请注意不能联网。在使用Python解决任务时,你可以运行代码并得到结果,如果运行结果有错误,你需要尽可能对代码进行改进。你可以处理用户上传到电脑上的文件,文件默认存储路径是/mnt/data/。’}, {‘role’: ‘user’, ‘content’: ‘请生成一个代码,实现心形’}, {‘role’: ‘assistant’, ‘content’: “好的,我将为您提供一个简单的Python代码来绘制一个心形。这里我们将使用matplotlib库,这是一个用于绘制2D图形的强大工具。\n\npython\nimport matplotlib.pyplot as plt\nimport numpy as np\n\ndef draw_heart(size=600, color='red'):\n # 参数方程\n x = size * np.cos(np.linspace(0, np.pi, size))\n y = size * np.sin(np.linspace(0, np.pi, size))\n \n plt.figure(figsize=(8, 8))\n plt.plot(x, y, 'r')\n plt.axis('equal') # 确保心形在各个方向上均勻分布\n plt.title('Heart Shape')\n plt.xlabel('X-axis')\n plt.ylabel('Y-axis')\n plt.grid(True)\n plt.gca().set_aspect('equal', adjustable='box')\n plt.show()\n\ndraw_heart()\n\n\n上述代码”}]Output:
interpreterimport matplotlib.pyplot as plt import numpy as npdef draw_heart(size=600, color='red'):# 参数方程x = size * np.cos(np.linspace(0, np.pi, size))y = size * np.sin(np.linspace(0, np.pi, size))plt.figure(figsize=(8, 8))plt.plot(x, y, 'r')plt.axis('equal') # 确保心形在各个方向上均勻分布plt.title('Heart Shape')plt.xlabel('X-axis')plt.ylabel('Y-axis')plt.grid(True)plt.gca().set_aspect('equal', adjustable='box')plt.show()draw_heart()Backend kernel started with the configuration: /tmp/tmpkspqb3jz.json
{‘control_port’: 60651,
‘hb_port’: 56547,
‘iopub_port’: 57651,
‘ip’: ‘127.0.0.1’,
‘key’: b’f588594c-281de24e935be8cae16fda73’,
‘shell_port’: 33721,
‘signature_scheme’: ‘hmac-sha256’,
‘stdin_port’: 41243,
‘transport’: ‘tcp’}
Code kernel started.
Received: image <PIL.PngImagePlugin.PngImageFile image mode=RGBA size=695x395 at 0x7F0FE3C57C70>


![XFF伪造 [MRCTF2020]PYWebsite1](https://img-blog.csdnimg.cn/direct/7cc699f2086e48e58ba1be392ee5669f.png)
