1.Spring概述
1.1 Spring框架是什么
Spring是与2003年兴起的一个轻量级的Java开发框架,它是为了解决企业应用开发的复杂性而创建的。Spring的核心是控制反转(IOC)和面向切面编程(AOP)。Spring是可以在Java SE/EE中使用的轻量级开源框架。
Spring的主要作用就是为代码"解耦",降低代码间的耦合度。就是让对象和对象(模板和模板)之间关系不是使用代码关联,而是通过配置来说明。即在Spring中说明对象(模块)的关系。
Spring根据代码的功能特点,使用IOC降低业务对象之间耦合度。IOC使得主业务在相互调用过程中,不用再自己维护关系了,即不用再自己创建要使用的对象了,而是由Spring容器统一管理,自动"注入",注入即赋值。而AOP使得系统服务得到了最大复用,且不用再由及程序手工将系统及服务"混杂"到主业务逻辑中了,而是由Spring容器统一完成
1.2 Spring优点
1.2.1 轻量
Spring框架使用的jar都比较小,一般在1M以下或者几百kb。Spring核心功能所需的jar包总共在3M左右
Spring框架运行占用的资源少,运行效率高。不依赖其他jar包
1.2.2 针对接口编程,解耦合
Spring提供了IoC控制反转,由容器管理对象,对象的依赖关系。原来在程序代码中的对象创建方式,现在由容器完成。对象之间的依赖解耦合。
1.2.3 AOP编程的支持
通过Spring提供的AOP功能,方便进行面向切面的编程,许多不容易用传统OOP实现的功能可以通过AOP轻松应付。
1.2.4 方便集成各种优秀框架
Spring不排斥各种优秀的开源框架,相反Spring可以降低各种框架的使用难度,Spring提供了对各种优秀框架(如 Sruts,Hibernate,MyBatis)等的直接支持,简化框架的使用。
2 IoC控制反转
2.1 概念
IoC,Inversion of Control:控制反转,是一个理论,一个指导思想。指导开发人员如何使用对象,管理对象的。把对象的创建,属性赋值,对象的生命周期都交给代码之外的容器管理。
1.IoC分为控制和反转
控制:对象创建,属性赋值,对象生命周期管理
反转:把开发人员管理对象的权限转移给了代码之外的容器实现。由容器完成对象的管理。
正转:开发人员在代码中,使用new构造方法创建对象。开发人员掌握了对象的创建,属性赋值,对象从开始到销毁的全部过程。开发人员有对 对象的全部控制。
通过容器,可以使用容器中的对象(容器已经创建了对象,对象属性赋值了,对象也组装好了)
2.IoC技术的实现
DI(依赖注入):Dependency Injection,缩写是DI。是IoC的一种技术实现。程序只需要提供要使用的对象的名称就可以了。对象如何创建,如何从容器中查找,获取都是由容器内部自己实现。
依赖名词:比如说ClassA类使用了ClassB的属性或者方法,叫做ClassA依赖ClassB
public class ClassB{public void createOrder() {}
}public class ClassA{//属性private ClassB b = new ClassB();public void buy() {b.createOrder();}
}执行ClassA的buy()
ClassA a = new ClassA();
a.buy();
3.Spring框架使用的DI实现IoC
通过Spring框架,只需要提供要使用的对象名词就可以了。从容器中获取名称对应的对象
Spring底层使用的 反射机制,通过反射创建对象,给属性赋值。
2.2 第一个spring项目
我们来创建第一个Spring项目
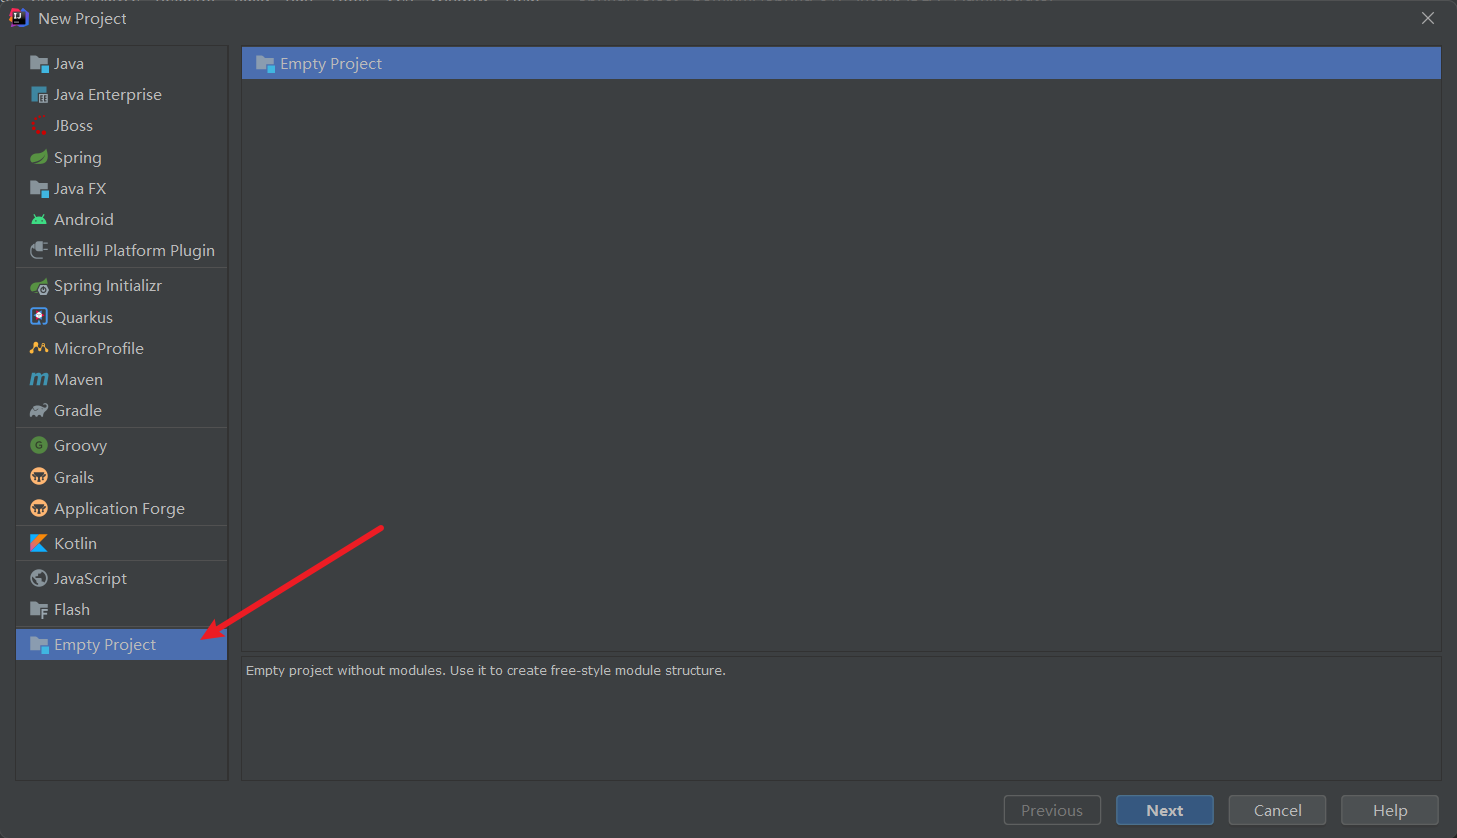
1.创建一个空项目
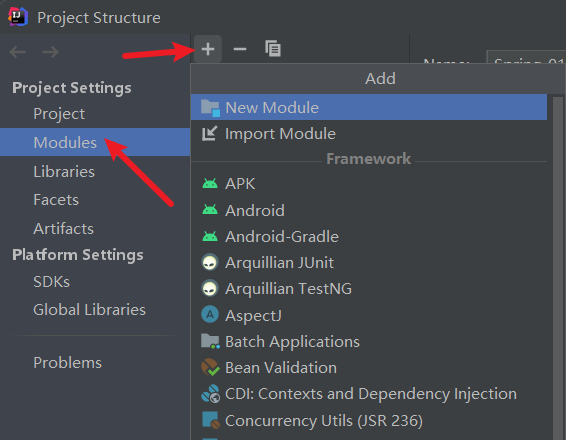
2.添加新的Module
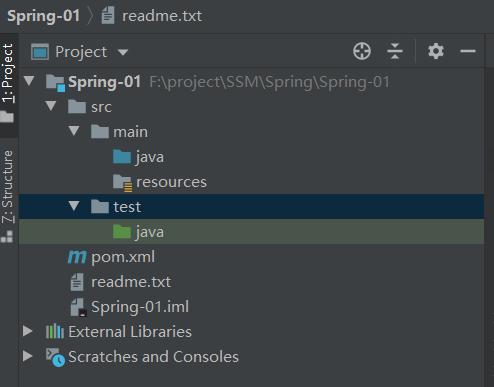
我们创建第一个项目,名称为Spring-01,创建完成后,我们来看项目目录结构
3.加入依赖,修改pom.xml
spring-context:spring依赖
junit:单元测试
<dependencies><dependency><groupId>junit</groupId><artifactId>junit</artifactId><version>4.13.2</version><scope>test</scope></dependency><!--spring依赖--><dependency><groupId>org.springframework</groupId><artifactId>spring-context</artifactId><version>5.3.4</version></dependency></dependencies>
4.开发人员定义类:接口和实现类
类也可以没有接口。
接口和实现类定义:和没有spring一样
接口的定义:
public interface SomeService {void doSome();
}
实现类的定义:
import com.lu.service.SomeService;public class SomeServiceImpl implements SomeService {@Overridepublic void doSome() {System.out.println("执行了业务方法doSome()...");}
}
5.创建spring的配置文件
作用:声明对象
把对象交给spring创建和管理
使用表示对象生命,一个bean表示一个java对象
<?xml version="1.0" encoding="UTF-8"?>
<beans xmlns="http://www.springframework.org/schema/beans"xmlns:xsi="http://www.w3.org/2001/XMLSchema-instance"xsi:schemaLocation="http://www.springframework.org/schema/beans http://www.springframework.org/schema/beans/spring-beans.xsd"></beans>spring标准的配置文件:
1.根标签是 beans
2.beans后面的是约束文件说明
3.beans里面是bean生命
4.什么是bean:bean就是java对象,spring容器管理的java对象,叫做bean
我们来创建一个对象
<?xml version="1.0" encoding="UTF-8"?>
<beans xmlns="http://www.springframework.org/schema/beans"xmlns:xsi="http://www.w3.org/2001/XMLSchema-instance"xsi:schemaLocation="http://www.springframework.org/schema/beans http://www.springframework.org/schema/beans/spring-beans.xsd"><!--声明对象id:自定义对象名称,唯一值(可以没有,spring可以提供默认名称)class:类的全限定名称,spring通过反射机制创建对象,不能是接口spring根据id,class创建对象,把对象放入到spring的一个map对象。map.put(id,对象)--><bean id="someService" class="com.lu.service.impl.SomeServiceImpl"></bean>
</beans>
6.使用容器中的对象
创建一个表示spring容器的对象 AppplicationContext
从容器中,根据名称获取对象,使用getBean(“对象名称”)
package com.lu;import com.lu.service.SomeService;
import org.junit.Test;
import org.springframework.context.ApplicationContext;
import org.springframework.context.support.ClassPathXmlApplicationContext;public class MyTest {@Testpublic void testdoSomething() {//SomeService service = new SomeServiceImpl();//service.doSome();//1.指定spring配置文件:从类路径(classpath)之下开始的路径String config="beans.xml";//2.创建容器对象 ApplicationContext 表示spring容器对象。通过ctx获取某个java对象ApplicationContext ctx = new ClassPathXmlApplicationContext(config);//3.从容器中获取指定名称的对象,使用getBean("id")SomeService service = (SomeService)ctx.getBean("someService");//4.调用对象的方法service.doSome();}
}
我们来运行一下:
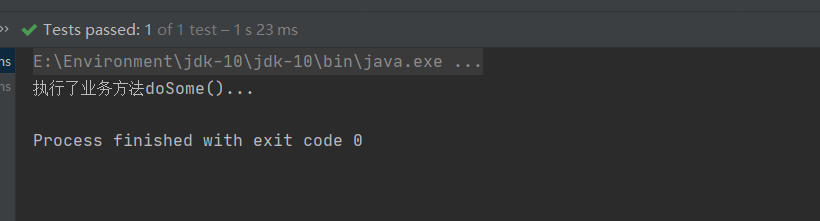
成功运行!
2.3 三个问题的探究
1.我们来思考一个问题,通过spring来创建对象,是调用的类的无参构造函数吗?
我们来测试一下,我们现在实现类中定义一个无参构造方法
package com.lu.service.impl;import com.lu.service.SomeService;public class SomeServiceImpl implements SomeService {public SomeServiceImpl() {System.out.println("无参构造");}@Overridepublic void doSome() {System.out.println("执行了业务方法doSome()...");}
}
然后在测试类中测试
//spring创建对象,调用的是类的哪个方法?@Testpublic void test01() {String config = "beans.xml";ApplicationContext ctx = new ClassPathXmlApplicationContext(config);//SomeService service = ctx.getBean(SomeService.class);//service.doSome();SomeService service = (SomeService) ctx.getBean("someService");service.doSome();}
控制台输出:

看来真的是调用了无参构造方法,也就是说spring默认调用的是无参构造方法,也就是说我们在类中有有参构造方法的话,我们必须显示的声明无参构造方法
2.我们再来思考一个问题,spring是在什么时候创建的对象?
我们来写代码测试一下
//spring是在什么时候创建的对象?
@Test
public void test02() {String config = "beans.xml";ApplicationContext ctx = new ClassPathXmlApplicationContext(config);//SomeService service = (SomeService) ctx.getBean("someService");//service.doSome();
}
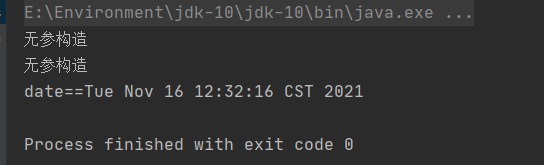
我们把后面两行注释掉,跑一下代码
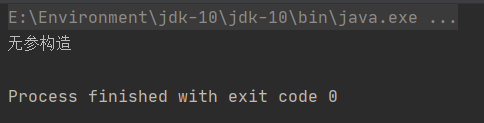
出来无参构造了,说明对象创建了,也就是说创建spring容器对象的时候,会读取配置文件,创建文件中声明的Java对象
这样做的优点是:
获取对象的速度快,因为对象已经创建好了
缺点:
占用内存
3.我们再来思考第三个问题,spring容器创建对象,一次创建几个呢?
我们来修改一下beans.xml文件
<?xml version="1.0" encoding="UTF-8"?>
<beans xmlns="http://www.springframework.org/schema/beans"xmlns:xsi="http://www.w3.org/2001/XMLSchema-instance"xsi:schemaLocation="http://www.springframework.org/schema/beans http://www.springframework.org/schema/beans/spring-beans.xsd"><bean id="someService" class="com.lu.service.impl.SomeServiceImpl"></bean><bean id="someService" class="com.lu.service.impl.SomeServiceImpl"></bean>
</beans>
跑一下测试类
//spring容器创建对象,一次创建几个
@Test
public void test03() {String config = "beans.xml";ApplicationContext ctx = new ClassPathXmlApplicationContext(config);//SomeService service = (SomeService) ctx.getBean("someService");//service.doSome();
}
输出一下
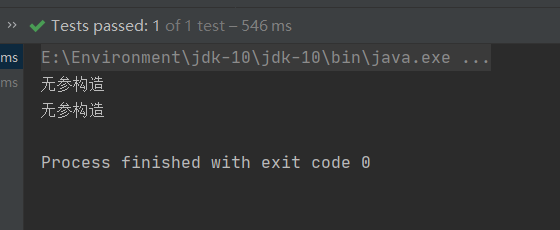
我们发现出来两个对象,也就是说:
在创建容器(ApplicationContext)对象时,会把配置文件中的所有对象都创建出来(spring的默认规则)
2.4 spring容器创建对象的特点
1.容器对象ApplicationContext:接口
通过ApplicationContext对象,获取要使用的其他Java对象,执行getBean(“的id”)
2.spring默认时调用类的无参构造方法,创建对象
3.spring读取配置文件,一次创建好所有的Java对象,都放到map中
2.4.1 获取容器中定义的对象信息
我们获取容器中定义的对象信息主要通过两个方法
getBeanDefinitionCount()	//获取容器中定义对象的数量
getBeanDefinitionNames()	//获取容器中定义的对象名称
我们来编写测试类:
@Test
public void test04() {String config = "beans.xml";ApplicationContext ctx = new ClassPathXmlApplicationContext(config);//获取容器中定义对象的数量int nums = ctx.getBeanDefinitionCount();System.out.println("容器中定义对象的数量==" + nums);//获取容器中定义的对象名称String names[] = ctx.getBeanDefinitionNames();for (String name :names) {System.out.println("容器中对象的名称==" + name);}
}
控制台输出:
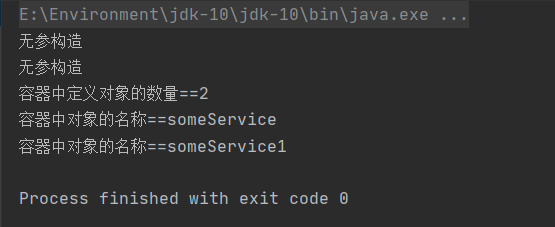
我们可以看到我们已经获取到容器中定义的对象信息。
2.4.2 spring创建非自定义类对象
刚才的例子我们的对象都是创建的自己定义的类的对象,那么spring如何创建非自定义类的对象呢,比如Date类
我们先来修改beans文件
<?xml version="1.0" encoding="UTF-8"?>
<beans xmlns="http://www.springframework.org/schema/beans"xmlns:xsi="http://www.w3.org/2001/XMLSchema-instance"xsi:schemaLocation="http://www.springframework.org/schema/beans http://www.springframework.org/schema/beans/spring-beans.xsd"><bean id="mydate" class="java.util.Date"></bean>
</beans>
来编写测试类:
//spring创建非自定义类的对象
//有class就能让spring创建对象
@Test
public void test05() {String config = "beans.xml";ApplicationContext ctx = new ClassPathXmlApplicationContext(config);Date date = (Date) ctx.getBean("mydate");System.out.println("date==" + date);
}
控制台输出:
我们看到Date类的对象创建成功了
2.4.3 没有接口的类创建对象
上面我们都是创建的有接口的类的对象,那么spring能否创建没有接口的类的对象呢
我们来试验一下,首先创建一个类,该类没有实现接口
package com.lu.service;public class OtherService {public void doOther() {System.out.println("执行OtherService的doOther()");}
}
beans.xml文件
<?xml version="1.0" encoding="UTF-8"?>
<beans xmlns="http://www.springframework.org/schema/beans"xmlns:xsi="http://www.w3.org/2001/XMLSchema-instance"xsi:schemaLocation="http://www.springframework.org/schema/beans http://www.springframework.org/schema/beans/spring-beans.xsd"><bean id="otherService" class="com.lu.service.OtherService"></bean>
</beans>
编写测试类:
@Test
public void test06() {String config = "beans.xml";ApplicationContext ctx = new ClassPathXmlApplicationContext(config);OtherService service = (OtherService) ctx.getBean("otherService");service.doOther();
}
控制台输出:
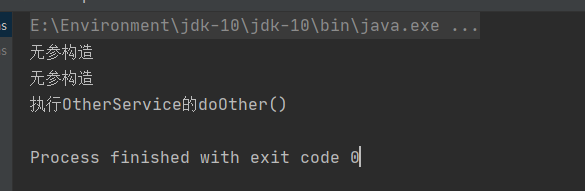
我们发现创建成功了,也就是说spring创建对象只需要拿到beans文件中的id即可
2.5 DI:属性赋值
spring调用类的无参构造方法,创建对象。对象创建后给属性赋值。
给属性赋值可以使用:
- xml配置文件中的标签和属性
- 使用注解
DI分类:
- set注入,也叫做设值注入
- 构造注入
2.5.1 基于xml的DI
在xml配置文件中使用标签和属性,完成对象创建,属性赋值
2.5.1.1 set注入,也叫做设值注入
概念:spring调用类中的set方法,在set方法中可以完成属性赋值。推荐使用!
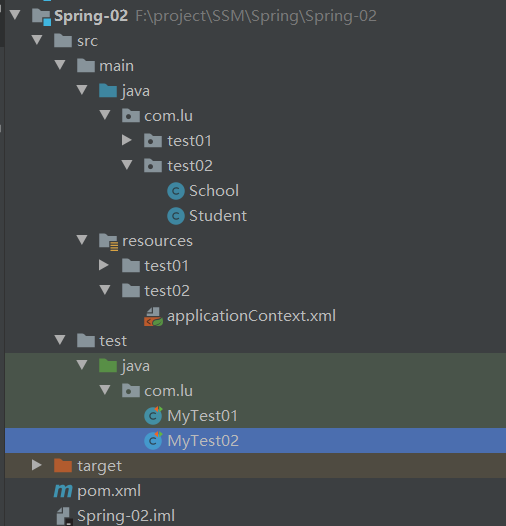
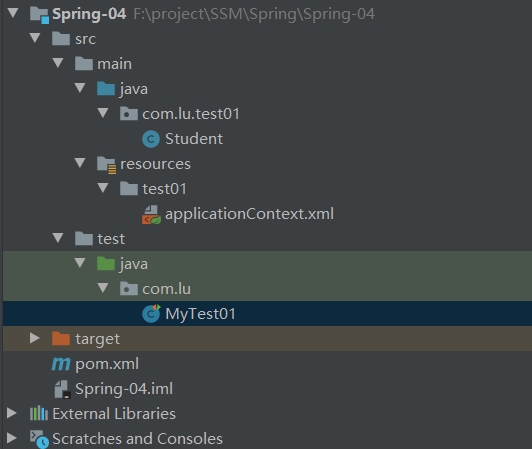
我们来实现一下,新建一个项目,叫做Spring-02,完成后的项目结构为:

首先创建一个Student类
package com.lu.test01;public class Student {private String name;private int age;public String getName() {return name;}public void setName(String name) {this.name = name;}public int getAge() {return age;}public void setAge(int age) {this.age = age;}@Overridepublic String toString() {return "Student{" +"name='" + name + '\'' +", age=" + age +'}';}
}
来编写xml文件
<?xml version="1.0" encoding="UTF-8"?>
<beans xmlns="http://www.springframework.org/schema/beans"xmlns:xsi="http://www.w3.org/2001/XMLSchema-instance"xsi:schemaLocation="http://www.springframework.org/schema/beans http://www.springframework.org/schema/beans/spring-beans.xsd"><!--声明bean--><bean id="myStudent" class="com.lu.test01.Student"></bean>
</beans>
编写测试类:
@Test
public void test01() {String config = "test01/applicationContext.xml";ApplicationContext ctx = new ClassPathXmlApplicationContext(config);Student student = (Student) ctx.getBean("myStudent");System.out.println("student == " + student);
}
控制台输出:

我们发现对象创建成功了,但是还没有赋值,现在我们要做的工作就是给属性赋值。
我们来重新编写applicationContext.xml文件
<?xml version="1.0" encoding="UTF-8"?>
<beans xmlns="http://www.springframework.org/schema/beans"xmlns:xsi="http://www.w3.org/2001/XMLSchema-instance"xsi:schemaLocation="http://www.springframework.org/schema/beans http://www.springframework.org/schema/beans/spring-beans.xsd"><!--声明bean--><!--DI:给属性赋值简单类型:java中的基本数据类型和String1.set注入:spring调用类的set方法,通过set方法完成属性赋值简单类型的set注入:语法:<bean id="xxx" class="yyyy"><property name="属性名" value="简单类型属性值"/>....</bean>--><bean id="myStudent" class="com.lu.test01.Student"><property name="name" value="张三"></property><property name="age" value="20"></property></bean>
</beans>
语法格式在上面已经说明了,我们重新来跑一下测试类:
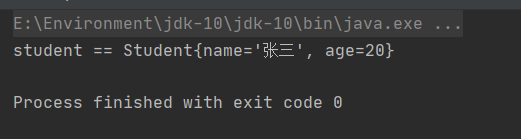
这里我们需要说明几点,
-
第一点是定义的类中属性必须要有对应的set方法,否则会报错
-
第二点是set方法里面可以随便定义,不一定非得有赋值语句,如果没有赋值语句,就不会赋值,但不会报错
-
第三点是如果set方法没有对应的属性值,也是可以执行的,只是只会执行该set方法,不会对不存在属性进行赋值
2.5.1.1.1 给非自定义类的属性赋值
上面我们举的例子是给自定义的类的属性进行赋值,那么如何给非自定义的类的属性赋值呢?
我们拿Date类来举一个例子
我们去查看Date类的源代码,发现set方法是下面这一个

也就是说我们需要给time进行赋值,且time是简单类型
我们再xml文件中进行修改
<?xml version="1.0" encoding="UTF-8"?>
<beans xmlns="http://www.springframework.org/schema/beans"xmlns:xsi="http://www.w3.org/2001/XMLSchema-instance"xsi:schemaLocation="http://www.springframework.org/schema/beans http://www.springframework.org/schema/beans/spring-beans.xsd"><!--声明日期类--><bean id="mydate" class="java.util.Date"><property name="time" value="2432115451534"></property></bean>
</beans>
编写测试类:
@Test
public void test02() {String config = "test01/applicationContext.xml";ApplicationContext ctx = new ClassPathXmlApplicationContext(config);Date date = (Date) ctx.getBean("mydate");System.out.println("date == " + date);
}
控制台输出:
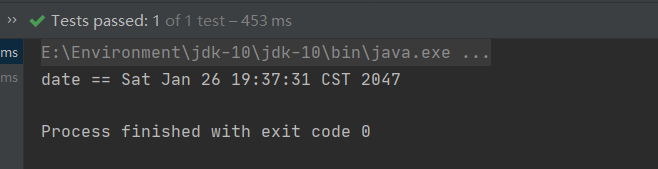
我们看到由于我们自己设置了值,现在的时间到达了2047年
2.5.1.1.2 给引用类型赋值
我们重新创建一个包,包结构如下:
我们首先定义一个School类
package com.lu.test02;public class School {private String name;private String address;public void setName(String name) {this.name = name;}public void setAddress(String address) {this.address = address;}@Overridepublic String toString() {return "School{" +"name='" + name + '\'' +", address='" + address + '\'' +'}';}
}
再定义一个Student类
package com.lu.test02;public class Student {private String name;private int age;//引用类型private School school;public Student() {System.out.println("Student类的无参构造方法执行了....");}public void setName(String name) {System.out.println("setName == " + name);this.name = name;}public void setAge(int age) {System.out.println("setAge == " + age);this.age = age;}public void setSchool(School school) {System.out.println("setSchool == " + school);this.school = school;}@Overridepublic String toString() {return "Student{" +"name='" + name + '\'' +", age=" + age +", school=" + school +'}';}
}
我们来编写applicationContext.xml文件
<?xml version="1.0" encoding="UTF-8"?>
<beans xmlns="http://www.springframework.org/schema/beans"xmlns:xsi="http://www.w3.org/2001/XMLSchema-instance"xsi:schemaLocation="http://www.springframework.org/schema/beans http://www.springframework.org/schema/beans/spring-beans.xsd"><!--声明bean--><!--DI:给属性赋值简单类型:java中的基本数据类型和String1.set注入:spring调用类的set方法,通过set方法完成属性赋值简单类型的set注入:语法:<bean id="xxx" class="yyyy"><property name="属性名" value="简单类型属性值"/>....</bean>2.set注入:引用类型set注入:语法:<bean id="xxx" class="yyy"><property name="属性名" ref="bean的id"/>...</bean>--><bean id="myStudent" class="com.lu.test02.Student"><property name="name" value="张三"></property><property name="age" value="20"></property><property name="school" ref="mySchool"></property></bean><!--声明school--><bean id="mySchool"  class="com.lu.test02.School"><property name="name" value="清华大学"></property><property name="address" value="北京"></property></bean></beans>
我们来编写测试类:
@Test
public void test01() {String config = "test02/applicationContext.xml";ApplicationContext ctx = new ClassPathXmlApplicationContext(config);Student student = (Student)ctx.getBean("myStudent");System.out.println(student);}
控制台输出:
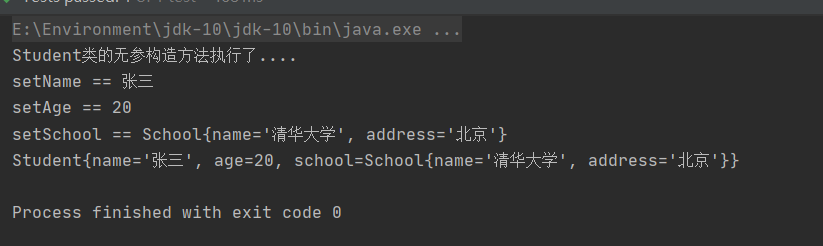
我们可以看到,对于引用类型的赋值,我们必须使用ref来引用
格式为:
<bean id="xxx" class="yyy"><property name="属性名" ref="引用类型的bean的id"/>...
</bean>
2.5.1.2 构造注入
构造注入:spring调用类中的有参构造方法,在创建对象的同时,给属性赋值。
我们举个例子,首先修改Student类,School类不需要修改
package com.lu.test03;public class Student {private String name;private int age;//引用类型private School school;public Student() {System.out.println("Student类的无参构造方法执行了....");}public Student(String name, int age, School school) {System.out.println("Student的有参构造方法执行了...");this.name = name;this.age = age;this.school = school;}@Overridepublic String toString() {return "Student{" +"name='" + name + '\'' +", age=" + age +", school=" + school +'}';}
}
再来修改applicationContext.xml文件
<?xml version="1.0" encoding="UTF-8"?>
<beans xmlns="http://www.springframework.org/schema/beans"xmlns:xsi="http://www.w3.org/2001/XMLSchema-instance"xsi:schemaLocation="http://www.springframework.org/schema/beans http://www.springframework.org/schema/beans/spring-beans.xsd"><!--构造注入:spring调用类的有参构造方法,创建对象同时给属性赋值语法:<bean id="xxx" class="yyy"><constructor-arg>:表示一个构造方法的形参标签有属性:name:构造方法形参名index:构造方法的参数位置value:简单类型的形参值ref:引用类型的形参值--><bean id="myStudent" class="com.lu.test03.Student"><constructor-arg name="name" value="李四"></constructor-arg><constructor-arg name="age" value="25"></constructor-arg><constructor-arg name="school" ref="mySchool"></constructor-arg></bean><!--声明school--><bean id="mySchool"  class="com.lu.test03.School"><property name="name" value="清华大学"></property><property name="address" value="北京"></property></bean></beans>
我们来编写测试类:
package com.lu;import com.lu.test03.Student;
import org.junit.Test;
import org.springframework.context.ApplicationContext;
import org.springframework.context.support.ClassPathXmlApplicationContext;public class MyTest03 {@Testpublic void test01() {String config = "test03/applicationContext.xml";ApplicationContext ctx = new ClassPathXmlApplicationContext(config);Student student = (Student)ctx.getBean("myStudent");System.out.println(student);}
}
控制台输出:
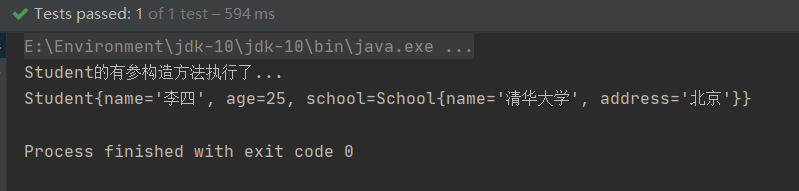
我们发现成功了,这种方法我们指定的是形参的name,还有一种方式是指定形参的index,从左往右进行指定,分别为0,1,2,3…等
我们来试验一下,修改applicationContext.xml文件
<?xml version="1.0" encoding="UTF-8"?>
<beans xmlns="http://www.springframework.org/schema/beans"xmlns:xsi="http://www.w3.org/2001/XMLSchema-instance"xsi:schemaLocation="http://www.springframework.org/schema/beans http://www.springframework.org/schema/beans/spring-beans.xsd"><!--构造注入:spring调用类的有参构造方法,创建对象同时给属性赋值语法:<bean id="xxx" class="yyy"><constructor-arg>:表示一个构造方法的形参标签有属性:name:构造方法形参名index:构造方法的参数位置value:简单类型的形参值ref:引用类型的形参值--><!--构造注入,使用index,参数的位置,构造方法参数从左往右的位置是0,1,2...--><bean id="myStudent2" class="com.lu.test03.Student"><constructor-arg index="0" value="李武"></constructor-arg><constructor-arg index="1" value="34"></constructor-arg><constructor-arg index="2" ref="mySchool"></constructor-arg></bean><!--声明school--><bean id="mySchool"  class="com.lu.test03.School"><property name="name" value="清华大学"></property><property name="address" value="北京"></property></bean></beans>
编写测试类:
@Test
public void test2() {String config = "test03/applicationContext.xml";ApplicationContext ctx = new ClassPathXmlApplicationContext(config);Student student = (Student) ctx.getBean("myStudent2");System.out.println(student);
}
控制台输出:

我们看到执行成功了,成功创建对象
甚至我们可以再省略一点,把index也给省略掉,但是我们的顺序必须严格按照形参的顺序来写
我们试验一下,我们来改写applicationContext.xml文件
<?xml version="1.0" encoding="UTF-8"?>
<beans xmlns="http://www.springframework.org/schema/beans"xmlns:xsi="http://www.w3.org/2001/XMLSchema-instance"xsi:schemaLocation="http://www.springframework.org/schema/beans http://www.springframework.org/schema/beans/spring-beans.xsd"><!--构造注入:spring调用类的有参构造方法,创建对象同时给属性赋值语法:<bean id="xxx" class="yyy"><constructor-arg>:表示一个构造方法的形参标签有属性:name:构造方法形参名index:构造方法的参数位置value:简单类型的形参值ref:引用类型的形参值--><!--构造注入,省略index属性--><bean id="myStudent3" class="com.lu.test03.Student"><constructor-arg value="张三丰"></constructor-arg><constructor-arg value="58"></constructor-arg><constructor-arg ref="mySchool"></constructor-arg></bean><!--声明school--><bean id="mySchool"  class="com.lu.test03.School"><property name="name" value="清华大学"></property><property name="address" value="北京"></property></bean></beans>
编写测试类:
@Test
public void test3() {String config = "test03/applicationContext.xml";ApplicationContext ctx = new ClassPathXmlApplicationContext(config);Student student = (Student) ctx.getBean("myStudent3");System.out.println(student);
}
控制台输出:
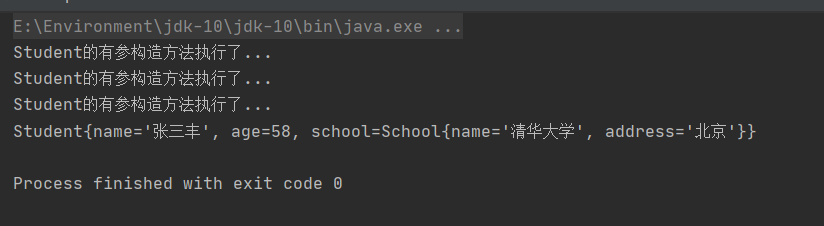
我们也创建成功了,但值得注意的是,我们在日常使用中,通常不会选择构造注入,都是通过设值注入来创建对象。
2.5.1.2.1 通过构造注入创建File对象
我们首先查看File类的构造方法
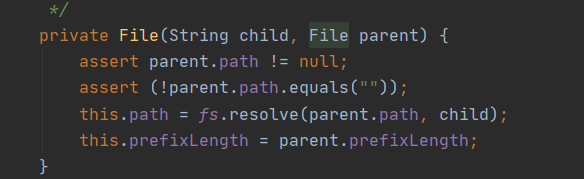
我们可以看到需要一个child和一个parent
我们来编写applicationContext.xml文件
<?xml version="1.0" encoding="UTF-8"?>
<beans xmlns="http://www.springframework.org/schema/beans"xmlns:xsi="http://www.w3.org/2001/XMLSchema-instance"xsi:schemaLocation="http://www.springframework.org/schema/beans http://www.springframework.org/schema/beans/spring-beans.xsd"><!--生命File对象--><bean id="myFile" class="java.io.File"><constructor-arg name="parent" value="C:\Users\Administrator.LAPTOP-62FQ379R\Desktop"></constructor-arg><constructor-arg name="child" value="新建 文本文档.txt"></constructor-arg></bean>
</beans>
编写测试类:
@Test
public void test4() {String config = "test03/applicationContext.xml";ApplicationContext ctx = new ClassPathXmlApplicationContext(config);//获取File对象File file = (File) ctx.getBean("myFile");System.out.println(file.getName());
}
控制台输出:
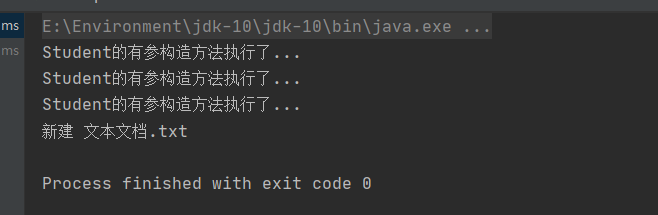
我们发现对象成功创建了,也就是说,创建类的对象,我们不能仅仅局限于自己自定义的类,非自定义的类我们同样也可以创建对象
2.5.1.3 引用类型的自动注入
概念:spring可以根据某些规则给引用类型完成赋值。只对引用类型有效。
规则byName,byType
首先我们重新创建一个项目,该项目拷贝test02的
School类
package com.lu.test04;public class School {private String name;private String address;public void setName(String name) {this.name = name;}public void setAddress(String address) {this.address = address;}@Overridepublic String toString() {return "School{" +"name='" + name + '\'' +", address='" + address + '\'' +'}';}
}
Student类:
package com.lu.test04;public class Student {private String name;private int age;//引用类型private School school;public Student() {System.out.println("Student类的无参构造方法执行了....");}public void setName(String name) {System.out.println("setName == " + name);this.name = name;}public void setAge(int age) {System.out.println("setAge == " + age);this.age = age;}public void setSchool(School school) {System.out.println("setSchool == " + school);this.school = school;}@Overridepublic String toString() {return "Student{" +"name='" + name + '\'' +", age=" + age +", school=" + school +'}';}
}
applicationContext.xml文件
<?xml version="1.0" encoding="UTF-8"?>
<beans xmlns="http://www.springframework.org/schema/beans"xmlns:xsi="http://www.w3.org/2001/XMLSchema-instance"xsi:schemaLocation="http://www.springframework.org/schema/beans http://www.springframework.org/schema/beans/spring-beans.xsd"><bean id="myStudent" class="com.lu.test04.Student"><property name="name" value="张三"></property><property name="age" value="20"></property><property name="school" ref="mySchool"></property></bean><!--声明school--><bean id="mySchool"  class="com.lu.test04.School"><property name="name" value="清华大学"></property><property name="address" value="北京"></property></bean></beans>
测试类:
package com.lu;import com.lu.test04.Student;
import org.junit.Test;
import org.springframework.context.ApplicationContext;
import org.springframework.context.support.ClassPathXmlApplicationContext;public class MyTest04 {@Testpublic void test01() {String config = "test04/applicationContext.xml";ApplicationContext ctx = new ClassPathXmlApplicationContext(config);Student student = (Student) ctx.getBean("myStudent");System.out.println(student);}
}
控制台输出:

我们就根据这个项目来改
2.5.1.3.1 byName(按名称注入)
Java类中引用类型属性名称和spring容器中bean的id名称一样的,且数据类型也是一样的,这些bean能够赋值给引用类型。
我们来修改applicationContext.xml文件
<?xml version="1.0" encoding="UTF-8"?>
<beans xmlns="http://www.springframework.org/schema/beans"xmlns:xsi="http://www.w3.org/2001/XMLSchema-instance"xsi:schemaLocation="http://www.springframework.org/schema/beans http://www.springframework.org/schema/beans/spring-beans.xsd"><!--byName(按名称注入):java类中引用类型的属性名称和spring容器中bean的id名称一样,且数据类型一样,这样的bean能够赋值给引用类型语法:<bean id="xxx" class="yyy" autowire="byName">简单类型属性赋值</bean>--><!--byName自动注入--><bean id="myStudent" class="com.lu.test04.Student" autowire="byName"><property name="name" value="张三"></property><property name="age" value="20"></property></bean><!--声明school--><bean id="school"  class="com.lu.test04.School"><property name="name" value="北京航空航天大学"></property><property name="address" value="北京"></property></bean></beans>
我们重新执行一下测试类,控制台输出:
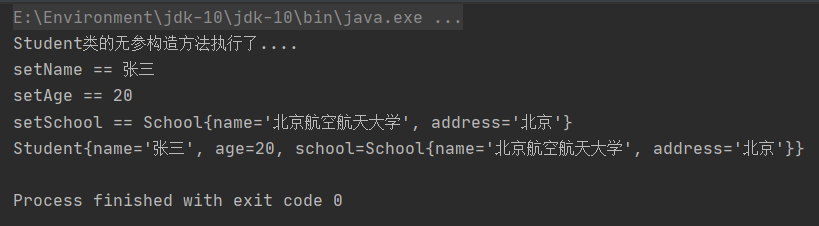
我们发现成功了!
2.5.1.3.2 byType(按类型注入)
Java类中引用类型的数据类型和spring容器中bean的class值是同源关系的,这样的bean赋值给引用类型。
我们新建一个test05项目,和上面的步骤一样
修改applicationContext.xml文件
<?xml version="1.0" encoding="UTF-8"?>
<beans xmlns="http://www.springframework.org/schema/beans"xmlns:xsi="http://www.w3.org/2001/XMLSchema-instance"xsi:schemaLocation="http://www.springframework.org/schema/beans http://www.springframework.org/schema/beans/spring-beans.xsd"><!--byType:Java类中引用类型的数据类型和spring容器中bean的class值是同源关系的,这样的bean赋值给引用类型。同源关系:1.java中引用类型的数据类型和bean的class值是一样的2.java中引用类型的数据类型和bean的class值是父子类关系的3.java中引用类型的数据类型和bean的class值是接口和实现类关系的语法:<bean id="xxx" class="yyy" autowire="byType">简单类型属性赋值</bean>--><!--byType自动注入--><bean id="myStudent" class="com.lu.test05.Student" autowire="byType"><property name="name" value="周星驰"></property><property name="age" value="56"></property></bean><!--声明school--><bean id="mySchool"  class="com.lu.test05.School"><property name="name" value="北京电子信息大学"></property><property name="address" value="北京"></property></bean></beans>
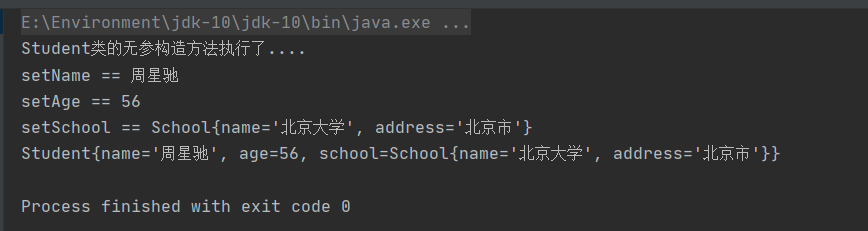
重新运行测试类,控制台输出:
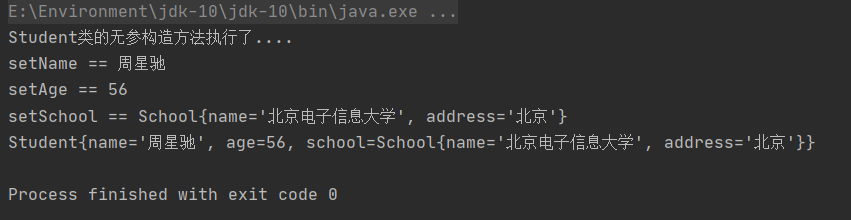
我们发现有几点需要注意的是,school类的bean的id不一样和引用类型的属性名一致,只需要class一样即可。这是同源关系的第一种情况,即引用类型的数据类型和bean的class值是一样的。
我们来测试同源关系的第二种情况,即引用类型的数据类型和和bean的class值是父子类关系
我们来编写School类的子类
package com.lu.test05;public class PrimarySchool extends School {}applicationContext.xml文件:
<?xml version="1.0" encoding="UTF-8"?>
<beans xmlns="http://www.springframework.org/schema/beans"xmlns:xsi="http://www.w3.org/2001/XMLSchema-instance"xsi:schemaLocation="http://www.springframework.org/schema/beans http://www.springframework.org/schema/beans/spring-beans.xsd"><!--byType:Java类中引用类型的数据类型和spring容器中bean的class值是同源关系的,这样的bean赋值给引用类型。同源关系:1.java中引用类型的数据类型和bean的class值是一样的2.java中引用类型的数据类型和bean的class值是父子类关系的3.java中引用类型的数据类型和bean的class值是接口和实现类关系的语法:<bean id="xxx" class="yyy" autowire="byType">简单类型属性赋值</bean>--><!--byType自动注入--><bean id="myStudent" class="com.lu.test05.Student" autowire="byType"><property name="name" value="周星驰"></property><property name="age" value="56"></property></bean><!--声明school的子类--><bean id="primarySchool" class="com.lu.test05.PrimarySchool"><property name="name" value="北京大学附属小学"></property><property name="address" value="北京市"></property></bean></beans>
运行测试类,控制台输出:
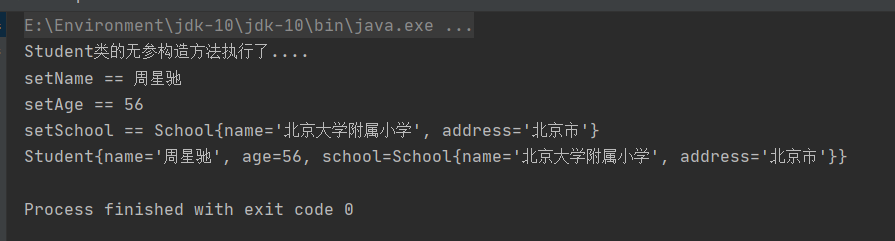
赋值成功了,第二种情况也可以
2.5.1.4 项目中使用多个spring配置文件
分多个配置文件的方式:
- 按功能模块分,一个模块一个配置文件
- 按类的功能分,数据库操作相关的类在一个文件,service类在一个配置文件,配置redis,事务等等的一个配置文件
spring管理多个配置文件:常用的是包含关系的配置文件。项目中有一个总的文件,里面是有import标签包含其他的多个配置文件。
语法:
总的文件(xml)
<import resource="classpath:其他的文件的路径1"/>
<import resource="classpath:其他的文件的路径2"/>关键字"classpath":表示类路径,也就是类文件(class文件)所在的目录。spring通过类路径中加载文件
什么时候使用classpath:在一个文件中要使用其他的文件需要使用classpath
我们来写一个例子:
spring-school配置文件:
<?xml version="1.0" encoding="UTF-8"?>
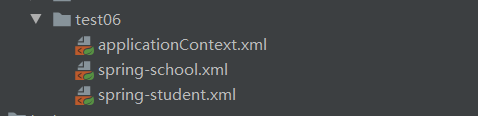
<beans xmlns="http://www.springframework.org/schema/beans"xmlns:xsi="http://www.w3.org/2001/XMLSchema-instance"xsi:schemaLocation="http://www.springframework.org/schema/beans http://www.springframework.org/schema/beans/spring-beans.xsd"><!--School类相关声明--><bean id="school" class="com.lu.test06.School"><property name="name" value="北京大学"></property><property name="address" value="北京市"></property></bean></beans>
spring-student配置文件:
<?xml version="1.0" encoding="UTF-8"?>
<beans xmlns="http://www.springframework.org/schema/beans"xmlns:xsi="http://www.w3.org/2001/XMLSchema-instance"xsi:schemaLocation="http://www.springframework.org/schema/beans http://www.springframework.org/schema/beans/spring-beans.xsd"><!--学生模块的bean--><bean id="myStudent" class="com.lu.test06.Student" autowire="byType"><property name="name" value="周星驰"></property><property name="age" value="56"></property></bean></beans>
applicationContext.xml配置文件:
<?xml version="1.0" encoding="UTF-8"?>
<beans xmlns="http://www.springframework.org/schema/beans"xmlns:xsi="http://www.w3.org/2001/XMLSchema-instance"xsi:schemaLocation="http://www.springframework.org/schema/beans http://www.springframework.org/schema/beans/spring-beans.xsd"><!--总的文件,目的是包含其他的多个配置文件,一般不声明bean语法:<import resource="classpath:其他文件的路径"/>关键字"classpath":表示类路径,也就是类文件(class文件)所在的目录。spring通过类路径中加载文件--><import resource="classpath:test06/spring-student.xml"></import><import resource="classpath:test06/spring-school.xml"></import></beans>
测试类:
package com.lu;import com.lu.test06.Student;
import org.junit.Test;
import org.springframework.context.ApplicationContext;
import org.springframework.context.support.ClassPathXmlApplicationContext;public class MyTest06 {@Testpublic void test01() {String config = "test06/applicationContext.xml";ApplicationContext ctx = new ClassPathXmlApplicationContext(config);Student student = (Student) ctx.getBean("myStudent");System.out.println(student);}
}
控制台输出:
可以了,成功输出!
除了上面这种方法,我们还可以使用通配符来使用
我们修改applicationContext.xml文件
<!--通配符(*:表示任意字符)--><import resource="classpath:test06/spring-*.xml"></import>
这样我们一行代码就可以引入多个配置文件,但有一点注意的是,总的文件名称,不能包含在通配符范围内
2.5.2 基于注解的DI
基于注解的DI:使用spring提供的注解,完成java对象的创建,属性的赋值
注解使用的核心步骤:
- 在源代码加入注解,例如@Component
- 在spring的配置文件,加入组件扫描器的标签
我们来举一个例子
首先看一下目录结构
首先创建一个Student类
package com.lu.test01;import org.springframework.stereotype.Component;/**
** @Component:表示创建对象,对象放到容器中,作用是<bean></bean>*      属性:value,表示对象名称,也就是bean的id属性值*      位置:在类的上面,表示创建此类的对象**  @Component(value = "myStudent") 等同于*  <bean id="myStudent" class="com.lu.test01.Student"></bean>** */
@Component(value = "myStudent")
public class Student {private String name;private int age;public Student() {System.out.println("Student的无参构造方法执行了...");}@Overridepublic String toString() {return "Student{" +"name='" + name + '\'' +", age=" + age +'}';}
}
applicationContext.xml文件
<?xml version="1.0" encoding="UTF-8"?>
<beans xmlns="http://www.springframework.org/schema/beans"xmlns:xsi="http://www.w3.org/2001/XMLSchema-instance"xmlns:context="http://www.springframework.org/schema/context"xsi:schemaLocation="http://www.springframework.org/schema/beans http://www.springframework.org/schema/beans/spring-beans.xsd http://www.springframework.org/schema/context https://www.springframework.org/schema/context/spring-context.xsd"><!--声明组件扫描器:使用注解必须加入这个语句component-scan:翻译过来就是组件扫描器,组件是java对象属性:base-package 注解在你的项目中的包名框架会扫描这个包和子包中的所有类,找类中的所有注解遇到注解后,按照注解表示的功能,去创建对象,给属性赋值--><context:component-scan base-package="com.lu.test01"></context:component-scan>
</beans>
编写测试类:
package com.lu;import com.lu.test01.Student;
import org.junit.Test;
import org.springframework.context.ApplicationContext;
import org.springframework.context.support.ClassPathXmlApplicationContext;public class MyTest01 {@Testpublic void test01() {String config = "test01/applicationContext.xml";ApplicationContext ctx = new ClassPathXmlApplicationContext(config);Student student = (Student) ctx.getBean("myStudent");System.out.println(student);}
}
控制台输出:
输出成功,说明使用@Component注解成功创建对象了。
值得注意的是,@Component()里面也可以不写value,直接写@Component(“myStudent”)
也可以不提供自定义对象名称,使用框架的默认名称:类名首字母小写
和@Component功能相同的创建对象的注解
@Repository:放在dao接口的实现类上面,表示创建dao对象,持久层对象,能访问数据库
@Service:放在业务层接口的实现类上面,表示创建业务层对象,业务层对象有事务的功能
@Controller:放在控制器类的上面,表示创建控制器对象,数据表示层对象
控制层对象能接受请求,把请求的处理结果显示给用户
以上四个注解都能创建对象,但是@Repository @Service @Controller有角色说明,表示对象是分层的
对象是属于不同层的,具有额外的功能
2.5.2.1 扫描包的三种方式
我们在applicationContext.xml文件中来说明
<?xml version="1.0" encoding="UTF-8"?>
<beans xmlns="http://www.springframework.org/schema/beans"xmlns:xsi="http://www.w3.org/2001/XMLSchema-instance"xmlns:context="http://www.springframework.org/schema/context"xsi:schemaLocation="http://www.springframework.org/schema/beans http://www.springframework.org/schema/beans/spring-beans.xsd http://www.springframework.org/schema/context https://www.springframework.org/schema/context/spring-context.xsd"><!--扫描多个包的三种方式--><!--第一种,使用多次组件扫描器--><context:component-scan base-package="com.lu.test01"></context:component-scan><context:component-scan base-package="com.lu.test02"></context:component-scan><!--第二种,使用分隔符(, 或者 ;),指定多个包--><context:component-scan base-package="com.lu.test01;com.lu.test02"></context:component-scan><!--第三种:指定父包--><context:component-scan base-package="com.lu"></context:component-scan>
</beans>
2.5.2.2 简单类型赋值
Student类
package com.lu.test02;import org.springframework.beans.factory.annotation.Value;
import org.springframework.stereotype.Component;@Component("myStudent")
public class Student {/*** 简单类型属性赋值:@Value* @Value:简单类型属性值*      属性:value 简单类型属性值*      位置:1) 在属性定义的上面,无需set方法,推荐使用*           2) 在set方法的上面* */@Value(value = "张三")private String name;@Value(value = "24")private int age;public Student() {System.out.println("Student的无参构造方法执行了...");}@Overridepublic String toString() {return "Student{" +"name='" + name + '\'' +", age=" + age +'}';}
}
applicationContext.xml文件
<?xml version="1.0" encoding="UTF-8"?>
<beans xmlns="http://www.springframework.org/schema/beans"xmlns:xsi="http://www.w3.org/2001/XMLSchema-instance"xmlns:context="http://www.springframework.org/schema/context"xsi:schemaLocation="http://www.springframework.org/schema/beans http://www.springframework.org/schema/beans/spring-beans.xsd http://www.springframework.org/schema/context https://www.springframework.org/schema/context/spring-context.xsd"><context:component-scan base-package="com.lu.test02"></context:component-scan></beans>
测试类:
package com.lu;import com.lu.test02.Student;
import org.junit.Test;
import org.springframework.context.ApplicationContext;
import org.springframework.context.support.ClassPathXmlApplicationContext;public class MyTest02 {@Testpublic void test01() {String config = "test02/applicationContext.xml";ApplicationContext ctx = new ClassPathXmlApplicationContext(config);Student student = (Student) ctx.getBean("myStudent");System.out.println(student);}
}
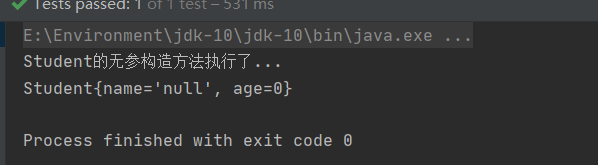
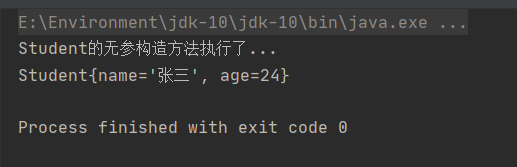
控制台输出:
我们也可以把注解写到set方法上,并且省略value
package com.lu.test02;import org.springframework.beans.factory.annotation.Value;
import org.springframework.stereotype.Component;@Component("myStudent")
public class Student {/*** 简单类型属性赋值:@Value* @Value:简单类型属性值*      属性:value 简单类型属性值*      位置:1) 在属性定义的上面,无需set方法,推荐使用*           2) 在set方法的上面* */private String name;private int age;@Value("李四")public void setName(String name) {this.name = name;}@Value("32")public void setAge(int age) {this.age = age;}public Student() {System.out.println("Student的无参构造方法执行了...");}@Overridepublic String toString() {return "Student{" +"name='" + name + '\'' +", age=" + age +'}';}
}
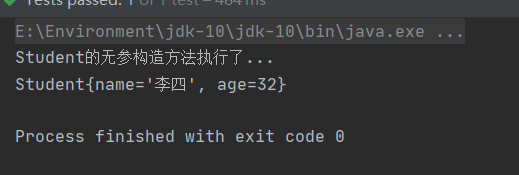
控制台输出:
2.5.2.3 使用外部属性配置文件
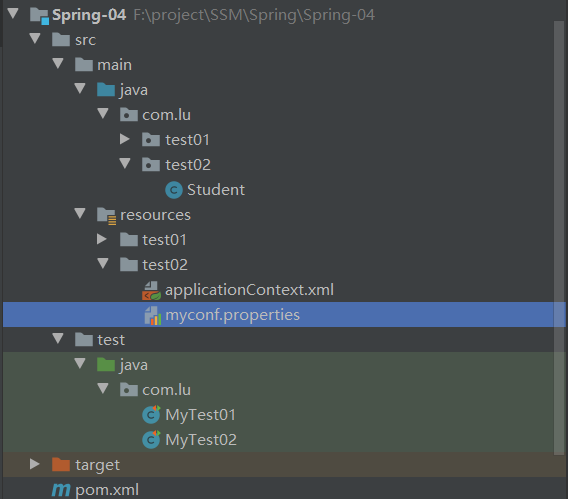
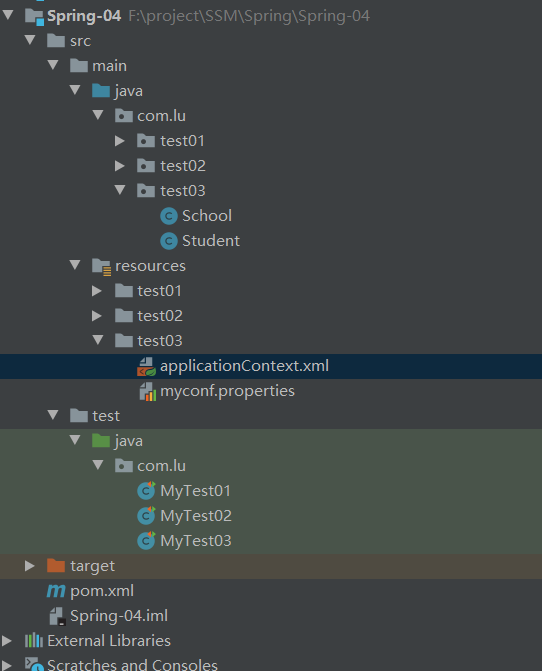
目录结构
创建myconf.properties
myname=王五
myage=54
Student类:
package com.lu.test02;import org.springframework.beans.factory.annotation.Value;
import org.springframework.stereotype.Component;@Component("myStudent")
public class Student {//使用外部属性文件中的数据,语法 ${"key"}@Value("${myname}")private String name;@Value("${myage}")private int age;public Student() {System.out.println("Student的无参构造方法执行了...");}@Overridepublic String toString() {return "Student{" +"name='" + name + '\'' +", age=" + age +'}';}
}
applicationContext.xml文件
<?xml version="1.0" encoding="UTF-8"?>
<beans xmlns="http://www.springframework.org/schema/beans"xmlns:xsi="http://www.w3.org/2001/XMLSchema-instance"xmlns:context="http://www.springframework.org/schema/context"xsi:schemaLocation="http://www.springframework.org/schema/beans http://www.springframework.org/schema/beans/spring-beans.xsd http://www.springframework.org/schema/context https://www.springframework.org/schema/context/spring-context.xsd"><context:component-scan base-package="com.lu.test02"></context:component-scan><!--读取外部的属性配置文件property-placeholder:读取properties这样的文件 Property--><context:property-placeholder file-encoding="utf-8" location="classpath:/test02/myconf.properties"></context:property-placeholder>
</beans>
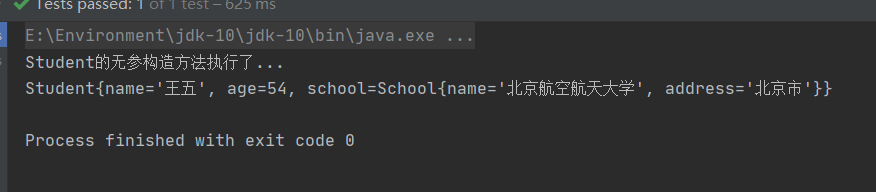
测试类控制台输出:

同样可以,这样我们就可以把属性值放到外部文件中去了
2.5.2.4 @Autowired自动注入byType
目录结构:
创建School类
package com.lu.test03;public class School {private String name;private String address;public void setName(String name) {this.name = name;}public void setAddress(String address) {this.address = address;}@Overridepublic String toString() {return "School{" +"name='" + name + '\'' +", address='" + address + '\'' +'}';}
}
Student类中声明引用类型School
package com.lu.test03;import org.springframework.beans.factory.annotation.Autowired;
import org.springframework.beans.factory.annotation.Value;
import org.springframework.stereotype.Component;@Component("myStudent")
public class Student {@Value("${myname}")private String name;@Value("${myage}")private int age;/*** 引用类型** @Autowired:spring框架提供的,给引用类型赋值的,使用自动注入原理 支持byName, byType, 默认是byType* 位置:1) 在属性定义的上面,无需set方法,推荐使用* 2) 在set方法的上面*///默认使用byType@Autowiredprivate School school;public Student() {System.out.println("Student的无参构造方法执行了...");}@Overridepublic String toString() {return "Student{" +"name='" + name + '\'' +", age=" + age +", school=" + school +'}';}
}
applicationContext.xml我呢见
<?xml version="1.0" encoding="UTF-8"?>
<beans xmlns="http://www.springframework.org/schema/beans"xmlns:xsi="http://www.w3.org/2001/XMLSchema-instance"xmlns:context="http://www.springframework.org/schema/context"xsi:schemaLocation="http://www.springframework.org/schema/beans http://www.springframework.org/schema/beans/spring-beans.xsd http://www.springframework.org/schema/context https://www.springframework.org/schema/context/spring-context.xsd"><context:component-scan base-package="com.lu.test03"></context:component-scan><!--读取外部的属性配置文件property-placeholder:读取properties这样的文件 Property--><context:property-placeholder file-encoding="utf-8" location="classpath:/test03/myconf.properties"></context:property-placeholder><bean id="mySchool" class="com.lu.test03.School"><property name="name" value="北京航空航天大学"></property><property name="address" value="北京市"></property></bean>
</beans>
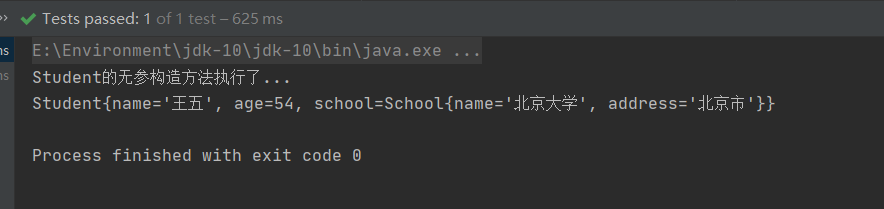
测试类输出:
我们看到执行成功了
这里我们的school类是在applicationContext.xml文件中用标签来声明的,我们也可以用注解的方式来给school类进行赋值
2.5.2.5 @Autowired自动注入byName
结合上面的项目,我们只需要改动Student类
package com.lu.test04;import org.springframework.beans.factory.annotation.Autowired;
import org.springframework.beans.factory.annotation.Qualifier;
import org.springframework.beans.factory.annotation.Value;
import org.springframework.stereotype.Component;@Component("myStudent")
public class Student {@Value("${myname}")private String name;@Value("${myage}")private int age;/*** 引用类型** @Autowired:spring框架提供的,给引用类型赋值的,使用自动注入原理 支持byName, byType, 默认是byType*          位置:1) 在属性定义的上面,无需set方法,推荐使用*               2) 在set方法的上面** byName自动注入:* 1)@Autowired:给引用类型赋值* 2)@Qualifier(value="bean的id"):从容器中找到指定名称的对象,把这个对象赋值给引用类型*///使用byName@Autowired@Qualifier(value = "mySchool")private School school;public Student() {System.out.println("Student的无参构造方法执行了...");}@Overridepublic String toString() {return "Student{" +"name='" + name + '\'' +", age=" + age +", school=" + school +'}';}
}
控制台输出:
2.5.2.6 @Resource注解
School类:
package com.lu.test06;import org.springframework.beans.factory.annotation.Value;
import org.springframework.stereotype.Component;@Component("mySchool")
public class School {@Value("北京大学")private String name;@Value("北京市")private String address;public void setName(String name) {this.name = name;}public void setAddress(String address) {this.address = address;}@Overridepublic String toString() {return "School{" +"name='" + name + '\'' +", address='" + address + '\'' +'}';}
}
Student类:
package com.lu.test06;import org.springframework.beans.factory.annotation.Autowired;
import org.springframework.beans.factory.annotation.Qualifier;
import org.springframework.beans.factory.annotation.Value;
import org.springframework.stereotype.Component;
import javax.annotation.Resource;@Component("myStudent")
public class Student {@Value("${myname}")private String name;@Value("${myage}")private int age;/*** 引用类型* @Resource:来自jdk中,给引用类型赋值的,支持byName,byType,默认是byName*            spring支持这个注解的使用*      位置:1)在属性定义的上面,无需set方法,推荐使用*           2)在set方法的上面****      说明:高于jdk1.8没有@Resource,需要加入一个依赖*      <dependency>*          <groupId>javax.annotation</groupId>*          <artifactId>javax.annotation-api</artifactId>*          <version>1.3.2</version>*      </dependency>* *///默认是byName 自动注入//先使用byName,赋值失败在使用byType@Resourceprivate School school;public Student() {System.out.println("Student的无参构造方法执行了...");}@Overridepublic String toString() {return "Student{" +"name='" + name + '\'' +", age=" + age +", school=" + school +'}';}
}
aplicationContext.xml文件:
<?xml version="1.0" encoding="UTF-8"?>
<beans xmlns="http://www.springframework.org/schema/beans"xmlns:xsi="http://www.w3.org/2001/XMLSchema-instance"xmlns:context="http://www.springframework.org/schema/context"xsi:schemaLocation="http://www.springframework.org/schema/beans http://www.springframework.org/schema/beans/spring-beans.xsd http://www.springframework.org/schema/context https://www.springframework.org/schema/context/spring-context.xsd"><context:component-scan base-package="com.lu.test06"></context:component-scan><!--读取外部的属性配置文件property-placeholder:读取properties这样的文件 Property--><context:property-placeholder file-encoding="utf-8" location="classpath:/test06/myconf.properties"></context:property-placeholder></beans>
控制台输出:
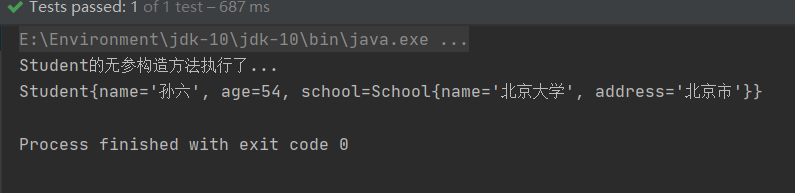
@Resource默认是byName,赋值失败会自动转换成byType,如果只用byName,而不是转换成byType
我们需要修改Student类
package com.lu.test07;import org.springframework.beans.factory.annotation.Value;
import org.springframework.stereotype.Component;import javax.annotation.Resource;@Component("myStudent")
public class Student {@Value("${myname}")private String name;@Value("${myage}")private int age;/*** 引用类型* @Resource:来自jdk中,给引用类型赋值的,支持byName,byType,默认是byName*            spring支持这个注解的使用*      位置:1)在属性定义的上面,无需set方法,推荐使用*           2)在set方法的上面****      说明:高于jdk1.8没有@Resource,需要加入一个依赖*      <dependency>*          <groupId>javax.annotation</groupId>*          <artifactId>javax.annotation-api</artifactId>*          <version>1.3.2</version>*      </dependency>** @Reource只是用byName赋值*      使用注解属性name="bean的id"* *///只是用byName@Resource(name = "mySchool")private School school;public Student() {System.out.println("Student的无参构造方法执行了...");}@Overridepublic String toString() {return "Student{" +"name='" + name + '\'' +", age=" + age +", school=" + school +'}';}
}
3 AOP面相切面编程
3.1 增加功能,导致的问题
在源代码中,业务方法中增加的功能
- 源代码可能改动的比较多
- 重复代码比较多
- 代码难于维护
3.2 一个静态代理的例子
项目的目录结构
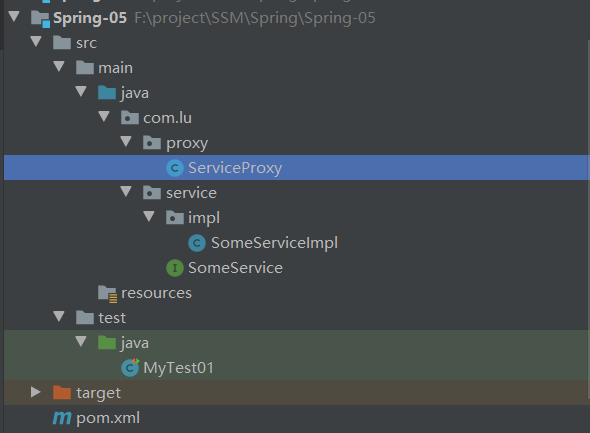
创建SomeService接口
package com.lu.service;public interface SomeService {void doSome();void doOther();
}
创建SomeServiceImpl实现该接口
package com.lu.service.impl;import com.lu.service.SomeService;public class SomeServiceImpl implements SomeService {@Overridepublic void doSome() {System.out.println("业务方法doSome执行了。。。。");}@Overridepublic void doOther() {System.out.println("业务方法doOther执行了。。。。");}
}
创建静态代理类
package com.lu.proxy;import com.lu.service.SomeService;
import com.lu.service.impl.SomeServiceImpl;import java.util.Date;/***  调用ServiceProxy类方法的时候,调用真正的目标方法*  调用目标方法的时候,增加一些功能**  ServiceProxy叫做代理,代理对目标的操作**  创建代理,可以完成对目标方法的调用,增减功能*  保持目标方法内容不变*  */
public class ServiceProxy implements SomeService {SomeService target = new SomeServiceImpl();@Overridepublic void doSome() {System.out.println("日志功能,当前时间为:" + new Date());target.doSome();System.out.println("提交事务");}@Overridepublic void doOther() {System.out.println("日志功能,当前时间为:" + new Date());target.doOther();System.out.println("提交事务");}
}
测试类中进行测试
import com.lu.proxy.ServiceProxy;
import com.lu.service.SomeService;
import com.lu.service.impl.SomeServiceImpl;
import org.junit.Test;public class MyTest01 {@Testpublic void test01() {SomeService service = new ServiceProxy();service.doSome();System.out.println("===========================");service.doOther();}
}
控制台输出:
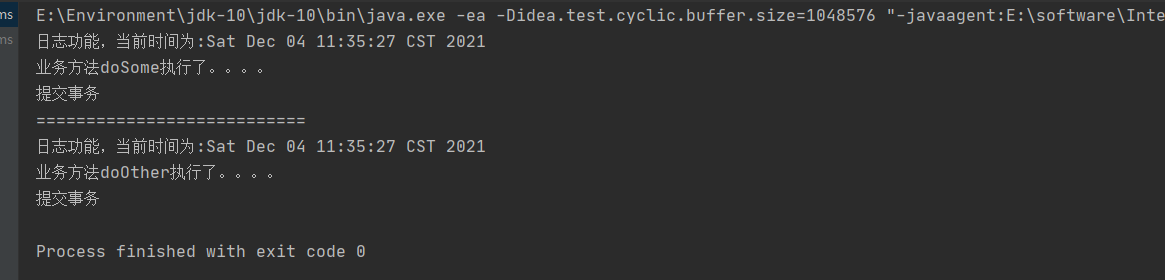
从这个例子中我们可以看待代理给我们带来的便利
3.3 AOP概念
什么是AOP?
AOP(Aspect Orient Programming):面向切面编程
Aspect:表示切面,给业务方法增加的功能,叫做切面。切面一般都是非业务功能,而且切面功能一般都是可以复用的。
例如:日志功能,权限检查,统计信息等等
Orient:面向
Programming:编程
怎么理解面向切面编程?
- 设计项目时,找出切面的功能
- 安排切面的执行时间,执行的位置
AOP作用
- 让切面功能复用
- 让开发人员专注业务逻辑,提高开发效率
- 实现业务功能和其他非业务功能解耦合
- 给存在的业务方法,增加功能,不用修改原来的代码
AOP中术语
- Aspect:切面,给业务方法增加的功能
- JoinPoint:连接点,连接切面的业务方法。在这个业务方法执行时,会同时执行切面的功能
- Pointcut:切入点,是一个或多个连接点集合。表示这些方法执行时,都能增加切面的功能。表示切面执行的位置
- target:目标对象,给哪个对象增加切面的功能,这个对象就是目标对象
- Advice:通知(增强),表示切面的执行时间。在目标方法之前执行切面,还是目标方法之后执行切面
AOP中重要的三个要素:Aspect,Pointcut,Advice
这个概念的理解是:在Advice的事件,在Pointcut的位置,执行Aspect
AOP是一个动态的思想,是在程序的运行时间,创建代理(ServiceProxy),使用代理执行方法时,增加切面的功能。这个代理对象是存在内存中的。
什么时候用AOP?
你要给某些方法增加相同的功能,源代码不能改。给业务方法增加非业务功能,也可以使用AOP
3.4 AOP技术思想的实现
使用框架实现AOP,实现AOP的框架有很多,有名的有两个
- Spring:Spring框架实现AOP思想中的部分功能。Spring框架实现AOP的操作比较繁琐,笨重
- Aspectj:独立的框架,专门做AOP。属于Eclipse
3.5 使用AspectJ框架实现AOP
AspectJ框架可以使用注解和xml配置文件两种方式实现AOP
3.5.1 通知
AspectJ表示切面执行时间,用的通知(Advice)。这个通知可以使用注解表示。
讲5个注解,表示切面的5个执行时间,这些注解叫做通知注解
@Before:前置通知
@AfterReturning:后置通知
@Around:环绕通知
@AfterThrowing:异常通知
@After:最终通知
3.5.2 Pointcut位置
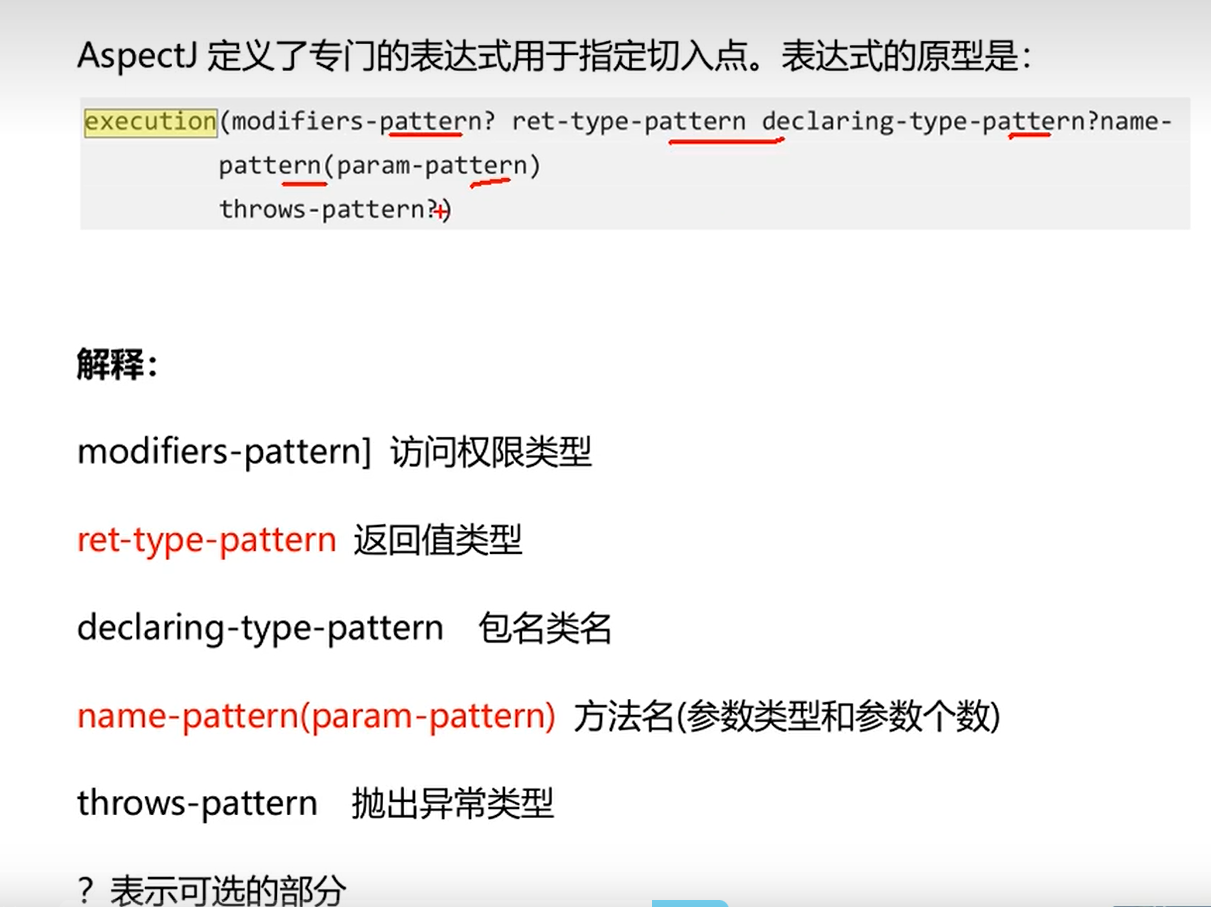
Pointcut用来表示切面执行的位置,使用Aspectj中切入点表达式。
切入点表达式语法:execution(访问权限 返回值类型 包名类名 方法名(参数) 异常类型)
| 符号 | 意义 |
|---|---|
| * | 0至多个任意字符 |
| … | 用在方法参数中,表示任意多个参数;用在包名后,表示当前包及其子包 |
| + | 用在类名后,表示当前类及其子类;用在接口后,表示当前接口及其实现类 |
例子:
execution(public * *(…))
指定切入点为:任意公共方法
execution(* set*(…)):指定切入点为
任何一个以"set"开始的方法
execution(* com.lu.service..(…))
指定切入点为:定义在service包里的任意类的任意方法
execution(* com.lu.service….(…))
指定切入点为:定义在service包或者子包里的任意类的任意方法
“…“出现在类名中时,后面必须跟”*”,表示包、子包下的所有类
execution(* …service..*(…))
指定所有包下的service子包下所有类(接口)中所有方法为切入点
3.5.3 @Before 前置通知
在目标方法执行之前执行。被注解为前置通知的方法,可以包含一个 JoinPoint 类型参数。该类型的对象本身就是切入点表达式。通过该参数,可获取切入点表达式、方法签名、目标对象等。
不光前置通知的方法,可以包含一个 JoinPoint 类型参数,所有的通知方法均可包含该参数。
步骤:
使用aspectj框架的注解,实现前置通知
实现步骤:
1.新建maven项目
2.修改pom.xml 加入依赖spring-context依赖, spring-aspects依赖(能使用aspectj框架的功能)junit
3.创建业务接口和实现类
4.创建一个叫做切面类,是一个普通类1) 在类的上面加入@Aspect2) 在类中定义方法,方法表示切面的功能在方法的上面加入Aspect框架中的通知注解,例如@Before(value="切入点表达式")5.创建spring配置文件1) 声明目标对象2) 声明切面类对象3) 声明自动代理生成器6.创建测试类,测试目标方法执行时,增加切面的功能
pom.xml文件:
<?xml version="1.0" encoding="UTF-8"?>
<project xmlns="http://maven.apache.org/POM/4.0.0"xmlns:xsi="http://www.w3.org/2001/XMLSchema-instance"xsi:schemaLocation="http://maven.apache.org/POM/4.0.0 http://maven.apache.org/xsd/maven-4.0.0.xsd"><modelVersion>4.0.0</modelVersion><groupId>org.example</groupId><artifactId>Spring-07</artifactId><version>1.0-SNAPSHOT</version><properties><project.build.sourceEncoding>UTF-8</project.build.sourceEncoding><maven.compiler.source>10</maven.compiler.source><maven.compiler.target>10</maven.compiler.target></properties><dependencies><dependency><groupId>junit</groupId><artifactId>junit</artifactId><version>4.13.2</version><scope>test</scope></dependency><dependency><groupId>org.springframework</groupId><artifactId>spring-context</artifactId><version>5.3.4</version></dependency><dependency><groupId>org.springframework</groupId><artifactId>spring-aspects</artifactId><version>4.3.19.RELEASE</version></dependency></dependencies></project>
业务接口:
package com.lu.service;public interface SomeService {public void doSome(String name,Integer age);
}
实现类:
package com.lu.service.impl;import com.lu.service.SomeService;public class SomeServiceImpl implements SomeService {@Overridepublic void doSome(String name, Integer age) {System.out.println("业务方法doSome(),创建商品的订单");}
}
切面类:
package com.lu.handle;import org.aspectj.lang.JoinPoint;
import org.aspectj.lang.annotation.Aspect;
import org.aspectj.lang.annotation.Before;import java.util.Date;/*** @author lucycia* @Aspect:切面类的注解* 位置:放在某个类的上面* 作用:表示当前类时切面类* 切面类:表示切面功能的类*/
@Aspect
public class MyAspect {//定义方法,表示切面的具体功能/*** 前置通知方法的定义* 1) 方法时public* 2) 方法时void* 3) 方法名称自定义* 4) 方法可以有参数,如果有就是JoinPoint* 也可以没有* *//*** @Before:前置通知* 属性:value 切入点表达式,表示切面的执行位置* 在这个方法时,会同时执行切面的功能* 位置:在方法的上面** 特点:* 1)执行时间:在目标方法之前先执行* 2)不会影响目标方法的执行* 3)不会修改目标方法的执行结果* */
// @Before(value = "execution(public void com.lu.service.impl.SomeServiceImpl.doSome(String,Integer) )")
// public void myBefore() {
// //切面的代码。
// System.out.println("前置通知,切面的功能,在目标方法之前先执行" + new Date());
// }// @Before(value = "execution(* *..SomeServiceImpl.do*(..) )")
// public void myBefore() {
// //切面的代码。
// System.out.println("前置通知,切面的功能,在目标方法之前先执行.." + new Date());
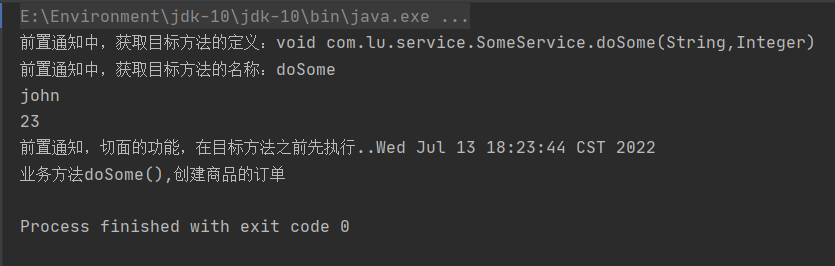
// }/*** 切面类中的通知方法,可以有参数* JoinPoint必须是他** JoinPoint:表示正在执行的业务方法,相当于反射中的Method* 使用要求:必须是参数列表的第一个* 作用:获取方法执行时的信息,例如方法名称,方法的参数集合* */@Before(value = "execution(* *..SomeServiceImpl.do*(..) )")public void myBefore(JoinPoint jp) {//获取方法的定义System.out.println("前置通知中,获取目标方法的定义:" + jp.getSignature());System.out.println("前置通知中,获取目标方法的名称:" + jp.getSignature().getName());//获取方法执行时参数Object[] args = jp.getArgs();for (Object obj :args) {System.out.println(obj);}//切面的代码。System.out.println("前置通知,切面的功能,在目标方法之前先执行.." + new Date());}}
spring配置文件:
<?xml version="1.0" encoding="UTF-8"?>
<beans xmlns="http://www.springframework.org/schema/beans"xmlns:xsi="http://www.w3.org/2001/XMLSchema-instance" xmlns:aop="http://www.springframework.org/schema/aop"xsi:schemaLocation="http://www.springframework.org/schema/beans http://www.springframework.org/schema/beans/spring-beans.xsd http://www.springframework.org/schema/aop https://www.springframework.org/schema/aop/spring-aop.xsd"><!--声明目标对象--><bean id="someService" class="com.lu.service.impl.SomeServiceImpl"></bean><!--声明切面类对象--><bean id="myAspect" class="com.lu.handle.MyAspect"></bean><!--声明自动代理生成器,目的是创建目标对象的代理调用aspectj框架中的功能,寻找spring容器中的所有目标对象把每个目标对象加入切面类中的功能,生成代理这个代理对象是修改的内存中的目标对象,这个目标对象就是代理对象--><aop:aspectj-autoproxy></aop:aspectj-autoproxy></beans>
测试类:
package com.lu;import com.lu.service.SomeService;
import org.junit.Test;
import org.springframework.context.ApplicationContext;
import org.springframework.context.support.ClassPathXmlApplicationContext;public class MyTest {@Testpublic void test01() {String config = "applicationContext.xml";ApplicationContext ctx = new ClassPathXmlApplicationContext(config);SomeService service = (SomeService)ctx.getBean("someService");service.doSome("john",23);}
}
结果:
3.5.4 @AfterReturning 后置通知
在目标方法执行之后执行。由于是目标方法之后执行,所以可以获取到目标方法的返回值。该注解的 returning 属性就是用于指定接收方法返回值的变量名的。所以,被注解为后置通知的方法,除了可以包含 JoinPoint 参数外,还可以包含用于接收返回值的变量。该变量最好为 Object 类型,因为目标方法的返回值可能是任何类型。
package com.lu.handle;import org.aspectj.lang.JoinPoint;
import org.aspectj.lang.annotation.AfterReturning;
import org.aspectj.lang.annotation.Aspect;
import org.aspectj.lang.annotation.Before;import java.io.ObjectInputStream;
import java.util.Date;/*** @author lucycia*/
@Aspect
public class MyAspect {/** 后置通知方法的定义* 1)方法是public* 2) 方法是void* 3)方法名称自定义* 4)方法有参数,推荐使用Object类型* *//*** @AfterReturning:后置通知*      属性:value:切入点表达式*           returning 自定义的变量,表示目标方法的返回值*                     自定义变量名称必须和通知方法的形参名一致*      位置:在方法的上面** 特点:*  1,在目标方法之后执行的*  2.能获取到目标方法的执行结果*  3.不会影响目标方法的执行** 方法的参数:*  Object res:表示目标方法的返回值,使用res接收doOther的调用结果*  Object res = doOther()**  后置通知的执行顺序:*      Object res = SomeServiceImpl.doOther(..);*      myAfterReturning(res)* */@AfterReturning(value = "execution(* *..SomeServiceImpl.doOther(..))",returning = "res")public void myAfterRuturning(Object res) {System.out.println("后置通知,在目标方法之后执行的,能拿到执行结果:" + res);//Object res 有什么用if("abcd".equals(res)) {System.out.println("根据返回值的不同,做不同的增强功能");} else if("aaaaa".equals(res)) {System.out.println("做其他的操作");}}}
3.5.5 @Around 环绕通知
@Around(value=“切入点表达式”)
使用环绕通知:就是调用切面类中的通知方法
在目标方法执行之前之后执行。被注解为环绕增强的方法要有返回值,Object 类型。并且方法可以包含一个 ProceedingJoinPoint 类型的参数。接口 ProceedingJoinPoint 其有一个proceed()方法,用于执行目标方法。若目标方法有返回值,则该方法的返回值就是目标方法的返回值。最后,环绕增强方法将其返回值返回。该增强方法实际是拦截了目标方法的执行。
package com.lu.handle;import org.aspectj.lang.ProceedingJoinPoint;
import org.aspectj.lang.annotation.Around;
import org.aspectj.lang.annotation.Aspect;import java.util.Date;@Aspect
public class MyAspect {/*** 环绕通知方法的定义*  1) 方法是public*  2) 方法是必须有返回值,推荐使用Object类型*  3) 方法名称自定义*  4) 方法必须有ProceedingJoinPoint参数** @Around:环绕通知*      属性:value 切入点表达式*      位置:在方法定义的上面** 返回值:Object,表示调用目标方法希望得到的执行结果(不一定是目标方法自己的返回值)* 参数:ProceedingJoinPoint,相当于反射中的Method*      作用:执行目标方法的,等于Method.invoke()** 特点:*  1.在目标方法的前和后都能增强功能*  2.控制目标方法是否执行*  3.修改目标方法的执行结果* */@Around(value = "execution(* *..SomeServiceImpl.doFirst(..))")public Object myAround(ProceedingJoinPoint pjp) throws Throwable {System.out.println("执行了环绕通知,在目标方法之前,输出日志时间==" + new Date());Object methodReturn = null;//执行目标方法 ProceedingJoinPoint,表示doFirstmethodReturn = pjp.proceed();//method.invoke().,表示执行doFirst()方法本身System.out.println("环绕通知,在目标方法之后,增加了十五提交功能");//return "HelloAround,不是目标方法的执行结果";return methodReturn;}
}
3.5.6 @AfterThrowing 异常通知
语法:@AfterThrowing(value=“切入点表法式”,throwing=“自定义变量”)
在目标方法抛出异常后执行。该注解的 throwing 属性用于指定所发生的异常类对象。
当然,被注解为异常通知的方法可以包含一个参数 Throwable,参数名称为 throwing 指定的名称,表示发生的异常对象。
package com.lu.handle;import org.aspectj.lang.annotation.AfterThrowing;
import org.aspectj.lang.annotation.Aspect;@Aspect
public class MyAspect {/*** 异常通知方法的定义* 1) 方法是public* 2) 方法没有返回值,是void* 3) 方法名称自定义* 4) 方法有参数是Exception*** @AfterThrowing:异常通知*      属性:value 切入点表达式*           throwing 自定义变量,表示目标方法抛出的异常*      位置:在方法的上面* 特点:*  1.在目标方法抛出异常后执行的,没有异常不执行*  2.能获取到目标方法的异常信息*  3.不是异常处理程序。可以得到发生异常的通知,可以发送邮件短信等*     看作是目标方法的监控程序*     *     * 异常通知的执行* try{*     SomeServiceImpl.doSecond(..)* }catch(Exception e){*     myAfterThrowing(e);* }* */@AfterThrowing(value = "execution(* *..SomeServiceImpl.doSecond(..))",throwing = "ex")public void myAfterThrowing(Exception ex) {System.out.println("异常通知,在目标方法抛出异常时执行的,异常原因是:" + ex.getMessage());/*异常发生可以做:1.记录异常的时间,位置等信息2.发送邮件短信等通知开发人员* */}
}
3.5.7 @After 最终通知
语法:@After(value=“切入点表达式”)
无论目标方法是否抛出异常,该增强均会被执行。
package com.lu.handle;import org.aspectj.lang.annotation.After;
import org.aspectj.lang.annotation.Aspect;
import org.springframework.stereotype.Component;@Aspect
@Component
public class MyAspect {/*** 最终通知方法的定义* 1) 方法是public* 2)方法是没有返回值,是void* 3)方法名称自动逸* 4)方法没有参数*** @After:最终通知*      属性:value 切入点表达式*      位置:在方法的上面** 特点:*  1.在目标方法之后执行的*  2.总是会被执行*  3.可以用来做程序最后的收尾工作,例如清楚临时数据,变量。清理内存*  * 最终通知* try{*     SomeServiceImpl.doThird()* }finally{*     myAfter()* }* */@After(value = "execution(* *..SomeServiceImpl.doThird(..))")public void myAfter() {System.out.println("最终通知,总是会被执行");}
}
3.5.8 @Pointcut 定义和管理切入点注解
语法:@Pointcut(value=“切入点表达式”)
当较多的通知增强方法使用相同的 execution 切入点表达式时,编写、维护均较为麻烦。AspectJ 提供了@Pointcut 注解,用于定义 execution 切入点表达式。
其用法是,将@Pointcut 注解在一个方法之上,以后所有的 executeion 的 value 属性值均可使用该方法名作为切入点。代表的就是@Pointcut 定义的切入点。这个使用@Pointcute 注解的方法一般使用 private 的标识方法,即没有实际作用的方法。
package com.lu.handle;import org.aspectj.lang.annotation.After;
import org.aspectj.lang.annotation.Aspect;
import org.aspectj.lang.annotation.Before;
import org.aspectj.lang.annotation.Pointcut;
import org.springframework.stereotype.Component;@Aspect
@Component
public class MyAspect {@Before(value = "mypt()")public void myBefore() {System.out.println("前置通知。。。。");}@After(value = "mypt()")public void myAfter() {System.out.println("后置通知。。。。");}/*** @Pointcut:定义和管理切入点,不是通知注解*      属性:value 切入点表达式*      位置:在一个自定义方法的上面,这个方法看作是切入点表达式的别名*           其他的通知注解中,可以使用方法名称,就表示使用这个切入点表达式了* */@Pointcut("execution(* *..SomeServiceImpl.doThird(..))")private void mypt() {//无需代码}
}
3.6 AOP总结
AOP是一种同台的技术思想,目的是实现业务功能和非业务功能的解耦合。业务功能是独立的模块,其他功能也是独立的模块。例如事务功能,日志等等,让这些事务,日志功能是可以被复用的。
当目标方法需要一些功能时,可以在不修改,不能修改源代码的情况下,使用AOP技术在程序执行期间,生成代理对象,通过代理执行业务方法,同时增加功能。
4 Spring继承MyBatis
4.1 继承思路
Spring能继承很多的框架,是Spring一个优势功能。通过集成功能,让开发人员使用其他框架更方便
集成使用的是Spring Ioc 核心技术
4.2 要使用框架,例如Mybatis,怎么使用Mybatis?
使用Mybatis,需要创建Mybatis框架中的某些对象,使用这些对象,就能使用Mybatis提供的功能了
分析:Mybatis执行sql语句,需要使用哪些对象?
1.需要Dao接口的代理对象,例如StudentDao接口,需要一个它的代理对象
使用SqlSession.getMapper(StudentDao.class),得到dao代理对象
2.需要有SqlSessionFactory,创建SqlSessionFactory对象,才能使用openSession()得到SqlSession对象
3.数据源DataSource对象,使用一个更强大,功能更多的连接池对象代理Mybatis自己的PooledDataSource
4.3 步骤
mybatis实现步骤:1.使用的mysql数据库,使用学生表student2(id int 主键列,自动增长,name varchar(80),age int)2.创建maven项目3.加入依赖junit,spring依赖,mybatis依赖,mysql驱动mybatis-spring依赖(mybatis网站上提供的,用来在spring项目中,创建mybatis对象)spring有关事务的依赖mybatis和spring整合的时候,事务是自动提交的4.创建实体类Student5.创建Dao接口和mapper文件写sql语句6.写mybatis主配置文件7.创建service接口和它的实现类8.创建spring的配置文件1) 声明数据源DataSource,使用的阿里的Druid连接池2) 声明SqlSessionFactoryBean类,在这个类内部创建的是SqlSessionFactory对象3) 声明MapperScannerConfiguration类,在内部创建dao代理对象创建的对象都放在spring容器中。4) 声明Service对象,把3)中的dao赋值给service属性9.测试dao访问数据库
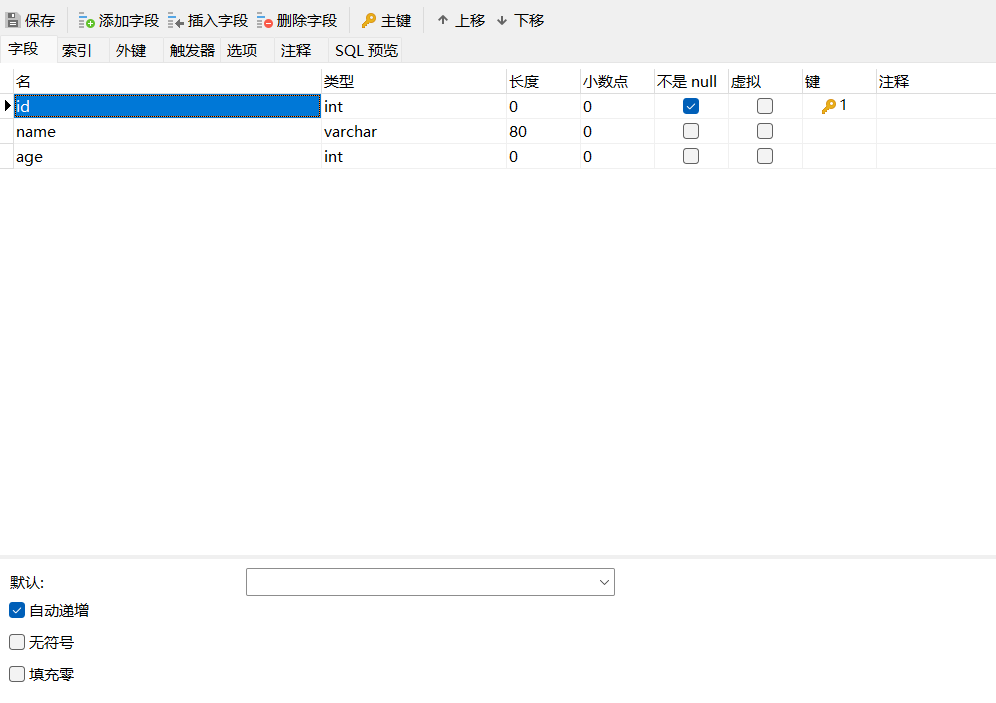
1.使用的mysql数据库,使用学生表student2(id int 主键列,自动增长,
name varchar(80),
age int)
<?xml version="1.0" encoding="UTF-8"?>
<project xmlns="http://maven.apache.org/POM/4.0.0"xmlns:xsi="http://www.w3.org/2001/XMLSchema-instance"xsi:schemaLocation="http://maven.apache.org/POM/4.0.0 http://maven.apache.org/xsd/maven-4.0.0.xsd"><modelVersion>4.0.0</modelVersion><groupId>org.example</groupId><artifactId>Spring-13</artifactId><version>1.0-SNAPSHOT</version><properties><project.build.sourceEncoding>UTF-8</project.build.sourceEncoding><maven.compiler.source>10</maven.compiler.source><maven.compiler.target>10</maven.compiler.target></properties><dependencies><dependency><groupId>junit</groupId><artifactId>junit</artifactId><version>4.13.2</version><scope>test</scope></dependency><dependency><groupId>org.springframework</groupId><artifactId>spring-aspects</artifactId><version>5.2.5.RELEASE</version></dependency><dependency><groupId>org.mybatis</groupId><artifactId>mybatis</artifactId><version>3.5.7</version></dependency><dependency><groupId>mysql</groupId><artifactId>mysql-connector-java</artifactId><version>8.0.26</version></dependency><!--spring事务依赖--><dependency><groupId>org.springframework</groupId><artifactId>spring-tx</artifactId><version>5.3.4</version></dependency><dependency><groupId>org.springframework</groupId><artifactId>spring-jdbc</artifactId><version>5.3.4</version></dependency><!--mybatis和spring集成依赖--><dependency><groupId>org.mybatis</groupId><artifactId>mybatis-spring</artifactId><version>1.3.3</version></dependency><!--阿里的连接池--><dependency><groupId>com.alibaba</groupId><artifactId>druid</artifactId><version>1.1.12</version></dependency></dependencies><build><resources><resource><directory>src/main/java</directory><includes><include>**/*.properties</include><include>**/*.xml</include></includes><filtering>false</filtering></resource></resources></build></project>
package com.lu.domain;public class Student {private Integer id;private String name;private Integer age;public Integer getId() {return id;}public void setId(Integer id) {this.id = id;}public String getName() {return name;}public void setName(String name) {this.name = name;}public Integer getAge() {return age;}public void setAge(Integer age) {this.age = age;}@Overridepublic String toString() {return "Student{" +"id=" + id +", name='" + name + '\'' +", age=" + age +'}';}
}
package com.lu.dao;import com.lu.domain.Student;import java.util.List;public interface StudentDao {int insertStudent(Student student);List<Student> selectStudents();
}
<?xml version="1.0" encoding="UTF-8" ?>
<!DOCTYPE mapperPUBLIC "-//mybatis.org//DTD Mapper 3.0//EN""http://mybatis.org/dtd/mybatis-3-mapper.dtd"><mapper namespace="com.lu.dao.StudentDao"><!--使用insert,update,delete,select标签写sql--><insert id="insertStudent">insert into student2(name,age) values(#{name},#{age})</insert><select id="selectStudents" resultType="com.lu.domain.Student">select id,name,age from student2</select>
</mapper>
<?xml version="1.0" encoding="UTF-8" ?>
<!DOCTYPE configurationPUBLIC "-//mybatis.org//DTD Config 3.0//EN""http://mybatis.org/dtd/mybatis-3-config.dtd">
<configuration><settings><setting name="logImpl" value="STDOUT_LOGGING"/></settings><typeAliases><package name="com.lu.domain"/></typeAliases><mappers><!--<mapper resource="com\lu\dao\StudentDao.xml"/>--><!--要求:1.mapper文件和dao接口在同一个目录2.mapper文件和dao接口名称一致--><package name="com.lu.dao"/></mappers>
</configuration>
package com.lu.service;import com.lu.domain.Student;import java.util.List;public interface StudentService {int addStudent(Student student);List<Student> queryStudent();
}
package com.lu.service.impl;import com.lu.dao.StudentDao;
import com.lu.domain.Student;
import com.lu.service.StudentService;import java.util.List;public class StudentServiceImpl implements StudentService {private StudentDao studentDao;public void setStudentDao(StudentDao studentDao) {this.studentDao = studentDao;}@Overridepublic int addStudent(Student student) {int rows = studentDao.insertStudent(student);return rows;}@Overridepublic List<Student> queryStudent() {List<Student> students = studentDao.selectStudents();return students;}
}
<?xml version="1.0" encoding="UTF-8"?>
<beans xmlns="http://www.springframework.org/schema/beans"xmlns:xsi="http://www.w3.org/2001/XMLSchema-instance"xmlns:context="http://www.springframework.org/schema/context"xsi:schemaLocation="http://www.springframework.org/schema/beans http://www.springframework.org/schema/beans/spring-beans.xsd http://www.springframework.org/schema/context https://www.springframework.org/schema/context/spring-context.xsd"><!--加载外部的属性配置文件--><context:property-placeholder location="classpath:jdbc.properties"></context:property-placeholder><!--声明数据源DataSource--><bean id="dataSource" class="com.alibaba.druid.pool.DruidDataSource" init-method="init" destroy-method="close"><property name="url" value="${jdbc.url}"></property><property name="username" value="${jdbc.username}"></property><property name="password" value="${jdbc.passwprd}"></property></bean><!--声明SqlSessionFactoryBean,在这个类的内部,创建SqlSessionFactory--><bean id="factory" class="org.mybatis.spring.SqlSessionFactoryBean"><!--指定数据源--><property name="dataSource" ref="dataSource"></property><!--指定mybatis的主配置文件Resource可以直接使用value属性--><property name="configLocation" value="classpath:mybatis.xml"></property></bean><!--声明MapperScannerConfigurationSqlSession.getMapper(StudentDao.class)循环basePackage所表示的包,把包中的每个接口都找到,调用SqlSession.getMapper把每个dao接口都创建出dao对象,dao代理对象放在容器中ApplicationContext ctx = ....SqlSessionFactory sqlSessionFactory = ctx.getBean("factory");SqlSession session = sqlSessionFactory.openSession();for(接口: com.lu.dao){接口 对象 = session.getMapper(接口)springMap.put(接口名的首字母小写,对象)}--><bean class="org.mybatis.spring.mapper.MapperScannerConfigurer"><!--指定SqlSessionFactory对象的名称--><property name="sqlSessionFactoryBeanName" value="factory"></property><!--指定基本包,dao接口所在的包名--><property name="basePackage" value="com.lu.dao"></property></bean><!--声明service--><bean id="studentService" class="com.lu.service.impl.StudentServiceImpl"><property name="studentDao" ref="studentDao"></property></bean></beans>
package com.lu;import com.lu.dao.StudentDao;
import com.lu.domain.Student;
import com.lu.service.StudentService;
import org.junit.Test;
import org.springframework.context.ApplicationContext;
import org.springframework.context.support.ClassPathXmlApplicationContext;import java.util.List;public class MyTest {@Testpublic void test01() {ApplicationContext ctx = new ClassPathXmlApplicationContext("applicationContext.xml");StudentDao dao = (StudentDao) ctx.getBean("studentDao");Student student = new Student();student.setAge(21);student.setName("张三");dao.insertStudent(student);}@Testpublic void test02() {String config = "applicationContext.xml";ApplicationContext ctx = new ClassPathXmlApplicationContext(config);StudentService service = (StudentService) ctx.getBean("studentService");Student student = new Student();student.setAge(22);student.setName("李四");service.addStudent(student);}@Testpublic void test03() {String config = "applicationContext.xml";ApplicationContext ctx = new ClassPathXmlApplicationContext(config);StudentService service = (StudentService) ctx.getBean("studentService");List<Student> students = service.queryStudent();for (Student stu :students) {System.out.println(stu);}}
}
5 Spring事务
5.1 事务的概念
什么是事务?事务时一些sql序列的集合,是多条sql,作为一个整体执行
mysql执行事务
beginTransaction 开启事务
insert into student() values...
select * from student where id = 1001
update school set name=xxx where id = 1005
endTransaction 事务结束
什么情况下需要使用事务?
一个操作需要多条(2条或2条以上的sql)sql语句一起完成,操作才能成功。
5.2 在程序中事务在哪说明
事务:放在业务类的方法上面(public方法上面),表示业务方法执行时,需要事务的支持
public class AccountService{private AccountDao dao;private MoneyDao dao2;//在service(业务类)的public方法上面,需要说明事务public void trans(String a,String b,Integer money) {dao.updateA();dao.updateB();dao2.insertA();}
}public class AccountDao{public void updateA() {}public void updateB() {}
}public class MoneyDao{public void insertA() {}public void deleteB() {}
}
5.3 事务管理器
5.3.1 不同的数据库访问技术,处理事务是不同的
1)使用jdbc访问数据库,事务处理。
public void updateAccount(){Connection conn = ...conn.setAutoCommit(false);stat.insert();stat.update();conn.commit();conn.setAutoCommit(true);
}
2)mybatis执行数据库,处理事务
public void updateAccount() {SqlSession session = Sqlsession.openSession(false);try{session.insert("insert into student...");session.update("update school....");session.commit();}catch(Exception e) {session.rollback();}}
5.3.2 spring同意管理事务,把不同的数据库访问技术的事务处理统一起来
使用spring的事务管理器,管理不同的数据库访问技术的事务处理,开发人员只需要掌握spring的事务处理一个方案,就可以实现使用不同数据库访问技术的事务管理。
管理事务面向的是spring,有spring管理事务,做事务提交,事务回滚
5.3.3 Spring事务管理器
Spring框架使用事务管理器对象,管理所有的事务
事务管理器接口:PlatFormTransactionManager
作用:定义了事务的操作,主要是commit(),rollback()
事务管理器有很多实现类:一种数据库的访问技术有一个实现类。由实现类具体完成事务的提交,回滚。
意味着:jdbc或者mybatis访问数据库有自己的事务管理器实现类:DataSourceTransactionManager
hibernate框架,他的事务管理器实现类:HibernateTransactionManager
5.3.4 事务的提交和回滚的时机
什么时候提交事务,回滚事务?
当你的业务方法正常执行时,没有异常,事务是提交的。如果你的业务方法抛出运行时异常,事务是回滚的。
异常分类:
Error:严重错误。回滚事务
Exception:异常类,可以处理的异常情况
1)运行时异常:RuntimeException和它的子类都是运行时异常,在程序执行过程中抛出的异常。常见的运行时异常:NullPoinerException,NumberFormatException,IndexOutOfBoundException,ArithmeticException
2)受查异常:编写Java代码的时候,必须处理的异常。例如IOException,SQLException,FileNotFoundException
怎么记忆?
方法中抛出了运行时异常,事务回滚,其他情况(正常执行方法,受查异常)就是提交事务。
5.3.5 使用使用的AOP的环绕通知
环绕通知:可以在目标方法的前和后都能增强功能,不需要修改代码。
spring给业务方法在执行时,增加上事务的切面功能
@Around(value = "execution(* 所有业务类中的方法)")
public Object myAround(ProceedingJoinPoint pjp) {try{PlatformTransactionManager.beginTransaction();//使用spring的事务管理器,开启事务pjp.proceed();执行目标方法PlatformTransactionManager.commit();//业务方法正常执行,提交事务}catch(Exception e) {PlatformTransactionManager.rollback();//业务方法未正常执行,回滚事务}
}
5.4 事务定义接口TransactionDefinition
TransactionDefinition接口。定义了三类常量,定义了有关事务控制的属性。
事务的属性:1) 隔离级别 2) 传播行为 3) 事务的超时
给业务方法说明事务属性。和ACID不一样。
5.4.1 隔离级别
隔离级别:控制事务之间影响的程度。
5个值,只有四个隔离级别
1)DEFAULT:采用DB默认的事务隔离级别。Mysql默认为REPEATABLE_READ;Oracle默认为READ_COMMITTED。
2)READ_UNCOMMITTED:读未提交。未解决任何并发问题
3)READ_COMMITTED:读已提交。解决脏读,存在不可重复读与幻读
4)REPEATABLE_READ:可重复读。解决脏读,不可重复读,存在幻读
5)SERIALIZABLE:串行化。不存在并发问题。
5.4.2 超时时间
超时时间,以秒为单位。整数值,默认是-1
超时时间:表示一个业务方法最长的执行时间,到达时间没有执行完毕,spring回滚事务。
5.4.3 传播行为
传播行为有7个值
传播行为:业务方法在调用时,事务在方法之间的,传递和使用。
使用传播行为,标识方法有无事务。
PROPAGATION_REQUIRED
PROPAGATION_REQUIRES_NEW
PROPAGATION_SUPPORTS
以上三个需要掌握
PROPAGATION_MANDATORY
PROPAGATION_NESTED
PROPAGATION_NEVER
PROPAGATION_NOT_SUPPORTED
1)REQUIRED:spring默认传播行为,方法在调用的时候,如果存在事务就是使用当前的事务,如果没有事务,则新建事务,方法在新事物中执行。
2)SUPPORTS:支持,方法有事务可以正常执行,没有事务也可以正常执行。
3)REQUIRES_NEW:方法需要一个新事物。如果调用方法时,存在一个事务,则原来的事务暂停,直到新事务执行完毕。如果方法调用时,没有事务,则新建一个事务,在新事务执行代码。
5.5 Spring框架使用自己的注解@Transactional控制事务
@Transactional注解,使用注解的属性控制事务(隔离级别,传播行为,超时)
属性:
1.propagation:事务的传播行为,它使用的Propagation类的枚举值,例如 Propagation.REQUIRED
2.isolation:表示隔离级别,使用isolation类的枚举值,表示隔离级别。默认 Isolation.DEFAULT
3.readOnly:boolean类型的值,表示数据库操作是不是只读的,默认是false
4.timeout:事务超时,默认是-1,整数值,单位是秒。例如timeout=20
5.rollbackFor:表示回滚的异常类列表,他的值是一个数组,每个值是异常类型的class
6.rollbackForClassName:表示回滚的异常类列表,他的值是异常类名称,是String类型的值
7.noRollbackFor:不需要回滚的异常类列表,是class类型的
8.noRollbackForClassName:不需要回滚的异常类列表,是String类型的值
位置:
1.在业务方法的上面,在public方法的上面
2.在类的上面
注解的使用步骤:
1.在spring的配置文件,声明事务的内容
声明事务管理器,说明使用哪个事务管理器对象
声明使用注解管理事务,开启事务注解驱动
2.在类的源代码中,加入@Transactional
事务的控制模式:1.编程式,在代码中变成控制事务。 2。声明式事务,不需要编码
例子:
spring配置文件
<?xml version="1.0" encoding="UTF-8"?>
<beans xmlns="http://www.springframework.org/schema/beans"xmlns:xsi="http://www.w3.org/2001/XMLSchema-instance"xmlns:context="http://www.springframework.org/schema/context" xmlns:tx="http://www.springframework.org/schema/tx"xsi:schemaLocation="http://www.springframework.org/schema/beans http://www.springframework.org/schema/beans/spring-beans.xsd http://www.springframework.org/schema/context https://www.springframework.org/schema/context/spring-context.xsd http://www.springframework.org/schema/tx http://www.springframework.org/schema/tx/spring-tx.xsd"><context:property-placeholder location="classpath:jdbc.properties"></context:property-placeholder><bean id="dataSource" class="com.alibaba.druid.pool.DruidDataSource" init-method="init" destroy-method="close"><property name="url" value="${jdbc.url}"></property><property name="username" value="${jdbc.username}"></property><property name="password" value="${jdbc.passwprd}"></property></bean><bean id="factory" class="org.mybatis.spring.SqlSessionFactoryBean"><property name="dataSource" ref="dataSource"></property><property name="configLocation" value="classpath:mybatis.xml"></property></bean><bean class="org.mybatis.spring.mapper.MapperScannerConfigurer"><property name="sqlSessionFactoryBeanName" value="factory"></property><property name="basePackage" value="com.lu.dao"></property></bean><!--声明service--><bean id="buyService" class="com.lu.service.impl.BuyGppdsServoceImpl"><property name="goodsDao" ref="goodsDao"></property><property name="saleDao" ref="saleDao"></property></bean><!--声明事务的控制--><!--声明事务管理器--><bean id="transactionManager" class="org.springframework.jdbc.datasource.DataSourceTransactionManager"><!--指定数据源DataSource--><property name="dataSource" ref="dataSource"></property></bean><!--开启事务注解驱动,告诉框架使用注解管理驱动transaction-manager:指定事务管理器的id--><tx:annotation-driven transaction-manager="transactionManager"></tx:annotation-driven>
</beans>
java代码
package com.lu.service.impl;import com.lu.dao.GoodsDao;
import com.lu.dao.SaleDao;
import com.lu.domain.Goods;
import com.lu.domain.Sale;
import com.lu.exception.NotEnougthException;
import com.lu.service.BuyGppdsServoce;
import org.springframework.transaction.annotation.Isolation;
import org.springframework.transaction.annotation.Propagation;
import org.springframework.transaction.annotation.Transactional;public class BuyGppdsServoceImpl implements BuyGppdsServoce {private SaleDao saleDao;private GoodsDao goodsDao;public void setSaleDao(SaleDao saleDao) {this.saleDao = saleDao;}public void setGoodsDao(GoodsDao goodsDao) {this.goodsDao = goodsDao;}/*第一种设置方式@Transactional(propagation = Propagation.REQUIRED,isolation = Isolation.DEFAULT,readOnly = false,timeout = 20,rollbackFor = {NullPointerException.class,NotEnougthException.class})第二种设置方式@Transactional(propagation = Propagation.REQUIRED,isolation = Isolation.DEFAULT,readOnly = false,timeout = 20)解释rollbackFor的使用1)框架首先检查方法抛出的异常是不是在rollbackFor的数组中,如果在一定回滚2)如果方法抛出的异常不在rollbackFor数组,框架会继续检查抛出的异常是不是 运行时异常RuntimeException如果是RuntimeException,一定回滚第三种方式:使用默认值 REQUIRED,发生运行时异常回滚**/@Transactional(propagation = Propagation.REQUIRED,isolation = Isolation.DEFAULT,readOnly = false,timeout = 20,rollbackFor = {NullPointerException.class,NotEnougthException.class})@Overridepublic void buy(Integer goodsId, Integer num) {System.out.println("buy方法的开始。。。。。。。。。。");//生成销售记录Sale sale = new Sale();sale.setGid(goodsId);sale.setNum(num);saleDao.insertSale(sale);//查询商品Goods goods = goodsDao.selectById(goodsId);if(goods == null) {throw new NullPointerException(goodsId + "商品不存在");} else if(goods.getAmount() < num) {throw new NotEnougthException(goodsId + "库存不足");}//更新库存Goods buyGoods = new Goods();buyGoods.setId(goodsId);buyGoods.setAmount(num);goodsDao.updateGoods(buyGoods);System.out.println("buy方法的结束。。。。。。。。。。");}
}
@Transactional使用的特点:
1.spring框架自己提供的事务控制
2.适合中小型项目
3.使用方便,效率高
5.6 使用Aspectj框架在spring配置文件中,声明事务控制
使用aspectj的aop,声明事务控制叫做声明式事务
使用步骤:
-
pom.xml加入spring-aspects的依赖
-
在spring的配置文件声明事务的内容
1)声明事务管理器
2)声明业务方法需要的事务属性
3)声明切入点表达式
声明式事务:
spring配置文件
<?xml version="1.0" encoding="UTF-8"?>
<beans xmlns="http://www.springframework.org/schema/beans"xmlns:xsi="http://www.w3.org/2001/XMLSchema-instance"xmlns:context="http://www.springframework.org/schema/context" xmlns:tx="http://www.springframework.org/schema/tx"xmlns:aop="http://www.springframework.org/schema/aop"xsi:schemaLocation="http://www.springframework.org/schema/beans http://www.springframework.org/schema/beans/spring-beans.xsd http://www.springframework.org/schema/context https://www.springframework.org/schema/context/spring-context.xsd http://www.springframework.org/schema/tx http://www.springframework.org/schema/tx/spring-tx.xsd http://www.springframework.org/schema/aop https://www.springframework.org/schema/aop/spring-aop.xsd"><context:property-placeholder location="classpath:jdbc.properties"></context:property-placeholder><bean id="dataSource" class="com.alibaba.druid.pool.DruidDataSource" init-method="init" destroy-method="close"><property name="url" value="${jdbc.url}"></property><property name="username" value="${jdbc.username}"></property><property name="password" value="${jdbc.passwprd}"></property></bean><bean id="factory" class="org.mybatis.spring.SqlSessionFactoryBean"><property name="dataSource" ref="dataSource"></property><property name="configLocation" value="classpath:mybatis.xml"></property></bean><bean class="org.mybatis.spring.mapper.MapperScannerConfigurer"><property name="sqlSessionFactoryBeanName" value="factory"></property><property name="basePackage" value="com.lu.dao"></property></bean><!--声明service--><bean id="buyService" class="com.lu.service.impl.BuyGppdsServoceImpl"><property name="goodsDao" ref="goodsDao"></property><property name="saleDao" ref="saleDao"></property></bean><!--声明式事务:不用写代码--><!--1.声明事务管理器--><bean id="transactionManager" class="org.springframework.jdbc.datasource.DataSourceTransactionManager"><property name="dataSource" ref="dataSource"></property></bean><!--2.声明业务方法的事务属性 (隔离级别,传播行为,超时)id:给业务方法配置事务段代码七个名称,为一只transaction-manager:事务管理器的id--><tx:advice id="serviceAdvice" transaction-manager="transactionManager"><!--给具体的业务方法增加事务的说明--><tx:attributes><!--给具体的业务方法,说明他需要的事务属性name:业务方法的名称。配置name的值:1.业务方法的名称 2.带有部分通配符的方法名称 3.使用*propagation:指定传播行为的值isolation:隔离级别read-only:是否只读,默认是falsetimeout:超时时间rollback-for:指定回滚的异常类列表,使用的异常全限定名称--><tx:method name="buy"propagation="REQUIRED"isolation="DEFAULT"read-only="false"timeout="20"rollback-for="java.lang.NullPointerException,com.lu.exception.NotEnougthException"/></tx:attributes></tx:advice><!--声明切入点表达式:表示哪些包中的类,类中的方法参与事务--><aop:config><!--声明切入点表达式expression:切入点表达式,表示哪些类和类中的方法要参与事务id:切入点表达式的名称,唯一值expression怎么写?--><aop:pointcut id="servicePointcut" expression="execution(* *..service..*.*(..))"/><!--关联切入点表达式和事务通知--><aop:advisor advice-ref="serviceAdvice" pointcut-ref="servicePointcut"></aop:advisor></aop:config>
</beans>
声明式事务优缺点:
缺点:
- 理解难,配置复杂。
有点:
- 代码和事务配置是分开的,控制事务源代码不用修改
- 能快速的了解和掌控项目的全部事务。适合大型项目
中,声明事务控制
使用aspectj的aop,声明事务控制叫做声明式事务
使用步骤:
-
pom.xml加入spring-aspects的依赖
-
在spring的配置文件声明事务的内容
1)声明事务管理器
2)声明业务方法需要的事务属性
3)声明切入点表达式
声明式事务:
spring配置文件
<?xml version="1.0" encoding="UTF-8"?>
<beans xmlns="http://www.springframework.org/schema/beans"xmlns:xsi="http://www.w3.org/2001/XMLSchema-instance"xmlns:context="http://www.springframework.org/schema/context" xmlns:tx="http://www.springframework.org/schema/tx"xmlns:aop="http://www.springframework.org/schema/aop"xsi:schemaLocation="http://www.springframework.org/schema/beans http://www.springframework.org/schema/beans/spring-beans.xsd http://www.springframework.org/schema/context https://www.springframework.org/schema/context/spring-context.xsd http://www.springframework.org/schema/tx http://www.springframework.org/schema/tx/spring-tx.xsd http://www.springframework.org/schema/aop https://www.springframework.org/schema/aop/spring-aop.xsd"><context:property-placeholder location="classpath:jdbc.properties"></context:property-placeholder><bean id="dataSource" class="com.alibaba.druid.pool.DruidDataSource" init-method="init" destroy-method="close"><property name="url" value="${jdbc.url}"></property><property name="username" value="${jdbc.username}"></property><property name="password" value="${jdbc.passwprd}"></property></bean><bean id="factory" class="org.mybatis.spring.SqlSessionFactoryBean"><property name="dataSource" ref="dataSource"></property><property name="configLocation" value="classpath:mybatis.xml"></property></bean><bean class="org.mybatis.spring.mapper.MapperScannerConfigurer"><property name="sqlSessionFactoryBeanName" value="factory"></property><property name="basePackage" value="com.lu.dao"></property></bean><!--声明service--><bean id="buyService" class="com.lu.service.impl.BuyGppdsServoceImpl"><property name="goodsDao" ref="goodsDao"></property><property name="saleDao" ref="saleDao"></property></bean><!--声明式事务:不用写代码--><!--1.声明事务管理器--><bean id="transactionManager" class="org.springframework.jdbc.datasource.DataSourceTransactionManager"><property name="dataSource" ref="dataSource"></property></bean><!--2.声明业务方法的事务属性 (隔离级别,传播行为,超时)id:给业务方法配置事务段代码七个名称,为一只transaction-manager:事务管理器的id--><tx:advice id="serviceAdvice" transaction-manager="transactionManager"><!--给具体的业务方法增加事务的说明--><tx:attributes><!--给具体的业务方法,说明他需要的事务属性name:业务方法的名称。配置name的值:1.业务方法的名称 2.带有部分通配符的方法名称 3.使用*propagation:指定传播行为的值isolation:隔离级别read-only:是否只读,默认是falsetimeout:超时时间rollback-for:指定回滚的异常类列表,使用的异常全限定名称--><tx:method name="buy"propagation="REQUIRED"isolation="DEFAULT"read-only="false"timeout="20"rollback-for="java.lang.NullPointerException,com.lu.exception.NotEnougthException"/></tx:attributes></tx:advice><!--声明切入点表达式:表示哪些包中的类,类中的方法参与事务--><aop:config><!--声明切入点表达式expression:切入点表达式,表示哪些类和类中的方法要参与事务id:切入点表达式的名称,唯一值expression怎么写?--><aop:pointcut id="servicePointcut" expression="execution(* *..service..*.*(..))"/><!--关联切入点表达式和事务通知--><aop:advisor advice-ref="serviceAdvice" pointcut-ref="servicePointcut"></aop:advisor></aop:config>
</beans>
声明式事务优缺点:
缺点:
- 理解难,配置复杂。
有点:
- 代码和事务配置是分开的,控制事务源代码不用修改
- 能快速的了解和掌控项目的全部事务。适合大型项目