
3.无头单向非循环链表实现:
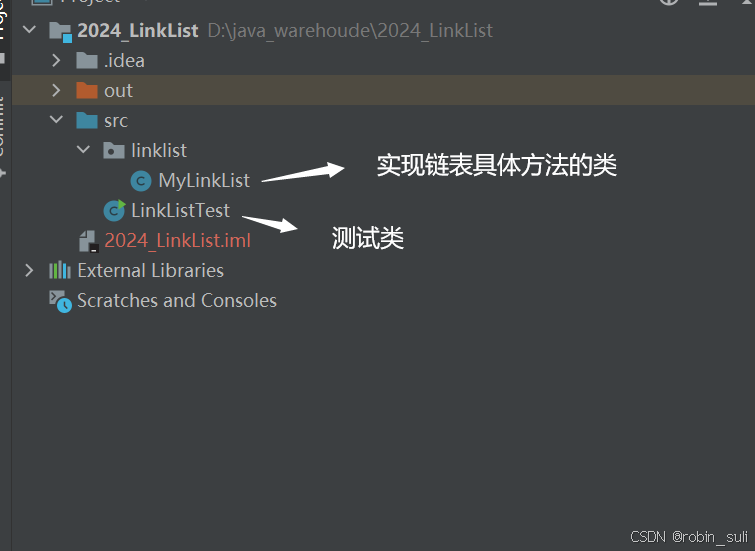
这里可以把方法先写在一个接口中,再通过MyLinkList实现接口,这样写可能更好,代码好复用。
public class MyLinkList {public int data;public MyLinkList.Node next;//静态内部类public static class Node {public int data;//0public Node next;//引用类型默认值为NULLpublic Node(int data) {this.data = data;}}
}public void addFirst(int data) {//第一次插入节点(链表为空)if (this.head == null) {Node node = new Node(data);//链表头为空时(head == null),整了链表的头引用为 nodethis.head = node;return;}//链表不为空,单链表插入要先绑后面Node node = new Node(data);node.next = this.head;head = node;//把node的引用给head,然head变成新的头}(2)尾插法:
public void addList(int data) {//第一次插入时if (this.head == null) {Node node = new Node(data);head = node;return;}Node node = new Node(data);Node cur = this.head;//cur从头开始/*这里注意cur不可以先走到空,如果cur走到null,那么cur的next就是cull*/while (cur.next != null) {cur = cur.next;}//出来时cur==null,就尾插cur.next = node;}(3)打印单链表:这里我们可以写一个,重载方法display2,可以让链表从返回的某个节点开始打印;
//打印单链表public void display2(Node nodeH) {Node cur = this.head;//cur从头开始cur = nodeH;while (cur != null) {System.out.print(cur.data + " ");cur = cur.next;}System.out.println();}public void display() {Node cur = this.head;//cur从头开始while (cur != null) {System.out.print(cur.data + " ");cur = cur.next;}System.out.println();}
(4)查找链表中是否包含某一数据节点:
//查找是否包含关键字Key,是否在链表中public boolean contains(int key) {Node cur = this.head;while (cur != null) {if (cur.data == key) {return true;}cur = cur.next;}return false;}public void clear() {Node cur = head;while (cur != null) {//注意定义一个,变量记住置为空的,后驱节点Node curN = cur.next;cur.next =null;//引用类型必须制空cur = curN;}//最后把头节点手动置为nullhead = null;}(6).返回链表的长度:
public int size() {Node cur = this.head;int count = 0;//count不能为1,如果是空链表,count=1返回就,寄了while (cur != null) {cur = cur.next;count++;}return count;}(7)任意位置插入:这里我画了个图来理解:

//任意位置插入(第一个数据节点为0号下标)public void addIndex(int index, int data) {//相当于头插if (index == 0) {addFirst(data);return;}//相当于尾插if (index == this.size()) {addList(data);return;}//正常插入方法:/*** 1. 先找到index前一个节点的地址->定义一个cur走index-1步* 2.画图插入*///先找到index前一个节点的地址Node cur = searchIndex(index);//插入Node node = new Node(data);/*** 这里注意,先绑后面(node = cur.next;),因为单链表前一个节点负责,单独的维护后一个节点,前一个节点的引用被覆盖(cur节点)* 那么原本和cur节点连接的节点就找不到了*/node.next = cur.next;cur.next = node;}//找到index前一个节点的地址的方法private Node searchIndex(int index) {//index下标位置检验if (index < 0 || index > this.size()) {throw new RuntimeException("下标位置不合法");}Node cur = this.head;while (index-1 != 0/*走index-1步*/) {cur = cur.next;index--;}return cur;//返回走index-1步后的,cur类型地址} //找key节点的前驱private Node searchPrev(int key) {Node prev = this.head;while(prev.next != null) {if (prev.next.data == key) {return prev;}else {prev = prev.next;//继续往后走}}return null;}//删除第一次出现关键字为key的节点public void remove(int key) {/** 1. 找到,要删除节点del的前驱* 2. 找到要删除的节点del* 3. 删除节点*///空节点直接返回if (this.head == null) {return;}//头节点直接删除if (this.head.data == key) {head = head.next;return;//这里注意别忘记了}//1. 找到,要删除节点del的前驱Node prev = searchPrev(key);if (prev == null) {throw new RuntimeException("没有你要删除的节点,请考量要删除的节点");}//2. 找到要删除的节点delNode del = prev.next;//3. 删除节点prev.next = del.next;}(9)只遍历一遍链表,删除所有指定的节点:这里我画了一个图可以帮助理解:定义一个一直往后走的快指针,和一个,不需要时往后走,判断是否要删除的慢指针

//遍历单链表一遍,删除所有值为key的节点public void removeAllKey(int key) {/** 1.定义一个快指针 cur : cur指针一直往后走;* 2.定义一个慢指针 prev: prev指针,只有cur遇到要删除的数据时,prev指针才往后走,不然保持不动* 3.注意最后不要漏了,head头节点*/// 1.定义一个 cur指针 : cur指针一直往后走// 2.定义一个 prev指针: prev指针,只有cur遇到要删除的数据时,prev指针才往后走,不然保持不动Node cur = this.head.next;//Node prev = this.head;while (cur != null) {if (cur.data == key) {//cur.data == key,时只有cur指针都在走,因为要遍历删除数据prev.next = cur.next;cur = cur.next;}else {//cur.data != key,两个指针都在动,prev指针,指向cur指针prev = cur;cur = cur.next;}}// 3.注意最后不要漏了,head头节点if (this.head.data == key) {this.head = this.head.next;}}反转一个链表
class Solution {public ListNode reverseList(ListNode head) {ListNode cur = head;if(head == null) {return null;}head = null;while(cur != null) {ListNode curN = cur.next;cur.next = head;head = cur;cur = curN;}return head;}
}
2.给定一个带有头结点 head 的非空单链表,返回链表的中间结点。如果有两个中间结点,则返回第二个中间结点:
理解视频:找到链表中间节点-CSDN直播
找到链表中间节点
class Solution {public ListNode middleNode(ListNode head) {if(head == null) {return null;}ListNode fast = head;//快指针一次走2步ListNode slow = head;//慢指针一次走一步
//条件不可以交换:(fast != null && slow.next != null),fast可能开始就为nullwhile (fast != null && fast.next != null) {fast = fast.next.next;slow = slow.next;}return slow;}
}
3.将两个有序链表合并为一个新的有序链表并返回。新链表是通过拼接给定的两个链表的所有节点组成的:
理解视频:合并两个有序链表-CSDN直播
合并两个有序链表
class Solution {public ListNode mergeTwoLists(ListNode list1, ListNode list2) {ListNode headH = new ListNode(-1);ListNode tmp = headH;//tmp用来遍历两个链表while(list1 != null && list2 != null) {//哪个节点数据小,就接在tmp后面if(list1.val < list2.val) {tmp.next = list1;list1 = list1.next;tmp = tmp.next;}else {tmp.next = list2;list2 = list2.next;tmp = tmp.next;}}//当其中一个链表遍历完,就直接接上另一个链表的后半部分if(list1 != null) {tmp.next = list1;}if(list2 != null) {tmp.next = list2;}return headH.next;}
}
4.链表的回文结构:
这里有两个点要注意:1.从后往前用slow走,因为偶数节点,fast指针会走到null,无法往前走。
2.回文时偶数情况下,A的下一个节点是slow节点,并且两个节点的val相等。这个时候就要直接返回ture
理解视频:链表的回文结构-CSDN直播
链表的回文结构
public class PalindromeList {public boolean chkPalindrome(ListNode A) {// write code hereif (A == null) {return true;}// write code hereListNode fast = A;ListNode slow = A;//1.找到中间节点while (fast != null && fast.next != null) {fast = fast.next.next;slow = slow.next;}//2.翻转链表ListNode cur = slow.next;while (cur != null) {ListNode curN = cur.next;cur.next = slow;slow = cur;cur = curN;}//3.判断回文//让A往后走,slow往前走直到;A.val==slow.val//注意:回文时会有偶数情况下,A的下一个节点是slow节点,并且两个节点的val相等。这个时候就要直接返回turewhile (A != slow) {if (A.val != slow.val) {return false;}//到这里A.val == slow.val//A.val == slow.val前提下,偶数情况下,A的下一个节点是slow节点,并且两个节点的val相等。这个时候就要直接返回tureif (A.next == slow) {return true;}A = A.next;slow = slow.next;}return true;}
}
5.编写代码,以给定值x为基准将链表分割成两部分,所有小于x的结点排在大于或等于x的结点之前:
注意:这里我的方法是,改完后,链表数据从小到大的,而做题在牛客网是,要求反过来(但是方法都一样)
理解视频:链表分割-CSDN直播
链表分割
//链表的分割public Node partition(Node pHead, int x) {Node as = null;Node ae = null;Node bs = null;Node be = null;Node cur = pHead;while (cur != null) {if (cur.data > x) {//第一次插入if (as == null) {as = ae = cur;}else {//第N次插入ae.next = cur;ae = ae.next;}} else {//第一次插入if (bs == null) {bs = be = cur;}else{//第N次插入be.next = cur;be = be.next;}}cur = cur.next;}//当一个链表为空时,返回if(as == null) {return bs;}//如果到这里as!= null//连接两部分ae.next = bs;//注意,第二部分结尾不为空时,要手动把第二部分最后一个节点,手动制空if(bs != null) {be.next = null;}//最后返回asreturn bs;}
6.给定一个链表,返回链表开始入环的第一个节点。 如果链表无环返回空 :
方法是:第一次相遇点,到入口点的距离,等于起始点到入口点的距离
这里我画了这个图的推到:

public class Solution {public ListNode detectCycle(ListNode head) {ListNode fast = head;ListNode slow = head;//  方法:第一次相遇点,到入口点的距离,等于起始点到入口点的距离while(fast != null && fast.next != null) {fast = fast.next.next;slow = slow.next;if(fast == slow) {break;}}/**1.走到这里,要么不满足{(fast != null && fast.next != null)}就是没有环;2. 要么就是有环*///没有环if(fast == null || fast.next == null) {return null;}/**有环:让slow以和fast以相同的速度,从起始点到入口点,fast从第一次相遇的成环点走到入口点*/slow = head;//把slow返回起始点while(slow != fast) {slow = slow.next;fast = fast.next;}return slow;}
}
7.输入两个链表,找出它们的第一个公共结点:
方法:先找到哪个链表长,再让长的链表先走,他们的差值步,最后两个链表一起走,直到他们第一次相遇。
public class Solution {public ListNode FindFirstCommonNode(ListNode pHead1, ListNode pHead2) {//1.先分别求出两个链表的长度ListNode pl = pHead1;ListNode ps = pHead2;int lenA = 0;int lenB = 0;while (pl != null) {lenA++;pl = pl.next;}while (ps != null) {lenB++;ps = ps.next;}//注意pl和ps,指向了null,要赋值回来pl = pHead1;ps = pHead2;//2.求差值int len = lenA - lenB;if (len < 0) {pl = pHead2;ps = pHead1;len = lenB - lenA;//len变为为正数}//现在知道pl指向长的链表,ps指向短的链表//3.操作两个链表pl和ps,长的链表(pl)先走链表的差值,然后再一起走直到相交while (len != 0) {pl = pl.next;len--;}//两个链表分别都走,直到他们相遇while (pl != ps) {pl = pl.next;ps = ps.next;}if (pl == null) {//pl,ps为空,也不可能相交return null;}return pl;}
}
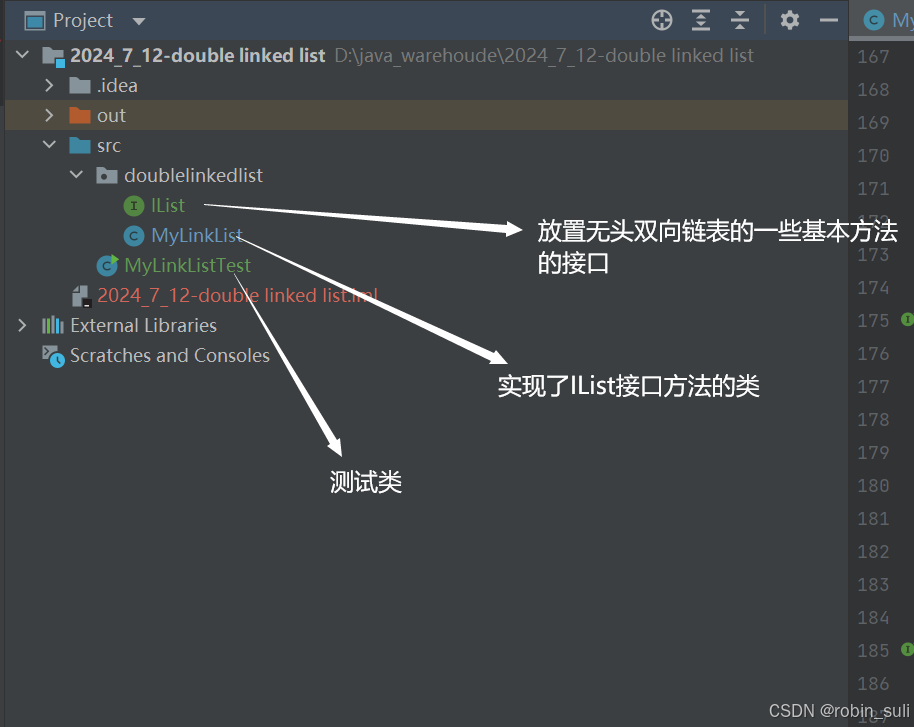
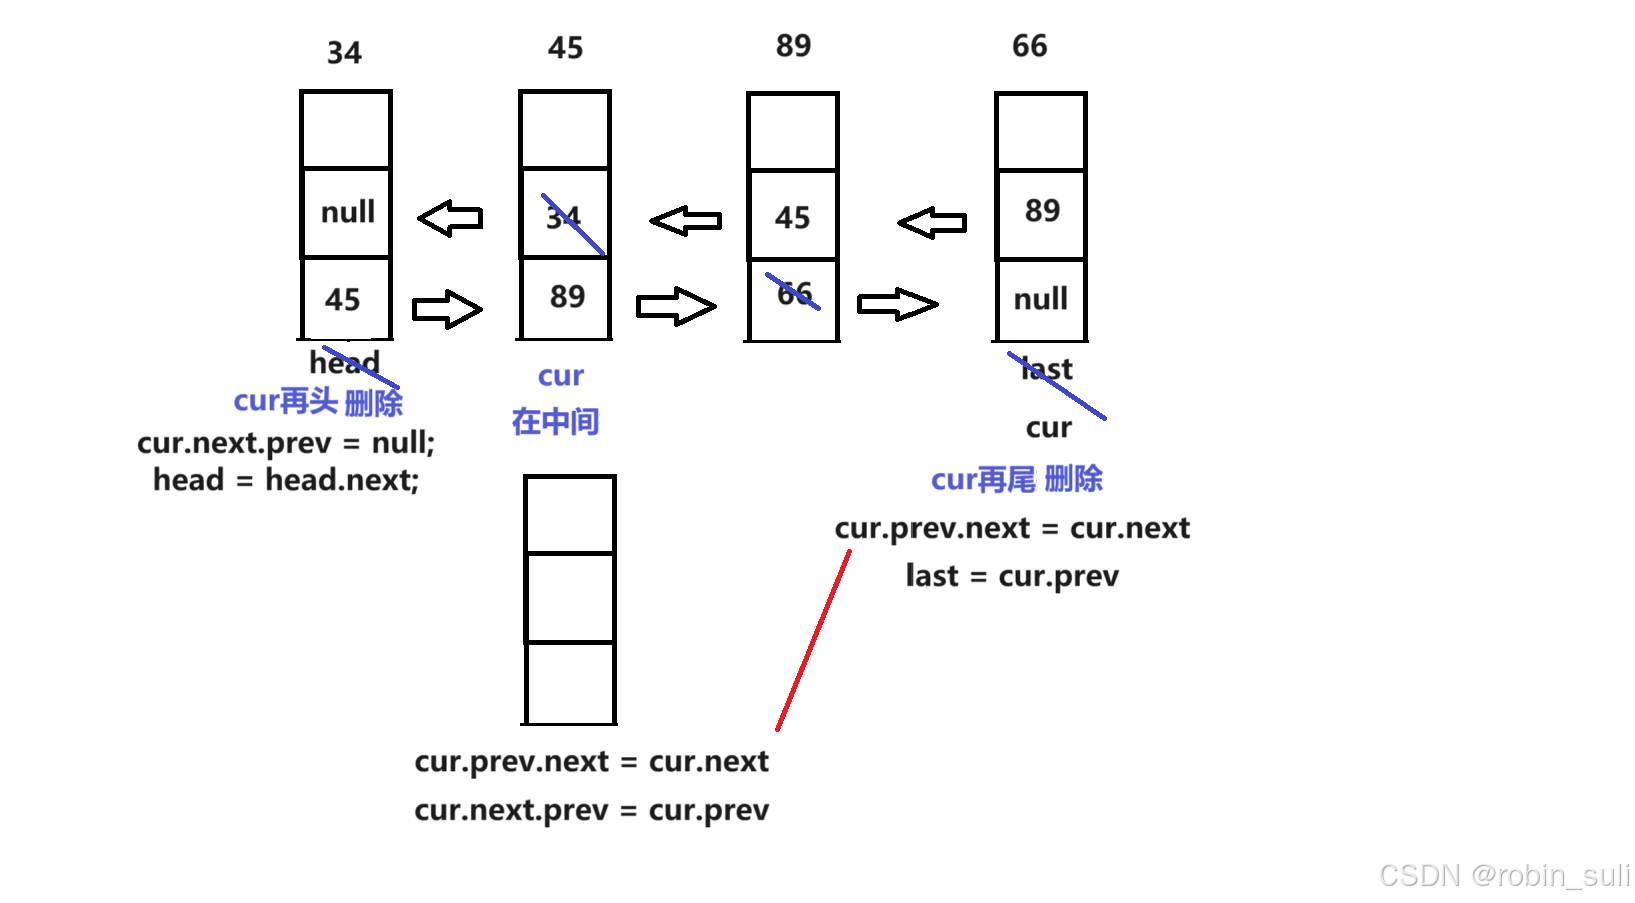
public class MyLinkList implements  IList{static class ListNode{public int val;public ListNode prev;public ListNode next;public ListNode(int val) {this.val = val;}}public ListNode head;//头节点public ListNode last;//尾节点@Overridepublic void addFirst(int data) {ListNode node = new ListNode(data);if (head == null) {head = last = node;}else {//所有的插入优先绑定后面node.next = head;head.prev = node;head = node;}}@Overridepublic void addLast(int data) {ListNode node = new ListNode(data);if (head == null) {head = last = node;}else {last.next = node;node.prev = last;last = last.next;}}@Overridepublic void addIndex(int index, int data) {int len = size();if (index > len || index < 0) {return;}if (index == len) {addLast(data);}if (index == 0) {addFirst(data);}ListNode cur = findIndex(index);ListNode node = new ListNode(data);node.next = cur;cur.prev.next = node;node.prev = cur.prev;cur.prev = node;}private ListNode findIndex(int index) {ListNode cur = head;while (index != 0) {cur = cur.next;index--;}return cur;}@Overridepublic boolean contains(int key) {ListNode cur = head;while (cur != null) {if (cur.val == key) {return true;}cur = cur.next;}return false;}@Overridepublic void remove(int key) {ListNode cur = head;while (cur != null) {if (cur.val == key) {if (cur == head) {//当只有一个节点要删除时if (head == null) {cur.next.prev = null;}head = head.next;//删除就走人return;}else {cur.prev.next = cur.next;//优化后,删除中间和尾巴的代码if (cur == last) {last = cur.prev;}else {cur.next.prev = cur.prev;}//删除就走人return;}}cur = cur.next;}}@Overridepublic void removeAllKey(int key) {ListNode cur = head;while (cur != null) {if (cur.val == key) {if (cur == head) {//当只有一个节点要删除时,cur.next.prev = null会为空,所以加上if判断if (head == null) {cur.next.prev = null;}head = head.next;//删除不能走人,接着删除后面。}else {cur.prev.next = cur.next;//优化后,删除中间和尾巴的代码if (cur == last) {last = cur.prev;}else {cur.next.prev = cur.prev;}//删除不能走人,接着删除后面。}}cur = cur.next;}}@Overridepublic int size() {ListNode cur = head;int len = 0;while (cur != null) {len++;cur = cur.next;}return len;}@Overridepublic void display() {ListNode cur = head;while (cur != null) {System.out.print(cur.val + " ");cur = cur.next;}System.out.println();}@Overridepublic void clear() {ListNode cur = head;while (cur != null) {ListNode curN = cur.next;cur.next = null;cur.prev = null;cur = curN;}//注意head和last节点在链表中还被引用着head = last = null;}
}
总结:
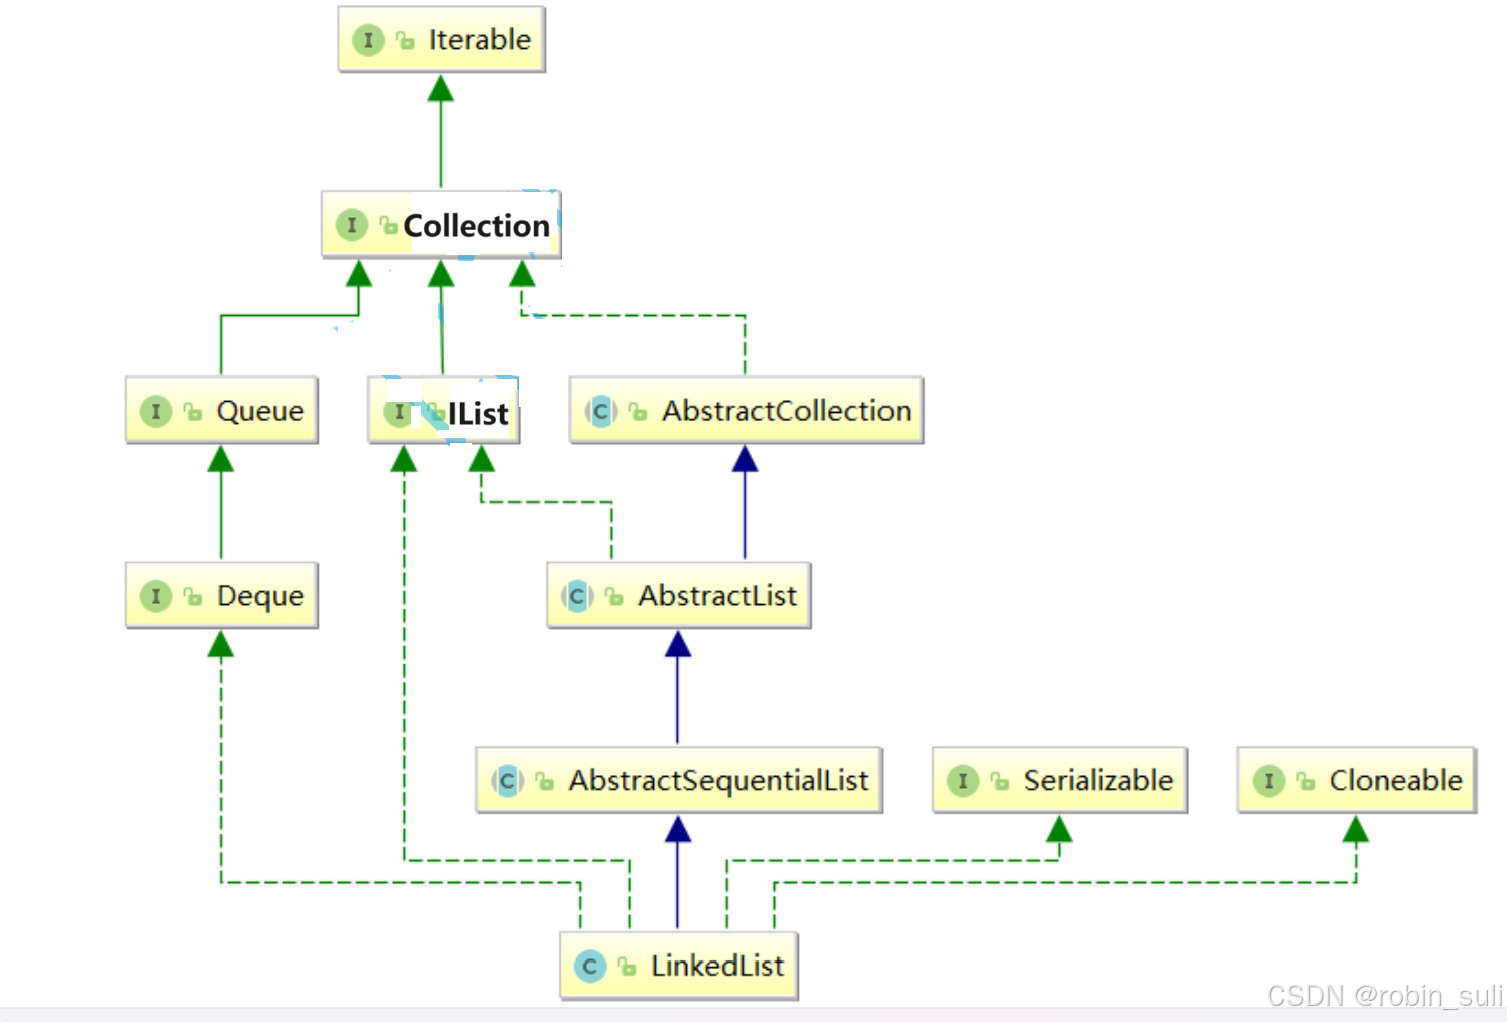
2. LinkedList的底层使用了双向链表
3. LinkedList没有实现RandomAccess接口,因此LinkedList不支持随机访问
5. LinkedList比较适合任意位置插入的场景

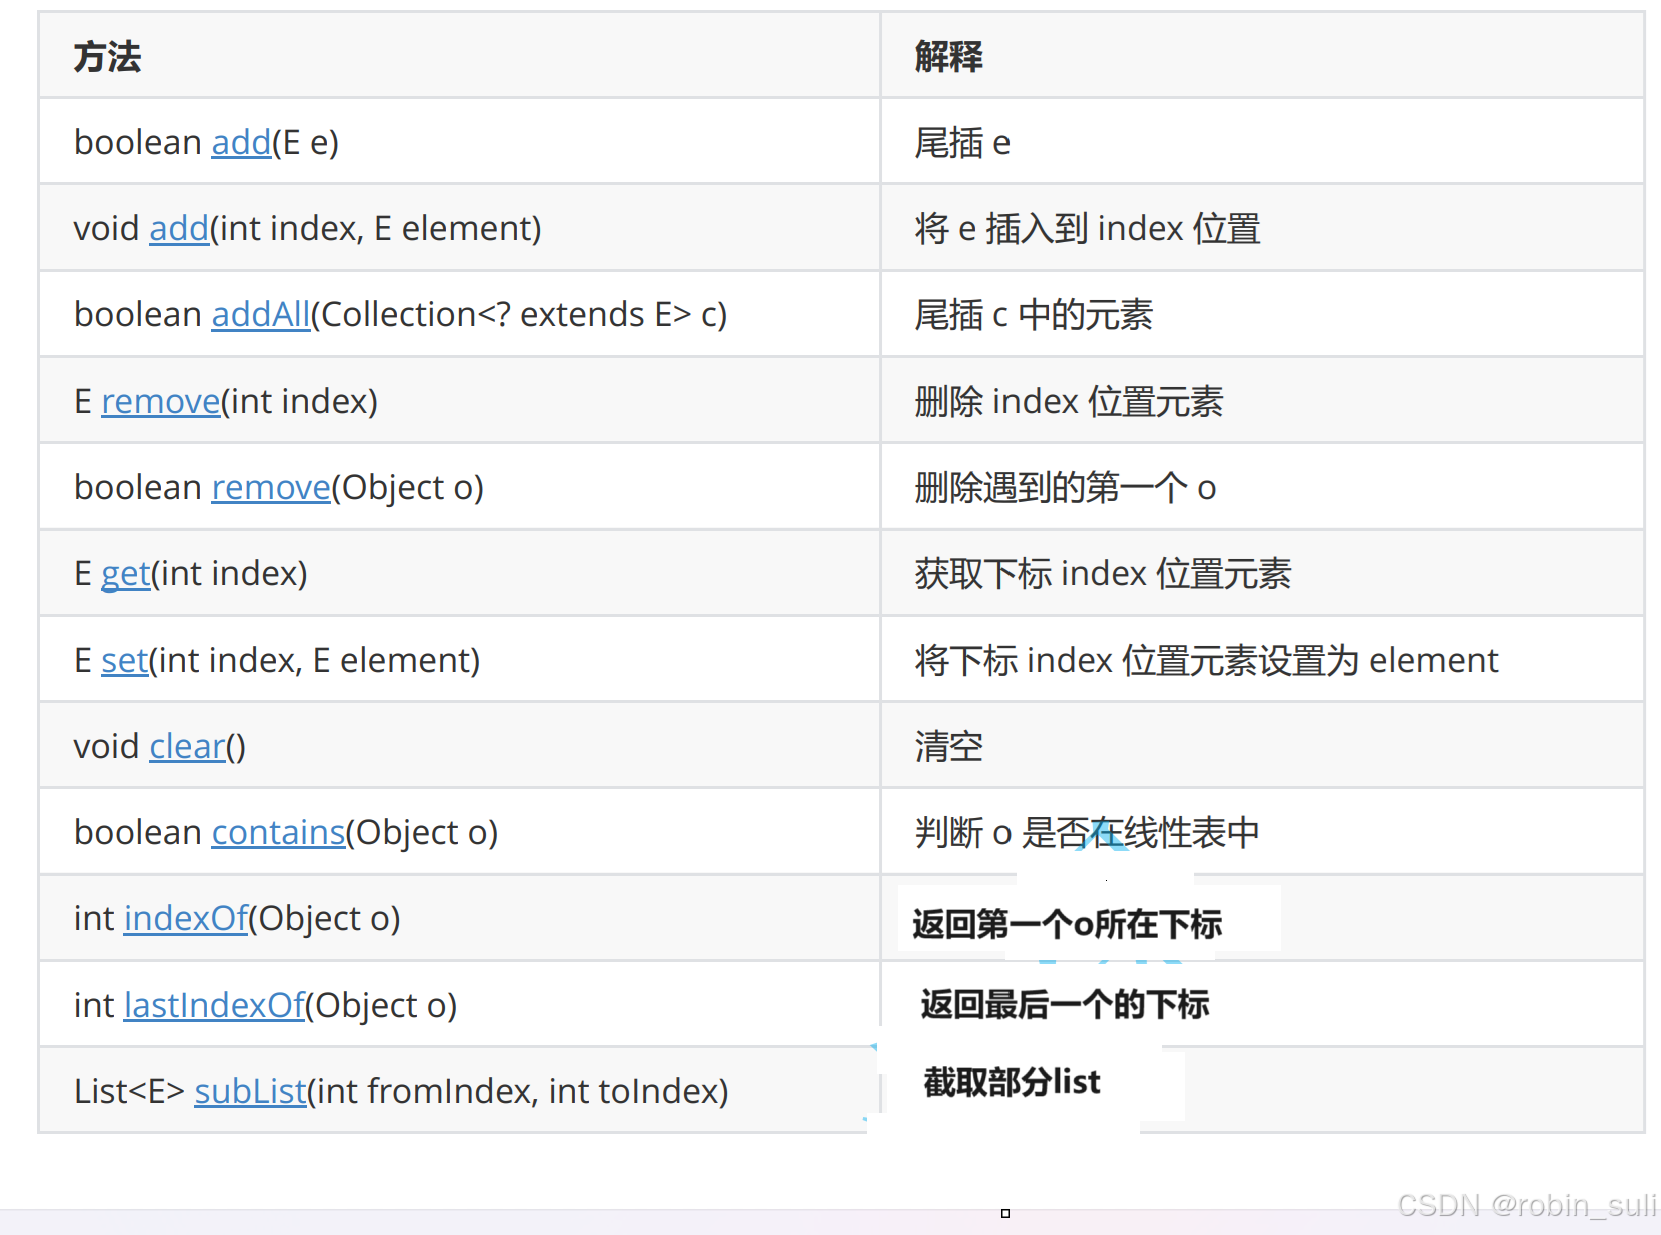
public class Test {public static void main(String[] args) {List<Integer> list = new LinkedList<>();list.add(1);list.add(2);list.add(3);list.add(4);System.out.println(list);ArrayList<Integer> list1 = new ArrayList<>();list1.add(11);list1.add(12);list1.add(13);System.out.println("==============");list.addAll(list1);System.out.println(list);}
}
输出:

5.LinkedList的遍历:ListIterator是Iterator的一个子类,可以专门用来打印链表
代码如下:
public class Test {public static void main(String[] args) {List<Integer> list = new LinkedList<>();list.add(1);list.add(2);list.add(3);list.add(4);System.out.println(list);ArrayList<Integer> list1 = new ArrayList<>();list1.add(11);list1.add(12);list1.add(13);System.out.println("foreach遍历");for (Integer x:list) {System.out.print(x + " ");}System.out.println();System.out.println("迭代器遍历历");Iterator<Integer> it = list.iterator();while (it.hasNext()) {System.out.print(it.next() + " ");}/*** ListIterator是Iterator的一个子类,可以专门用来打印链表*/System.out.println();System.out.println("使用迭代器遍历---正向遍历");ListIterator<Integer> it1 = list.listIterator();while (it1.hasNext()) {System.out.print(it1.next() + " ");}System.out.println();System.out.println("使用反向迭代器---反向遍历");ListIterator<Integer> it2 = list.listIterator(/*这里要传链表的长度*/ list.size());while (it2.hasPrevious()) {System.out.print(it2.previous() + " ");}}
}
六.ArrayList和LinkedList的区别:



![BUUCTF逆向wp [HDCTF2019]Maze](https://i-blog.csdnimg.cn/direct/0f892030a49c446ca68837854ac2983a.jpeg)


