【SpringCloud】Consul-服务注册中心及配置中心快速入门
文章目录
- 【SpringCloud】Consul-服务注册中心及配置中心快速入门
- 1. 下载安装及启动
- 2. 服务注册
- 2.1 引入依赖
- 2.2 yml配置
- 2.3 启动类配置
- 2.4 测试
- 3. 服务配置
- 3.1 引入依赖
- 3.2 yml配置
- 3.3 创建配置文件
- 3.4 动态刷新配置
- 3.5 测试
1. 下载安装及启动
Consul下载地址:下载地址
Spring Cloud Consul 文档地址:文档地址
下载完毕,以开发模式启动Consul:
consul agent -dev
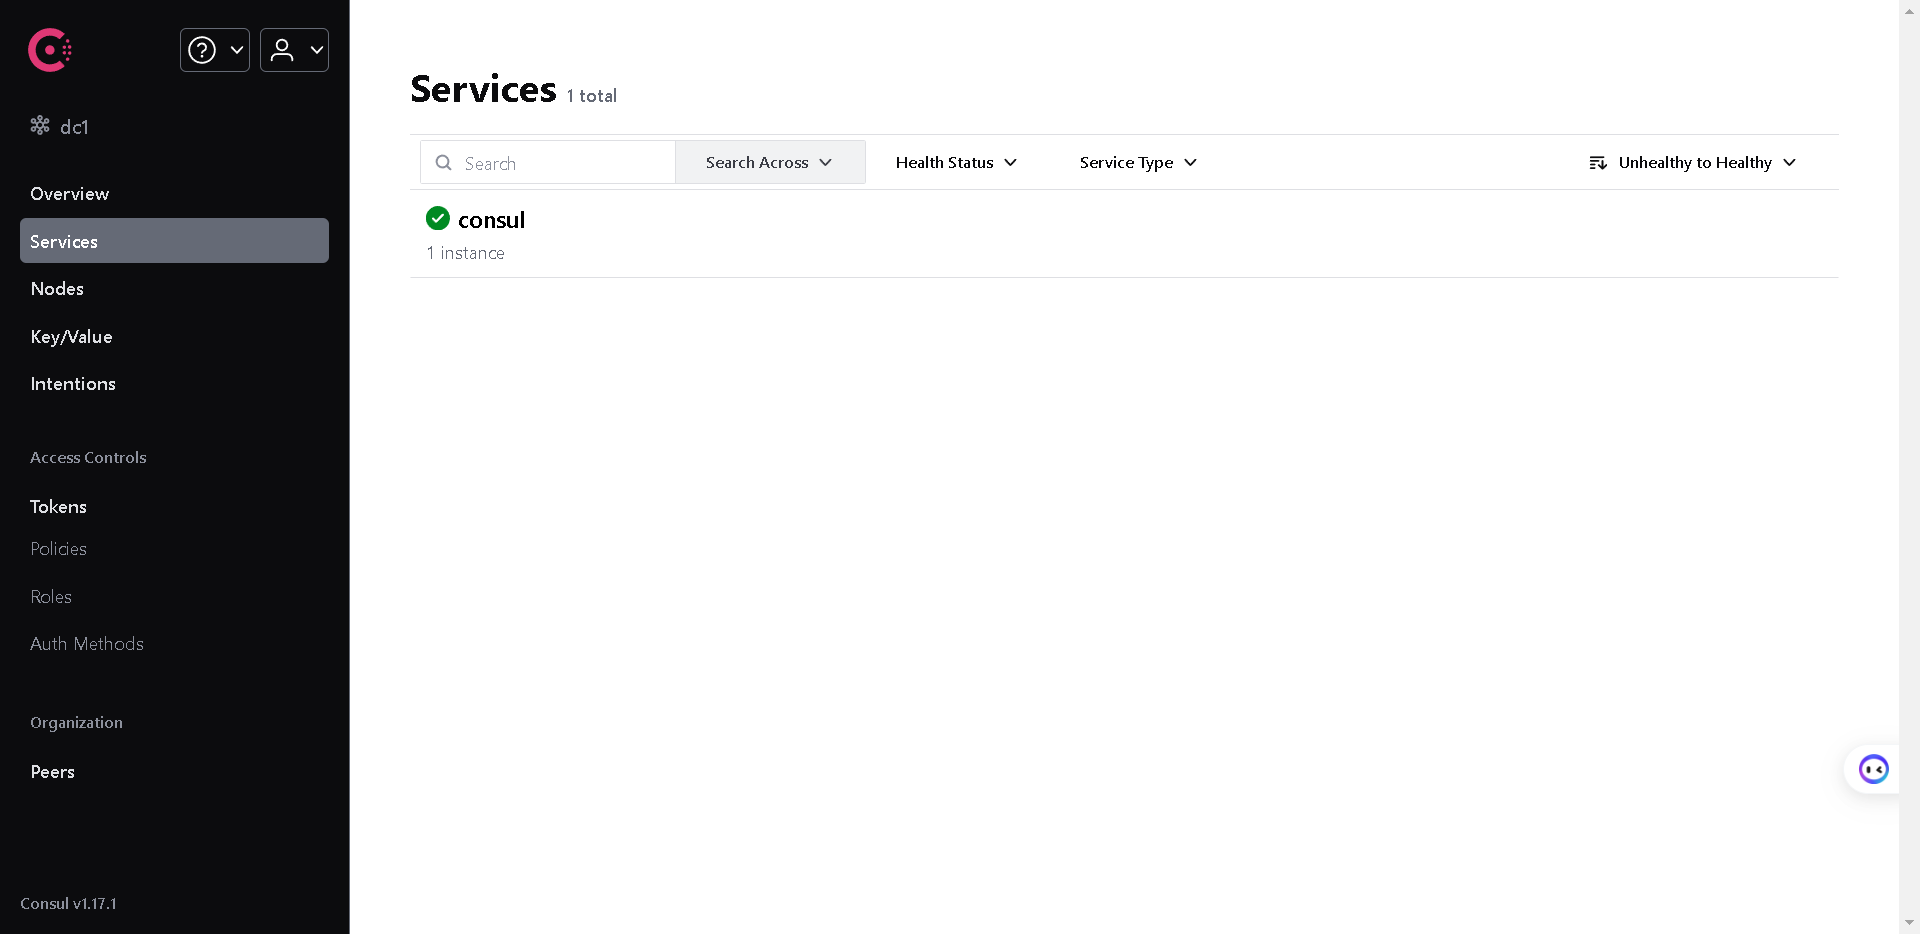
启动成功,进入可视化界面:http://localhost:8500:
2. 服务注册
2.1 引入依赖
<dependency><groupId>org.springframework.cloud</groupId><artifactId>spring-cloud-starter-consul-discovery</artifactId>
</dependency>
2.2 yml配置
spring:application:name: cloud-payment-servicecloud:consul:host: localhostport: 8500discovery:service-name: ${spring.application.name}
2.3 启动类配置
在启动类上添加 @EnableDiscoveryClient 注解开启服务发现:
@SpringBootApplication
@EnableDiscoveryClient
public class Main8001 {public static void main(String[] args) {SpringApplication.run(Main8001.class, args);}
}
2.4 测试
启动SpringBoot服务,检查服务是否注册成功。
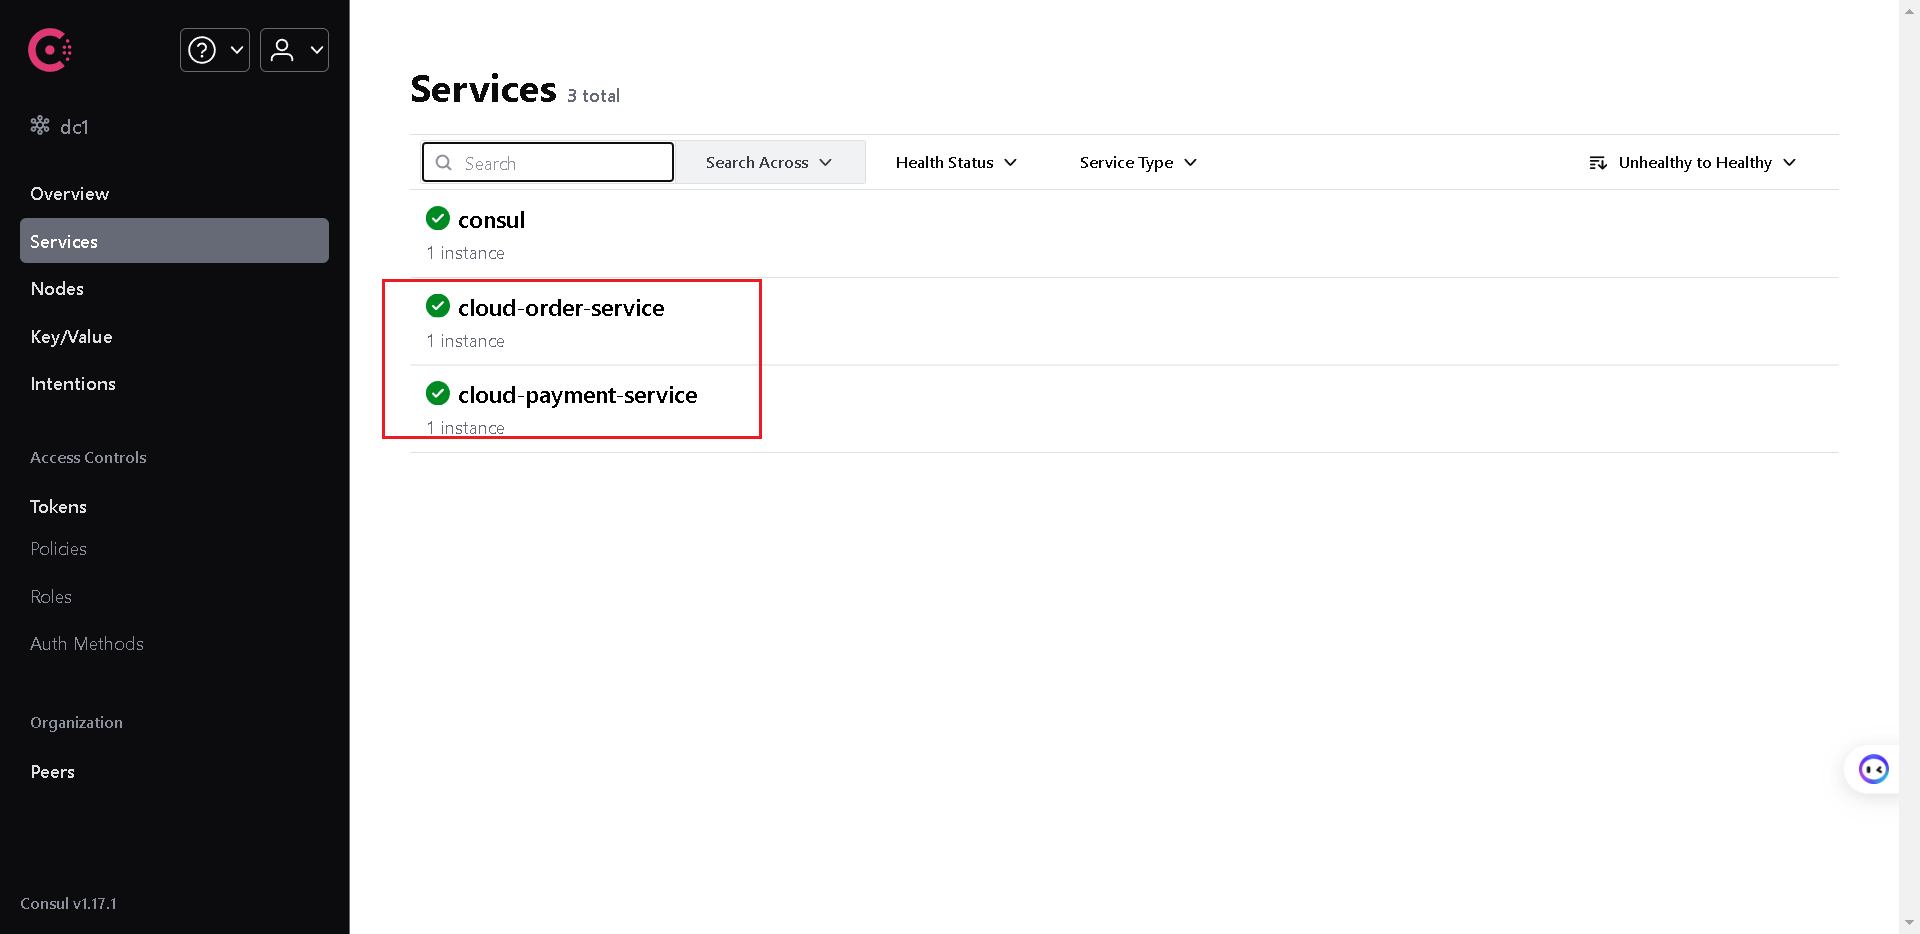
修改接口,测试接口调用是否成功:
@RestController
public class OrderController {//public static final String PaymentSrv_URL = "http://localhost:8001";//先写死,硬编码public static final String PaymentSrv_URL = "http://cloud-payment-service";//改成服务名@Autowiredprivate RestTemplate restTemplate;@GetMapping("/consumer/pay/get/{id}")public ResultData getPayInfo(@PathVariable("id") Integer id) {return restTemplate.getForObject(PaymentSrv_URL + "/pay/get/" + id, ResultData.class);}
}
在测试之前,别忘了将 RestTemplate 添加一个 @LoadBalanced 负载均衡注解,因为该服务可能有多个,所以要使用负载均衡策略:
@Configuration
public class RestTemplateConfig {@Bean@LoadBalancedpublic RestTemplate restTemplate() {return new RestTemplate();}
}
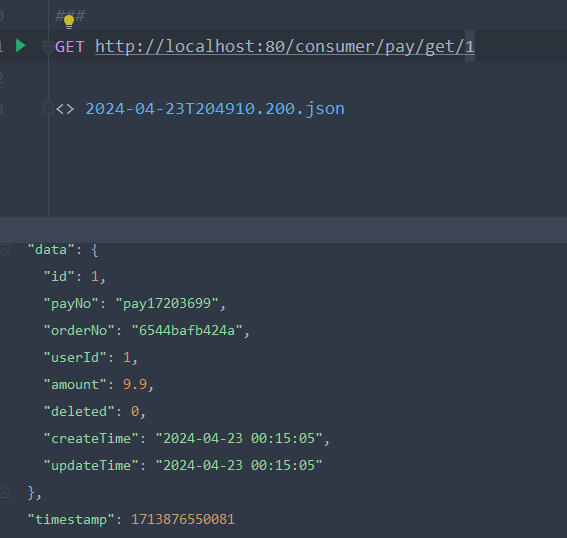
测试该接口,发现测试成功:
3. 服务配置
3.1 引入依赖
<!--SpringCloud consul config-->
<dependency><groupId>org.springframework.cloud</groupId><artifactId>spring-cloud-starter-consul-config</artifactId>
</dependency>
<dependency><groupId>org.springframework.cloud</groupId><artifactId>spring-cloud-starter-bootstrap</artifactId>
</dependency>
3.2 yml配置
原配置文件 application.yml 的内容:
server:port: 8001# ==========applicationName + druid-mysql8 driver===================
spring:application:name: cloud-payment-servicedatasource:type: com.alibaba.druid.pool.DruidDataSourcedriver-class-name: com.mysql.cj.jdbc.Driverurl: jdbc:mysql://localhost:3306/db2024?characterEncoding=utf8&useSSL=false&serverTimezone=GMT%2B8&rewriteBatchedStatements=true&allowPublicKeyRetrieval=trueusername: rootpassword: 123456cloud:consul:host: localhostport: 8500discovery:service-name: ${spring.application.name}# ========================mybatis===================
mybatis:mapper-locations: classpath:mapper/*.xmltype-aliases-package: com.zhj.cloud.entitiesconfiguration:map-underscore-to-camel-case: true
改造后的配置文件分为两部分:
- application.yml:
- bootstrap.yml
application.yml:
server:port: 8001# ==========applicationName + druid-mysql8 driver===================
spring:datasource:type: com.alibaba.druid.pool.DruidDataSourcedriver-class-name: com.mysql.cj.jdbc.Driverurl: jdbc:mysql://localhost:3306/db2024?characterEncoding=utf8&useSSL=false&serverTimezone=GMT%2B8&rewriteBatchedStatements=true&allowPublicKeyRetrieval=trueusername: rootpassword: 123456profiles:active: dev # 多环境配置加载内容dev/prod,不写就是默认default配置# ========================mybatis===================
mybatis:mapper-locations: classpath:mapper/*.xmltype-aliases-package: com.zhj.cloud.entitiesconfiguration:map-underscore-to-camel-case: true
bootstrap.yml
spring:application:name: cloud-payment-service####Spring Cloud Consul for Service Discoverycloud:consul:host: localhostport: 8500discovery:service-name: ${spring.application.name}config:profile-separator: '-' # default value is ",",we update '-';比如默认是cloud,payment,ervice 修改后为cloud-payment-serviceformat: YAML# config/cloud-payment-service/data
#       /cloud-payment-service-dev/data
#       /cloud-payment-service-prod/data
3.3 创建配置文件
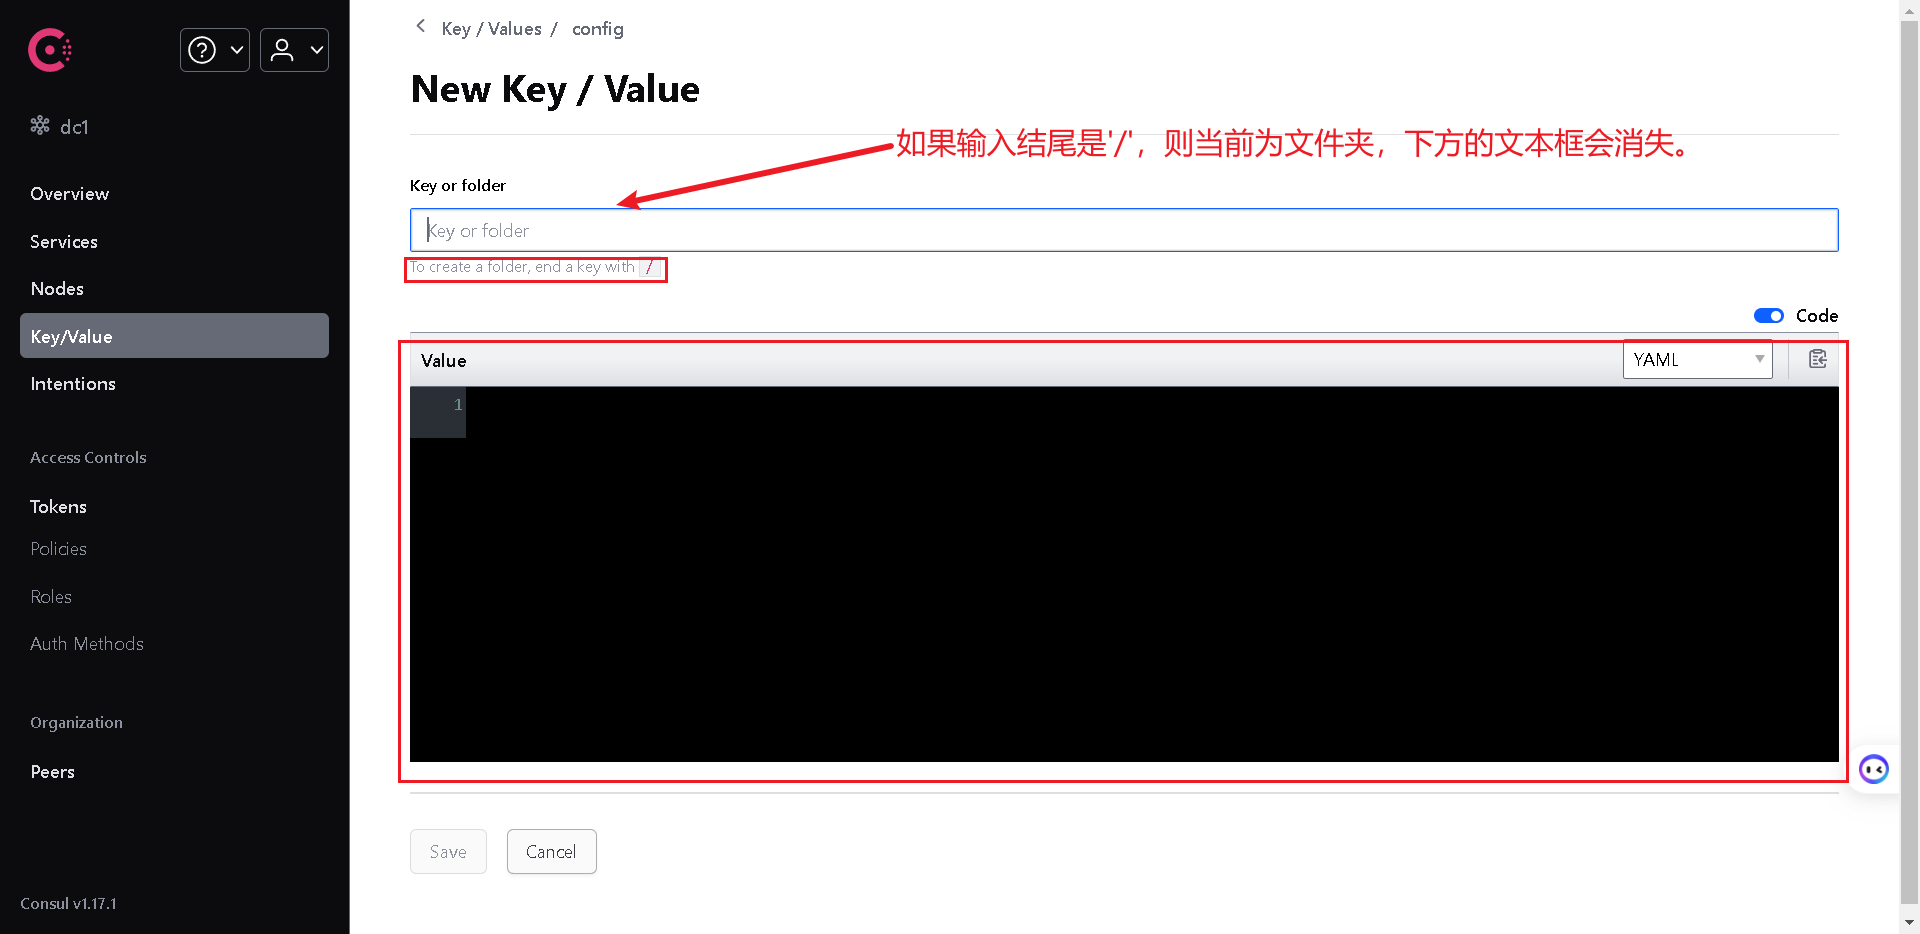
打开 Consul 可视化界面,点击 Create:
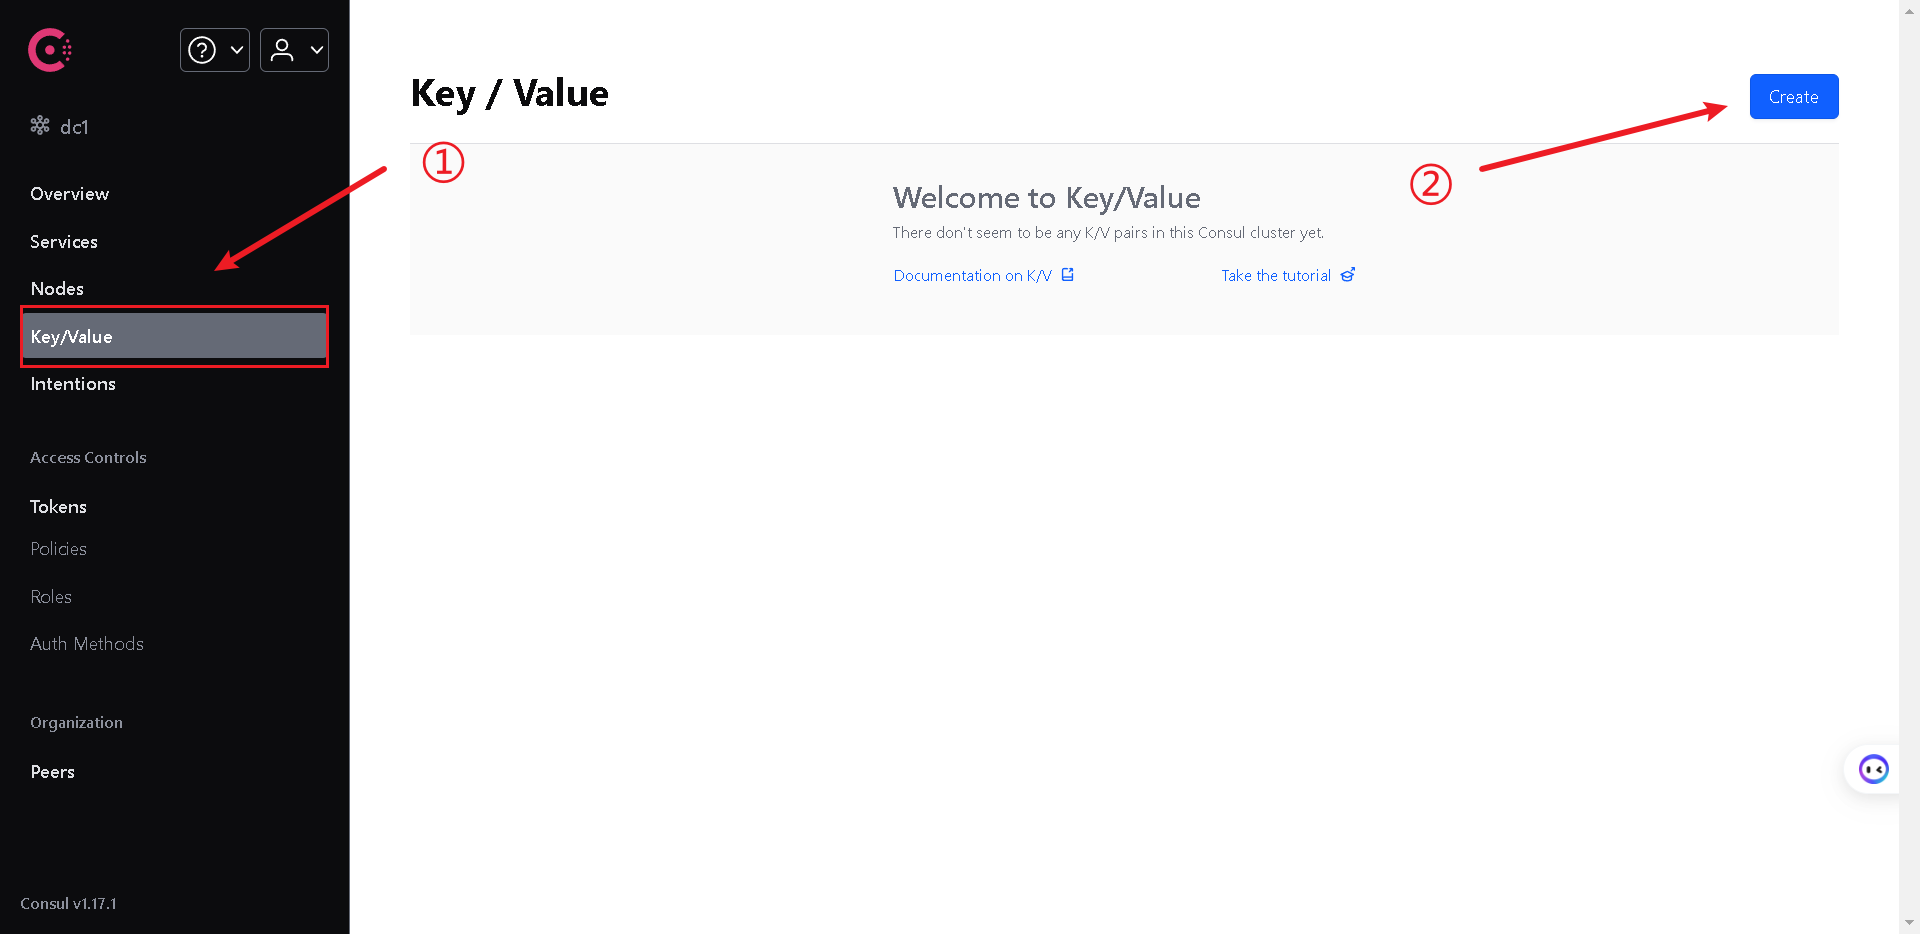
以官网配置为例:

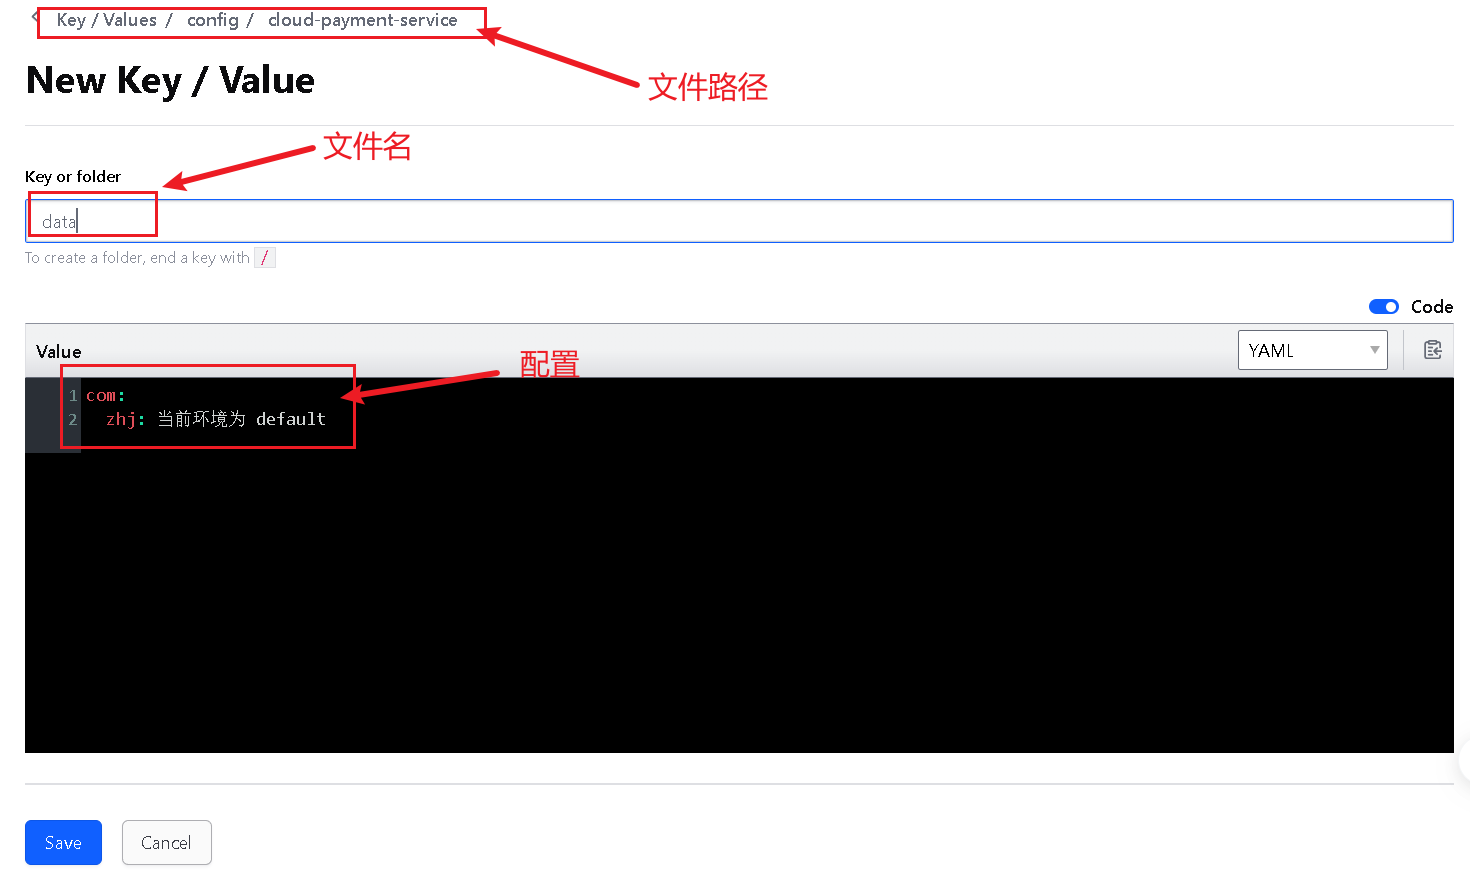
首先要创建一个 Config 文件夹,然后创建各个子文件夹,最后的data文件就是配置文件。
我们创建这三个配置文件:
- config/cloud-payment-service/data:默认环境,default
- config/cloud-payment-service-dev/data:开发环境,dev
- config/cloud-payment-service-prod/data:生产环境,prod
注意:如果输入结尾是’/',则当前为文件夹,下方的文本框会消失。
以 config/cloud-payment-service/data 为例,默认环境的配置如下,其他几个环境操作都相同。
3.4 动态刷新配置
在启动类上添加 @RefreshScope 注解即可开启动态刷新配置的功能,默认每隔55s刷新一次配置。
3.5 测试
在控制器中添加如下代码:
@Value("${server.port}")
private String port;@GetMapping(value = "/pay/get/info")
private String getInfoByConsul(@Value("${com.zhj}") String str) {return "com.zhj: " + str + "\t" + "port: " + port;
}
调用该接口:
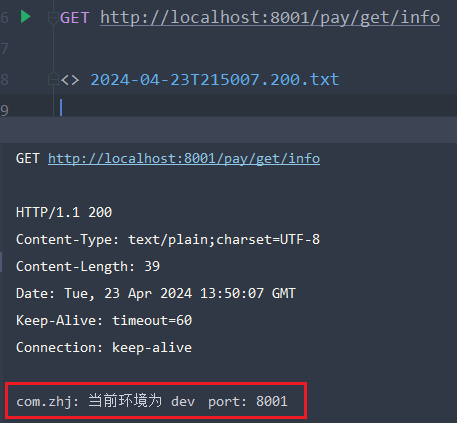
修改配置文件的 spring.profiles.active 的值为 prod ,再次测试:


