文章目录
- 一、前言
- 二、源码解析
- 1、nacos客户端如何监听服务端配置变化的
- 2、@ConfigurationProperties注解的bean是如何自动刷新的
- 3、@RefreshScope 注解的bean是如何自动刷新的
- 三、总结
一、前言
最近好奇 nacos 是怎么做到配置自动刷新的,于是就去debug跟了下源码,版本是 nacos2.2.1
二、源码解析
1、nacos客户端如何监听服务端配置变化的
我改动了一下 nacos 上的配置,发现客户端打印了如下日志:
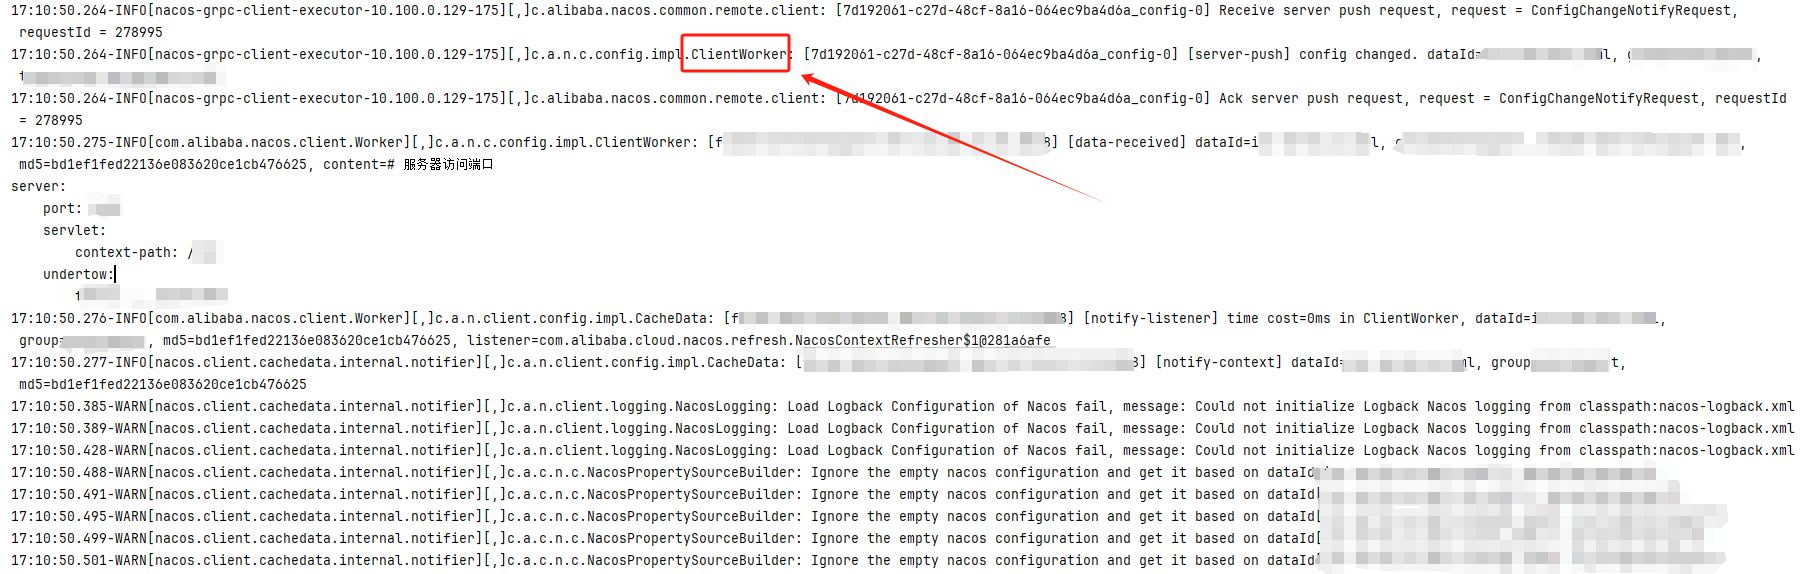
在日志中发现 ClientWorker 这个类,于是开始 debug,首先看 ClientWorker 的构造函数
//ClientWorker
@SuppressWarnings("PMD.ThreadPoolCreationRule")
public ClientWorker(final ConfigFilterChainManager configFilterChainManager, ServerListManager serverListManager,final NacosClientProperties properties) throws NacosException {this.configFilterChainManager = configFilterChainManager;//初始化一些参数init(properties);agent = new ConfigRpcTransportClient(properties, serverListManager);int count = ThreadUtils.getSuitableThreadCount(THREAD_MULTIPLE);ScheduledExecutorService executorService = Executors.newScheduledThreadPool(Math.max(count, MIN_THREAD_NUM),r -> {Thread t = new Thread(r);t.setName("com.alibaba.nacos.client.Worker");t.setDaemon(true);return t;});agent.setExecutor(executorService);agent.start();}
跟进 agent.start()
//ConfigRpcTransportClient
public void start() throws NacosException {securityProxy.login(this.properties);this.executor.scheduleWithFixedDelay(() -> securityProxy.login(properties), 0,this.securityInfoRefreshIntervalMills, TimeUnit.MILLISECONDS);startInternal();
}
继续跟进 startInternal() ,进到子类 ConfigRpcTransportClient (在 ClientWorker 内部 )
//ConfigRpcTransportClient
@Override
public void startInternal() {executor.schedule(() -> {while (!executor.isShutdown() && !executor.isTerminated()) {try {//如果阻塞队列里有内容,就直接过,没有的话,就等待5秒listenExecutebell.poll(5L, TimeUnit.SECONDS);if (executor.isShutdown() || executor.isTerminated()) {continue;}executeConfigListen();} catch (Throwable e) {LOGGER.error("[ rpc listen execute ] [rpc listen] exception", e);}}}, 0L, TimeUnit.MILLISECONDS);}
继续跟进 executeConfigListen() ,这是核心方法
//ClientWorker
@Override
public void executeConfigListen() {//创建listenCachesMap、removeListenCachesMap分别用于存放非销毁的缓存和销毁的cacheMap<String, List<CacheData>> listenCachesMap = new HashMap<>(16);Map<String, List<CacheData>> removeListenCachesMap = new HashMap<>(16);//获取当前时间戳long now = System.currentTimeMillis();//通过当前时间和上次全同步时间间隔是不是大于5分钟来决定这次是不是要全同步,ALL_SYNC_INTERNAL是5分钟boolean needAllSync = now - lastAllSyncTime >= ALL_SYNC_INTERNAL;for (CacheData cache : cacheMap.get().values()) {synchronized (cache) {//check local listeners consistent.//这个SyncWithServer在3个情况下是false,如果是false就意味着不会走里面的continue了,下面的检查都会执行//1.添加listener.默认为false//2.接收配置更改通知,设置为false//3.listener被移除,设置为falseif (cache.isSyncWithServer()) {cache.checkListenerMd5();if (!needAllSync) {//如果不是全部同步,就直接跳过,那么listenCachesMap、removeListenCachesMap都会是空的continue;}}if (!cache.isDiscard()) {//如果cache是非丢弃的,根据taskId分装到listenCachesMap里//get listen  configif (!cache.isUseLocalConfigInfo()) {List<CacheData> cacheDatas = listenCachesMap.get(String.valueOf(cache.getTaskId()));if (cacheDatas == null) {cacheDatas = new LinkedList<>();listenCachesMap.put(String.valueOf(cache.getTaskId()), cacheDatas);}cacheDatas.add(cache);}} else if (cache.isDiscard()) {//如果cache是丢弃的,根据taskId分装到removeListenCachesMap里if (!cache.isUseLocalConfigInfo()) {List<CacheData> cacheDatas = removeListenCachesMap.get(String.valueOf(cache.getTaskId()));if (cacheDatas == null) {cacheDatas = new LinkedList<>();removeListenCachesMap.put(String.valueOf(cache.getTaskId()), cacheDatas);}cacheDatas.add(cache);}}}}//记录是否有变化的keyboolean hasChangedKeys = false;//listenCachesMap不为空,走这里if (!listenCachesMap.isEmpty()) {for (Map.Entry<String, List<CacheData>> entry : listenCachesMap.entrySet()) {String taskId = entry.getKey();//用于记录上次更新的时间Map<String, Long> timestampMap = new HashMap<>(listenCachesMap.size() * 2);List<CacheData> listenCaches = entry.getValue();for (CacheData cacheData : listenCaches) {//循环每个cache,记录上次更新的时间到timestampMap里timestampMap.put(GroupKey.getKeyTenant(cacheData.dataId, cacheData.group, cacheData.tenant),cacheData.getLastModifiedTs().longValue());}//把每个cache的md5值发送到服务端ConfigBatchListenRequest configChangeListenRequest = buildConfigRequest(listenCaches);configChangeListenRequest.setListen(true);try {RpcClient rpcClient = ensureRpcClient(taskId);ConfigChangeBatchListenResponse configChangeBatchListenResponse = (ConfigChangeBatchListenResponse) requestProxy(rpcClient, configChangeListenRequest);if (configChangeBatchListenResponse.isSuccess()) {//从服务端的返回中拿到变化的keySet<String> changeKeys = new HashSet<>();//handle changed keys,notify listenerif (!CollectionUtils.isEmpty(configChangeBatchListenResponse.getChangedConfigs())) {//如果有变化的key,标记hasChangedKeys为truehasChangedKeys = true;for (ConfigChangeBatchListenResponse.ConfigContext changeConfig: configChangeBatchListenResponse.getChangedConfigs()) {String changeKey = GroupKey.getKeyTenant(changeConfig.getDataId(),changeConfig.getGroup(), changeConfig.getTenant());//变化的key记录下changeKeys.add(changeKey);//调用refreshContentAndCheck,走后续流程refreshContentAndCheck(changeKey);}}//handler content configsfor (CacheData cacheData : listenCaches) {String groupKey = GroupKey.getKeyTenant(cacheData.dataId, cacheData.group,cacheData.getTenant());if (!changeKeys.contains(groupKey)) {//找到那些没有变化的key,并且有listener的,看上次更新时间是不是没有变化来设置syncWithServer为true//sync:cache data md5 = server md5 && cache data md5 = all listeners md5.synchronized (cacheData) {if (!cacheData.getListeners().isEmpty()) {Long previousTimesStamp = timestampMap.get(groupKey);if (previousTimesStamp != null && !cacheData.getLastModifiedTs().compareAndSet(previousTimesStamp, System.currentTimeMillis())) {continue;}cacheData.setSyncWithServer(true);}}}cacheData.setInitializing(false);}}} catch (Exception e) {LOGGER.error("Async listen config change error ", e);try {Thread.sleep(50L);} catch (InterruptedException interruptedException) {//ignore}}}}if (!removeListenCachesMap.isEmpty()) {//需要删除的for (Map.Entry<String, List<CacheData>> entry : removeListenCachesMap.entrySet()) {String taskId = entry.getKey();List<CacheData> removeListenCaches = entry.getValue();ConfigBatchListenRequest configChangeListenRequest = buildConfigRequest(removeListenCaches);configChangeListenRequest.setListen(false);try {RpcClient rpcClient = ensureRpcClient(taskId);boolean removeSuccess = unListenConfigChange(rpcClient, configChangeListenRequest);if (removeSuccess) {for (CacheData cacheData : removeListenCaches) {synchronized (cacheData) {if (cacheData.isDiscard()) {ClientWorker.this.removeCache(cacheData.dataId, cacheData.group,cacheData.tenant);}}}}} catch (Exception e) {LOGGER.error("async remove listen config change error ", e);}try {Thread.sleep(50L);} catch (InterruptedException interruptedException) {//ignore}}}if (needAllSync) {lastAllSyncTime = now;}//If has changed keys,notify re sync md5.if (hasChangedKeys) {notifyListenConfig();}
}
正常情况下,executeConfigListen() 这个方法是每隔5秒会进一次,方法可以分为以下几个步骤:
- 创建
listenCachesMap、removeListenCachesMap分别用于存放非销毁的缓存和销毁的cache - 比较当前时间和上次全同步的时间间隔是否大于等于5分钟,如果大于等于5分钟就需要全局同步,否则不需要
- 循环每个
cache,看是否和服务端同步过了,如果没有,就需要添加到listenCachesMap里,走后面的检查,如果已经同步过了,就比较md5和上次的是否一致,如果不一致,就调用cache.checkListenerMd5()方法(具体这个方法干了啥,后面再聊),然后看是否需要全局同步,如果不需要,就跳过,如果需要就按照taskId分组,以及是否销毁来决定放置到listenCachesMap、removeListenCachesMap两个map中(同一个taskId最多3000个cache,这个在放置cacheMap的时候处理的,可以找ParamUtil.getPerTaskConfigSize()代码) - 如果
listenCachesMap有内容,就会循环listenCachesMap,构建ConfigBatchListenRequest,根据taskId获取gRpcClient,将然后发请求给服务端,获取变化的 key,然后调用refreshContentAndCheck(changeKey)方法,下面单独讲 - 同理,循环
removeListenCachesMap,也是构建ConfigBatchListenRequest,给服务端发消息,取消监听,删除缓存 - 最后如果是全局同步,需要更新一下全局同步的时间
- 如果有变化的key会调用
notifyListenConfig()方法,往阻塞队列里放一个元素,这样会立即触发下一次executeConfigListen()方法,在cache.checkListenerMd5()方法里去同步 md5 值,这时候,如果没有变更的 cache,他的syncWithServer被设置成了 true,再次进executeConfigListen()方法时,就会跳过检查
这里需要提一点,在与服务端建立 gRPC 连接时会添加 Handler 处理服务端推送的请求,当服务端的配置发生变化时,会推送消息,我们看下这段代码,在 ClientWorker 类的 initRpcClientHandler 方法
//ClientWorker
private void initRpcClientHandler(final RpcClient rpcClientInner) {/** Register Config Change /Config ReSync Handler*/rpcClientInner.registerServerRequestHandler((request) -> {if (request instanceof ConfigChangeNotifyRequest) {ConfigChangeNotifyRequest configChangeNotifyRequest = (ConfigChangeNotifyRequest) request;LOGGER.info("[{}] [server-push] config changed. dataId={}, group={},tenant={}",rpcClientInner.getName(), configChangeNotifyRequest.getDataId(),configChangeNotifyRequest.getGroup(), configChangeNotifyRequest.getTenant());String groupKey = GroupKey.getKeyTenant(configChangeNotifyRequest.getDataId(),configChangeNotifyRequest.getGroup(), configChangeNotifyRequest.getTenant());CacheData cacheData = cacheMap.get().get(groupKey);if (cacheData != null) {synchronized (cacheData) {cacheData.getLastModifiedTs().set(System.currentTimeMillis());cacheData.setSyncWithServer(false);notifyListenConfig();}}return new ConfigChangeNotifyResponse();}return null;});...省略
}
可以看到,在接受到服务端发送的请求后,会把 cache 的最后更新时间戳更新成当前时间戳,把 syncWithServer 更新成 false ,并且往阻塞队列里添加了一个元素,所以就会立即触发 executeConfigListen 方法执行,并且由于 syncWithServer 变成了 false ,所以会触发检查。
我们再回过头来继续看 refreshContentAndCheck 方法
//ClientWorker
private void refreshContentAndCheck(CacheData cacheData, boolean notify) {try {ConfigResponse response = getServerConfig(cacheData.dataId, cacheData.group, cacheData.tenant, 3000L,notify);cacheData.setEncryptedDataKey(response.getEncryptedDataKey());cacheData.setContent(response.getContent());if (null != response.getConfigType()) {cacheData.setType(response.getConfigType());}if (notify) {LOGGER.info("[{}] [data-received] dataId={}, group={}, tenant={}, md5={}, content={}, type={}",agent.getName(), cacheData.dataId, cacheData.group, cacheData.tenant, cacheData.getMd5(),ContentUtils.truncateContent(response.getContent()), response.getConfigType());}cacheData.checkListenerMd5();} catch (Exception e) {LOGGER.error("refresh content and check md5 fail ,dataId={},group={},tenant={} ", cacheData.dataId,cacheData.group, cacheData.tenant, e);}
}
getServerConfig 方法,内部就是发起请求给服务端,获取最新的配置内容,也就是 response.getContent(),并更新到 CacheData 里,然后调用了 cacheData.checkListenerMd5() 方法,继续看
//CacheData
void checkListenerMd5() {for (ManagerListenerWrap wrap : listeners) {if (!md5.equals(wrap.lastCallMd5)) {safeNotifyListener(dataId, group, content, type, md5, encryptedDataKey, wrap);}}
}
这里用 cache 里的 md5 值和每个 listener 的最后一次 md5 比较,ManagerListenerWrap 是对 Listener 做了一层封装,如果 md5 值不一致,就调用 safeNotifyListener 方法
//CacheData
private void safeNotifyListener(final String dataId, final String group, final String content, final String type,final String md5, final String encryptedDataKey, final ManagerListenerWrap listenerWrap) {final Listener listener = listenerWrap.listener;if (listenerWrap.inNotifying) {LOGGER.warn("[{}] [notify-currentSkip] dataId={}, group={}, md5={}, listener={}, listener is not finish yet,will try next time.",name, dataId, group, md5, listener);return;}Runnable job = () -> {long start = System.currentTimeMillis();ClassLoader myClassLoader = Thread.currentThread().getContextClassLoader();ClassLoader appClassLoader = listener.getClass().getClassLoader();try {if (listener instanceof AbstractSharedListener) {AbstractSharedListener adapter = (AbstractSharedListener) listener;adapter.fillContext(dataId, group);LOGGER.info("[{}] [notify-context] dataId={}, group={}, md5={}", name, dataId, group, md5);}// Before executing the callback, set the thread classloader to the classloader of// the specific webapp to avoid exceptions or misuses when calling the spi interface in// the callback method (this problem occurs only in multi-application deployment).Thread.currentThread().setContextClassLoader(appClassLoader);ConfigResponse cr = new ConfigResponse();cr.setDataId(dataId);cr.setGroup(group);cr.setContent(content);cr.setEncryptedDataKey(encryptedDataKey);configFilterChainManager.doFilter(null, cr);String contentTmp = cr.getContent();listenerWrap.inNotifying = true;listener.receiveConfigInfo(contentTmp);// compare lastContent and contentif (listener instanceof AbstractConfigChangeListener) {Map<String, ConfigChangeItem> data = ConfigChangeHandler.getInstance().parseChangeData(listenerWrap.lastContent, contentTmp, type);ConfigChangeEvent event = new ConfigChangeEvent(data);((AbstractConfigChangeListener) listener).receiveConfigChange(event);listenerWrap.lastContent = contentTmp;}listenerWrap.lastCallMd5 = md5;LOGGER.info("[{}] [notify-ok] dataId={}, group={}, md5={}, listener={} ,cost={} millis.", name, dataId,group, md5, listener, (System.currentTimeMillis() - start));} catch (NacosException ex) {LOGGER.error("[{}] [notify-error] dataId={}, group={}, md5={}, listener={} errCode={} errMsg={}", name,dataId, group, md5, listener, ex.getErrCode(), ex.getErrMsg());} catch (Throwable t) {LOGGER.error("[{}] [notify-error] dataId={}, group={}, md5={}, listener={}", name, dataId, group, md5,listener, t);} finally {listenerWrap.inNotifying = false;Thread.currentThread().setContextClassLoader(myClassLoader);}};final long startNotify = System.currentTimeMillis();try {if (null != listener.getExecutor()) {listener.getExecutor().execute(job);} else {try {INTERNAL_NOTIFIER.submit(job);} catch (RejectedExecutionException rejectedExecutionException) {LOGGER.warn("[{}] [notify-blocked] dataId={}, group={}, md5={}, listener={}, no available internal notifier,will sync notifier ",name, dataId, group, md5, listener);job.run();} catch (Throwable throwable) {LOGGER.error("[{}] [notify-blocked] dataId={}, group={}, md5={}, listener={}, submit internal async task fail,throwable= ",name, dataId, group, md5, listener, throwable);job.run();}}} catch (Throwable t) {LOGGER.error("[{}] [notify-error] dataId={}, group={}, md5={}, listener={} throwable={}", name, dataId,group, md5, listener, t.getCause());}final long finishNotify = System.currentTimeMillis();LOGGER.info("[{}] [notify-listener] time cost={}ms in ClientWorker, dataId={}, group={}, md5={}, listener={} ",name, (finishNotify - startNotify), dataId, group, md5, listener);
}
最核心的是 listener.receiveConfigInfo(contentTmp) 这个方法,跟进去,到实现类 AbstractSharedListener 里
//AbstractSharedListener
@Override
public final void receiveConfigInfo(String configInfo) {innerReceive(dataId, group, configInfo);
}
继续跟进 innerReceive 方法,来到 NacosContextRefresher 的 registerNacosListener 方法里的内部类的 innerReceive 方法里
//NacosContextRefresher
private void registerNacosListener(final String groupKey, final String dataKey) {String key = NacosPropertySourceRepository.getMapKey(dataKey, groupKey);Listener listener = listenerMap.computeIfAbsent(key,lst -> new AbstractSharedListener() {@Overridepublic void innerReceive(String dataId, String group,String configInfo) {refreshCountIncrement();nacosRefreshHistory.addRefreshRecord(dataId, group, configInfo);applicationContext.publishEvent(new RefreshEvent(this, null, "Refresh Nacos config"));if (log.isDebugEnabled()) {log.debug(String.format("Refresh Nacos config group=%s,dataId=%s,configInfo=%s",group, dataId, configInfo));}}});try {configService.addListener(dataKey, groupKey, listener);log.info("[Nacos Config] Listening config: dataId={}, group={}", dataKey,groupKey);}catch (NacosException e) {log.warn(String.format("register fail for nacos listener ,dataId=[%s],group=[%s]", dataKey,groupKey), e);}
}
可以看到方法内部,发布了一个 RefreshEvent 事件,监听这个事件的监听器是 RefreshEventListener(这里要先学习下Spring的事件发布),所以继续跟进到 RefreshEventListener 的 onApplicationEvent 方法
//RefreshEventListener
@Override
public void onApplicationEvent(ApplicationEvent event) {if (event instanceof ApplicationReadyEvent) {handle((ApplicationReadyEvent) event);}else if (event instanceof RefreshEvent) {handle((RefreshEvent) event);}
}
因为是 RefreshEvent,所以走下面的 handle 方法
//RefreshEventListener
public void handle(RefreshEvent event) {if (this.ready.get()) { // don't handle events before app is readylog.debug("Event received " + event.getEventDesc());Set<String> keys = this.refresh.refresh();log.info("Refresh keys changed: " + keys);}
}
继续跟进 refresh.refresh() 方法
//ContextRefresher
public synchronized Set<String> refresh() {Set<String> keys = refreshEnvironment();this.scope.refreshAll();return keys;
}
这里干了两件事,一个 refreshEnvironment(),一个 scope.refreshAll()
其实这两个方法里分别有@ConfigurationProperties 注解和 @RefreshScope 注解的处理
2、@ConfigurationProperties注解的bean是如何自动刷新的
我们先看 refreshEnvironment()
//ContextRefresher
public synchronized Set<String> refreshEnvironment() {Map<String, Object> before = extract(this.context.getEnvironment().getPropertySources());updateEnvironment();Set<String> keys = changes(before, extract(this.context.getEnvironment().getPropertySources())).keySet();this.context.publishEvent(new EnvironmentChangeEvent(this.context, keys));return keys;
}
这个方法,先获取更新前的参数放在 map 里,然后更新环境,然后再获取一遍,和之前的对比,就可以得到变化的 key,到这里没什么好说的,常规的刷新环境,然后又发布了一个 EnvironmentChangeEvent 环境变更事件,这里是Spring留的一个扩展,当你需要在环境刷新时做一些事,就可以写个监听器监听 EnvironmentChangeEvent 事件,这里 Spring 默认写了个监听器, ConfigurationPropertiesRebinder ,我们看下它的 onApplicationEvent 方法
//ConfigurationPropertiesRebinder
@Override
public void onApplicationEvent(EnvironmentChangeEvent event) {if (this.applicationContext.equals(event.getSource())// Backwards compatible|| event.getKeys().equals(event.getSource())) {rebind();}
}
继续跟进 rebind() 方法
//ConfigurationPropertiesRebinder
@ManagedOperation
public void rebind() {this.errors.clear();for (String name : this.beans.getBeanNames()) {rebind(name);}
}
这里循环了每个 bean,这个beans具体是什么,下面再看,我们先继续跟进 rebind() 方法
//ConfigurationPropertiesRebinder
@ManagedOperation
public boolean rebind(String name) {if (!this.beans.getBeanNames().contains(name)) {return false;}ApplicationContext appContext = this.applicationContext;while (appContext != null) {if (appContext.containsLocalBean(name)) {return rebind(name, appContext);}else {appContext = appContext.getParent();}}return false;
}
继续跟进 rebind(name, appContext) 方法
private boolean rebind(String name, ApplicationContext appContext) {try {Object bean = appContext.getBean(name);if (AopUtils.isAopProxy(bean)) {bean = ProxyUtils.getTargetObject(bean);}if (bean != null) {// TODO: determine a more general approach to fix this.// see// https://github.com/spring-cloud/spring-cloud-commons/issues/571if (getNeverRefreshable().contains(bean.getClass().getName())) {return false; // ignore}appContext.getAutowireCapableBeanFactory().destroyBean(bean);appContext.getAutowireCapableBeanFactory().initializeBean(bean, name);return true;}}catch (RuntimeException e) {this.errors.put(name, e);throw e;}catch (Exception e) {this.errors.put(name, e);throw new IllegalStateException("Cannot rebind to " + name, e);}return false;
}
这里已经很清楚了,把bean销毁,再重新初始化,这里有个 getNeverRefreshable() 方法可以配置从不刷新的 key 的,默认是 com.zaxxer.hikari.HikariDataSource 这个值从不刷新,可以通过 spring.cloud.refresh.never-refreshable 参数配置不刷新的 key,这里好像每次都会把所有 beans 里的 bean 都销毁重新初始化,好像是有什么bug,也在这里标注了一个 TODO,不知道后续有没有解决,下面我们看看这个 beans 到底是什么,这个 beans 是对象 ConfigurationPropertiesBeans,它的 getBeanNames() 方法,返回的其实是其内部的一个 map 的 keySet
//ConfigurationPropertiesBeans
private Map<String, ConfigurationPropertiesBean> beans = new HashMap<>();public Set<String> getBeanNames() {return new HashSet<>(this.beans.keySet());
}
我们看看这个 map 里的 ConfigurationPropertiesBean 是怎么放进去,其实 ConfigurationPropertiesBeans 这个类实现了 BeanPostProcessor 接口,熟悉 Spring 源码的已经知道了,在 bean 初始化之前,会调用这个类的 postProcessBeforeInitialization 方法,我们看下
//ConfigurationPropertiesBeans
@Override
public Object postProcessBeforeInitialization(Object bean, String beanName) throws BeansException {if (isRefreshScoped(beanName)) {return bean;}ConfigurationPropertiesBean propertiesBean = ConfigurationPropertiesBean.get(this.applicationContext, bean,beanName);if (propertiesBean != null) {this.beans.put(beanName, propertiesBean);}return bean;
}
可以看到通过 ConfigurationPropertiesBean.get(this.applicationContext, bean, beanName) 方法获取到 bean 就会放到 map 中,跟进
//ConfigurationPropertiesBean
/*** Return a {@link ConfigurationPropertiesBean @ConfigurationPropertiesBean} instance* for the given bean details or {@code null} if the bean is not a* {@link ConfigurationProperties @ConfigurationProperties} object. Annotations are* considered both on the bean itself, as well as any factory method (for example a* {@link Bean @Bean} method).* @param applicationContext the source application context* @param bean the bean to consider* @param beanName the bean name* @return a configuration properties bean or {@code null} if the neither the bean nor* factory method are annotated with* {@link ConfigurationProperties @ConfigurationProperties}*/
public static ConfigurationPropertiesBean get(ApplicationContext applicationContext, Object bean, String beanName) {Method factoryMethod = findFactoryMethod(applicationContext, beanName);Bindable<Object> bindTarget = createBindTarget(bean, bean.getClass(), factoryMethod);if (bindTarget == null) {return null;}bindTarget = bindTarget.withBindMethod(BindMethodAttribute.get(applicationContext, beanName));if (bindTarget.getBindMethod() == null && factoryMethod != null) {bindTarget = bindTarget.withBindMethod(JAVA_BEAN_BIND_METHOD);}if (bindTarget.getBindMethod() != VALUE_OBJECT_BIND_METHOD) {bindTarget = bindTarget.withExistingValue(bean);}return create(beanName, bean, bindTarget);
}
其实通过方法上的注释,已经能看出来了,没关系,我们继续跟进 createBindTarget 方法
//ConfigurationPropertiesBean
private static Bindable<Object> createBindTarget(Object bean, Class<?> beanType, Method factoryMethod) {ResolvableType type = (factoryMethod != null) ? ResolvableType.forMethodReturnType(factoryMethod): ResolvableType.forClass(beanType);Annotation[] annotations = findAnnotations(bean, beanType, factoryMethod);return (annotations != null) ? Bindable.of(type).withAnnotations(annotations) : null;
}
继续跟进 findAnnotations 方法
//ConfigurationPropertiesBean
private static Annotation[] findAnnotations(Object instance, Class<?> type, Method factory) {ConfigurationProperties annotation = findAnnotation(instance, type, factory, ConfigurationProperties.class);if (annotation == null) {return null;}Validated validated = findAnnotation(instance, type, factory, Validated.class);return (validated != null) ? new Annotation[] { annotation, validated } : new Annotation[] { annotation };
}
这里就显而易见了,所有加了注解 @ConfigurationProperties 的bean
3、@RefreshScope 注解的bean是如何自动刷新的
在看 scope.refreshAll() 之前,我们先了解下 @RefreshScope 注解的 bean 是如何在 Spring 中实例化初始化的,首先看 @RefreshScope 注解
@Target({ ElementType.TYPE, ElementType.METHOD })
@Retention(RetentionPolicy.RUNTIME)
@Scope("refresh")
@Documented
public @interface RefreshScope {/*** Alias for {@link Scope#proxyMode}.* @see Scope#proxyMode()* @return proxy mode*/@AliasFor(annotation = Scope.class)ScopedProxyMode proxyMode() default ScopedProxyMode.TARGET_CLASS;}
它是个复合注解,里面标记了 @Scope(“refresh”) ,并且 ScopedProxyMode 的默认值是 TARGET_CLASS,记住了,后面会用到
然后在 ClassPathBeanDefinitionScanner 扫描bean时,会为这些bean创建一个代理 beanDefinition,最终在实例化环节会多生成一个代理bean,bean的名字是在原本名字前拼接上 scopedTarget.,来看下 ClassPathBeanDefinitionScanner 的 doScan 方法
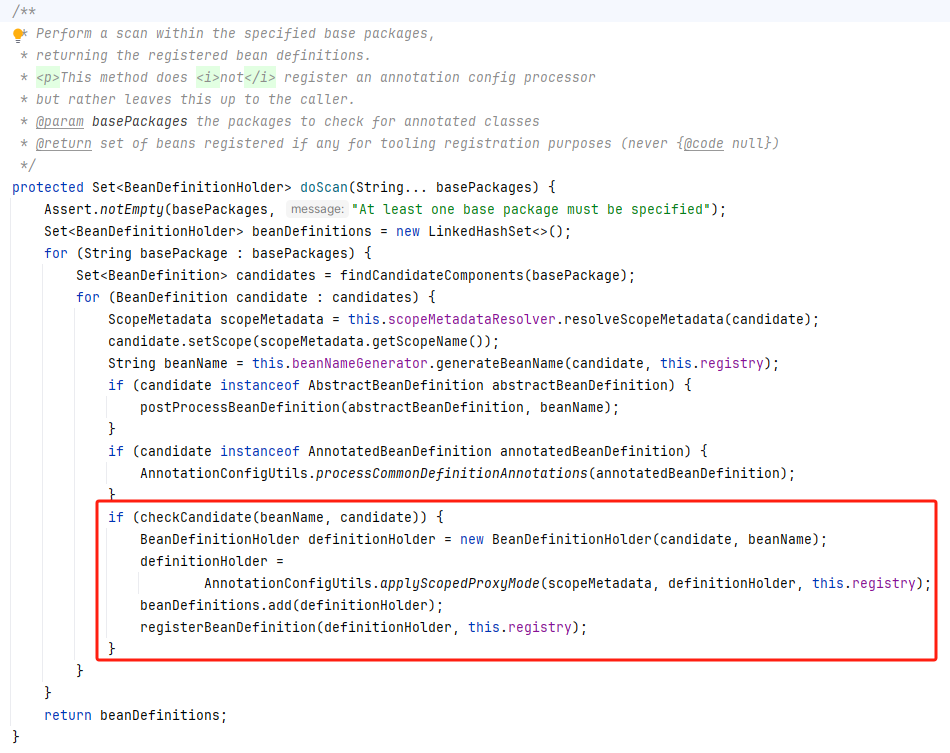
具体看 AnnotationConfigUtils.applyScopedProxyMode 方法
//AnnotationConfigUtils
static BeanDefinitionHolder applyScopedProxyMode(ScopeMetadata metadata, BeanDefinitionHolder definition, BeanDefinitionRegistry registry) {ScopedProxyMode scopedProxyMode = metadata.getScopedProxyMode();if (scopedProxyMode.equals(ScopedProxyMode.NO)) {return definition;}boolean proxyTargetClass = scopedProxyMode.equals(ScopedProxyMode.TARGET_CLASS);return ScopedProxyCreator.createScopedProxy(definition, registry, proxyTargetClass);
}
由于 ScopedProxyMode 是 TARGET_CLASS,不是 NO,所以 proxyTargetClass 是 true,继续进 ScopedProxyCreator.createScopedProxy 方法
//ScopedProxyCreator
public static BeanDefinitionHolder createScopedProxy(BeanDefinitionHolder definitionHolder, BeanDefinitionRegistry registry, boolean proxyTargetClass) {return ScopedProxyUtils.createScopedProxy(definitionHolder, registry, proxyTargetClass);
}
继续跟进 ScopedProxyUtils.createScopedProxy 方法
public static BeanDefinitionHolder createScopedProxy(BeanDefinitionHolder definition,BeanDefinitionRegistry registry, boolean proxyTargetClass) {String originalBeanName = definition.getBeanName();BeanDefinition targetDefinition = definition.getBeanDefinition();//bean的名字前面拼接上了一个scopedTarget.String targetBeanName = getTargetBeanName(originalBeanName);// Create a scoped proxy definition for the original bean name,// "hiding" the target bean in an internal target definition.//代理对象的class类型是ScopedProxyFactoryBeanRootBeanDefinition proxyDefinition = new RootBeanDefinition(ScopedProxyFactoryBean.class);proxyDefinition.setDecoratedDefinition(new BeanDefinitionHolder(targetDefinition, targetBeanName));proxyDefinition.setOriginatingBeanDefinition(targetDefinition);proxyDefinition.setSource(definition.getSource());proxyDefinition.setRole(targetDefinition.getRole());proxyDefinition.getPropertyValues().add("targetBeanName", targetBeanName);if (proxyTargetClass) {targetDefinition.setAttribute(AutoProxyUtils.PRESERVE_TARGET_CLASS_ATTRIBUTE, Boolean.TRUE);// ScopedProxyFactoryBean's "proxyTargetClass" default is TRUE, so we don't need to set it explicitly here.}else {proxyDefinition.getPropertyValues().add("proxyTargetClass", Boolean.FALSE);}// Copy autowire settings from original bean definition.proxyDefinition.setAutowireCandidate(targetDefinition.isAutowireCandidate());proxyDefinition.setPrimary(targetDefinition.isPrimary());if (targetDefinition instanceof AbstractBeanDefinition abd) {proxyDefinition.copyQualifiersFrom(abd);}// The target bean should be ignored in favor of the scoped proxy.//实际的目标对象这两个属性设置falsetargetDefinition.setAutowireCandidate(false);targetDefinition.setPrimary(false);// Register the target bean as separate bean in the factory.registry.registerBeanDefinition(targetBeanName, targetDefinition);// Return the scoped proxy definition as primary bean definition// (potentially an inner bean).//用原本的bean名称去创建一个代理的beanDefinitionreturn new BeanDefinitionHolder(proxyDefinition, originalBeanName, definition.getAliases());
}
这个方法就是具体的创建代理的 beanDefinition,可以看到在 getTargetBeanName 方法里,获取了 bean 的名字,也就是在原本 bean 的前面拼接上 scopedTarget.,并且代理对象的class类型是 ScopedProxyFactoryBean
总结一下就是:
- 创建一个代理对象,其名称为
"scopedTarget." + originalBeanName - 把代理对象的class类型设置为
ScopedProxyFactoryBean - 把原本的bean定义
autowireCandidate和primary改成false,相当于忽略了原本的bean,而使用新的代理bean - 用原本的bean名称去创建一个代理的
beanDefinition,达到偷梁换柱的效果
当 Spring 创建 bean 对象时,来到核心代码 AbstractBeanFactory 的 doGetBean 方法
/*** Return an instance, which may be shared or independent, of the specified bean.* @param name the name of the bean to retrieve* @param requiredType the required type of the bean to retrieve* @param args arguments to use when creating a bean instance using explicit arguments* (only applied when creating a new instance as opposed to retrieving an existing one)* @param typeCheckOnly whether the instance is obtained for a type check,* not for actual use* @return an instance of the bean* @throws BeansException if the bean could not be created*/
@SuppressWarnings("unchecked")
protected <T> T doGetBean(String name, @Nullable Class<T> requiredType, @Nullable Object[] args, boolean typeCheckOnly)throws BeansException {String beanName = transformedBeanName(name);Object beanInstance;// Eagerly check singleton cache for manually registered singletons.Object sharedInstance = getSingleton(beanName);if (sharedInstance != null && args == null) {if (logger.isTraceEnabled()) {if (isSingletonCurrentlyInCreation(beanName)) {logger.trace("Returning eagerly cached instance of singleton bean '" + beanName +"' that is not fully initialized yet - a consequence of a circular reference");}else {logger.trace("Returning cached instance of singleton bean '" + beanName + "'");}}beanInstance = getObjectForBeanInstance(sharedInstance, name, beanName, null);}else {// Fail if we're already creating this bean instance:// We're assumably within a circular reference.if (isPrototypeCurrentlyInCreation(beanName)) {throw new BeanCurrentlyInCreationException(beanName);}// Check if bean definition exists in this factory.BeanFactory parentBeanFactory = getParentBeanFactory();if (parentBeanFactory != null && !containsBeanDefinition(beanName)) {// Not found -> check parent.String nameToLookup = originalBeanName(name);if (parentBeanFactory instanceof AbstractBeanFactory abf) {return abf.doGetBean(nameToLookup, requiredType, args, typeCheckOnly);}else if (args != null) {// Delegation to parent with explicit args.return (T) parentBeanFactory.getBean(nameToLookup, args);}else if (requiredType != null) {// No args -> delegate to standard getBean method.return parentBeanFactory.getBean(nameToLookup, requiredType);}else {return (T) parentBeanFactory.getBean(nameToLookup);}}if (!typeCheckOnly) {markBeanAsCreated(beanName);}StartupStep beanCreation = this.applicationStartup.start("spring.beans.instantiate").tag("beanName", name);try {if (requiredType != null) {beanCreation.tag("beanType", requiredType::toString);}RootBeanDefinition mbd = getMergedLocalBeanDefinition(beanName);checkMergedBeanDefinition(mbd, beanName, args);// Guarantee initialization of beans that the current bean depends on.String[] dependsOn = mbd.getDependsOn();if (dependsOn != null) {for (String dep : dependsOn) {if (isDependent(beanName, dep)) {throw new BeanCreationException(mbd.getResourceDescription(), beanName,"Circular depends-on relationship between '" + beanName + "' and '" + dep + "'");}registerDependentBean(dep, beanName);try {getBean(dep);}catch (NoSuchBeanDefinitionException ex) {throw new BeanCreationException(mbd.getResourceDescription(), beanName,"'" + beanName + "' depends on missing bean '" + dep + "'", ex);}}}// Create bean instance.if (mbd.isSingleton()) {sharedInstance = getSingleton(beanName, () -> {try {return createBean(beanName, mbd, args);}catch (BeansException ex) {// Explicitly remove instance from singleton cache: It might have been put there// eagerly by the creation process, to allow for circular reference resolution.// Also remove any beans that received a temporary reference to the bean.destroySingleton(beanName);throw ex;}});beanInstance = getObjectForBeanInstance(sharedInstance, name, beanName, mbd);}else if (mbd.isPrototype()) {// It's a prototype -> create a new instance.Object prototypeInstance = null;try {beforePrototypeCreation(beanName);prototypeInstance = createBean(beanName, mbd, args);}finally {afterPrototypeCreation(beanName);}beanInstance = getObjectForBeanInstance(prototypeInstance, name, beanName, mbd);}else {String scopeName = mbd.getScope();if (!StringUtils.hasLength(scopeName)) {throw new IllegalStateException("No scope name defined for bean '" + beanName + "'");}Scope scope = this.scopes.get(scopeName);if (scope == null) {throw new IllegalStateException("No Scope registered for scope name '" + scopeName + "'");}try {Object scopedInstance = scope.get(beanName, () -> {beforePrototypeCreation(beanName);try {return createBean(beanName, mbd, args);}finally {afterPrototypeCreation(beanName);}});beanInstance = getObjectForBeanInstance(scopedInstance, name, beanName, mbd);}catch (IllegalStateException ex) {throw new ScopeNotActiveException(beanName, scopeName, ex);}}}catch (BeansException ex) {beanCreation.tag("exception", ex.getClass().toString());beanCreation.tag("message", String.valueOf(ex.getMessage()));cleanupAfterBeanCreationFailure(beanName);throw ex;}finally {beanCreation.end();}}return adaptBeanInstance(name, beanInstance, requiredType);
}
不同的作用域有不同的创建方式,我们看看,scope 是 refresh 的
String scopeName = mbd.getScope();
if (!StringUtils.hasLength(scopeName)) {throw new IllegalStateException("No scope name defined for bean '" + beanName + "'");
}
Scope scope = this.scopes.get(scopeName);
if (scope == null) {throw new IllegalStateException("No Scope registered for scope name '" + scopeName + "'");
}
try {Object scopedInstance = scope.get(beanName, () -> {beforePrototypeCreation(beanName);try {return createBean(beanName, mbd, args);}finally {afterPrototypeCreation(beanName);}});beanInstance = getObjectForBeanInstance(scopedInstance, name, beanName, mbd);
}
catch (IllegalStateException ex) {throw new ScopeNotActiveException(beanName, scopeName, ex);
}
跟进 scope.get 方法,来到 GenericScope 类里
@Override
public Object get(String name, ObjectFactory<?> objectFactory) {BeanLifecycleWrapper value = this.cache.put(name, new BeanLifecycleWrapper(name, objectFactory));this.locks.putIfAbsent(name, new ReentrantReadWriteLock());try {return value.getBean();}catch (RuntimeException e) {this.errors.put(name, e);throw e;}
}
这个 cache.put 方法往里点,最终来到 StandardScopeCache 的 put 方法
@Override
public Object put(String name, Object value) {Object result = this.cache.putIfAbsent(name, value);if (result != null) {return result;}return value;
}
相当于缓存里有,就返回,没有就返回一个新的 BeanLifecycleWrapper 对象,然后调用 BeanLifecycleWrapper 的 getBean 方法,最后会调用 createBean 创建对象,简单来说就是,做了个缓存机制,如果不刷新,一直取的是缓存,如果刷新了,就会重新创新 bean 对象
这时候我们再回过头看看 scope.refreshAll() 方法,其实就是清除缓存,来一起看看这个方法
//RefreshScope
@ManagedOperation(description = "Dispose of the current instance of all beans "+ "in this scope and force a refresh on next method execution.")
public void refreshAll() {super.destroy();this.context.publishEvent(new RefreshScopeRefreshedEvent());
}
下面那个 this.context.publishEvent(new RefreshScopeRefreshedEvent()); 没有监听器,应该是留个口子,后续扩展用的,先不管,我们重点看父类 GenericScope 的 destroy 方法
//GenericScope
@Override
public void destroy() {List<Throwable> errors = new ArrayList<>();Collection<BeanLifecycleWrapper> wrappers = this.cache.clear();for (BeanLifecycleWrapper wrapper : wrappers) {try {Lock lock = this.locks.get(wrapper.getName()).writeLock();lock.lock();try {wrapper.destroy();}finally {lock.unlock();}}catch (RuntimeException e) {errors.add(e);}}if (!errors.isEmpty()) {throw wrapIfNecessary(errors.get(0));}this.errors.clear();
}
可以看到调用了 cache.clear 方法清除缓存
三、总结
梳理下完整流程:
- 客户端创建
RpcClient与服务端建立连接时会添加Handler处理服务端推送的请求,并且启动一个线程不断去监听配置变化 - 当服务端某配置文件里的配置发生变化时,发送通知给到客户端,告知其某配置文件变化
- 客户端收到变更通知,立即把该配置文件内容发送到服务端去对比,服务端返回变化的配置文件
- 然后客户端会再次请求服务端,获取最新的配置内容,覆盖客户端的
- 最后销毁有
@ConfigurationProperties注解的 bean,重新初始化 - 删除
@RefreshScope注解的 bean 缓存,获取bean的时候会重新创建