实验需要三个工具,为win2003SP2,windows2003系统.ISO镜像,UitraISO文件。<?xml:namespace prefix = o ns = "urn:schemas-microsoft-com:office:office" />
一. 先建无人值守应答文件.
二. 然后在D盘新建两个文件夹win2003和SP2.
三. 把win2003SP2补丁解压到SP2文件夹中,把win2003安装镜像文件解压到win2003文件夹中。
四. 用命令把SP2补丁集成到2003安装光盘的I386目录下。
五. 新建一个裸机把集成后的2003安装光盘放入。
首先来创建无人值守应答文件,在这里写的不详细有看不明白的请看上一篇无人值守文章。
1. 把2003安装光盘里的DEOLOY.CAB解压包解压出来,在打开解压后的文件夹双击setupmgr.exe运行。
出现“欢迎使用安装管理器”请按下一步。
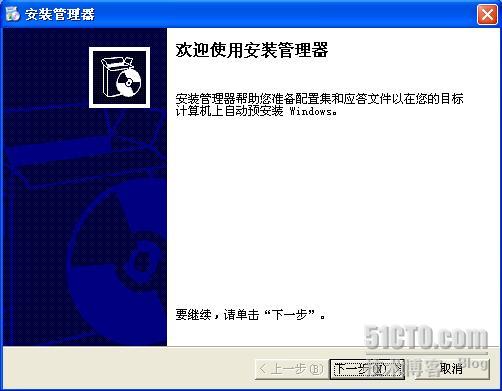
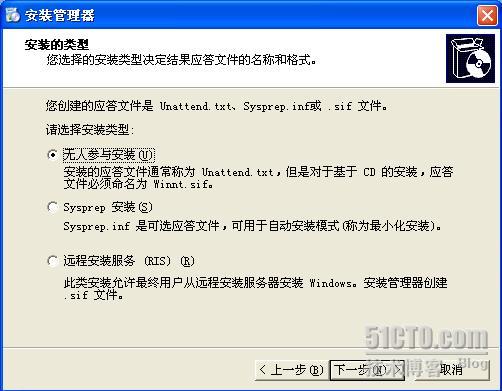
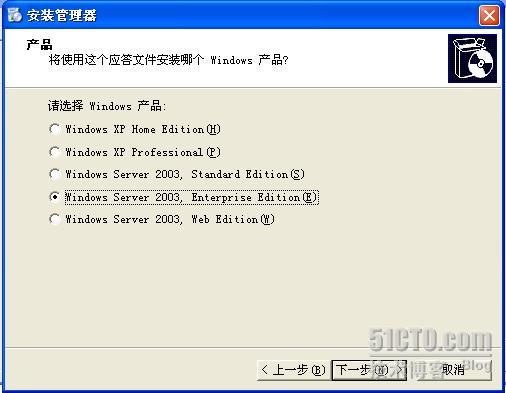
安装类型为无人参与安装。
选:2003企业版;
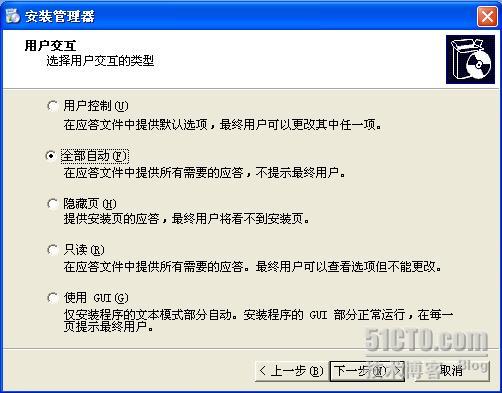
要选全部自动。
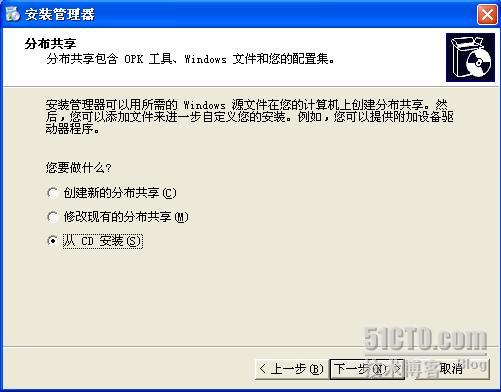
从CD安装。
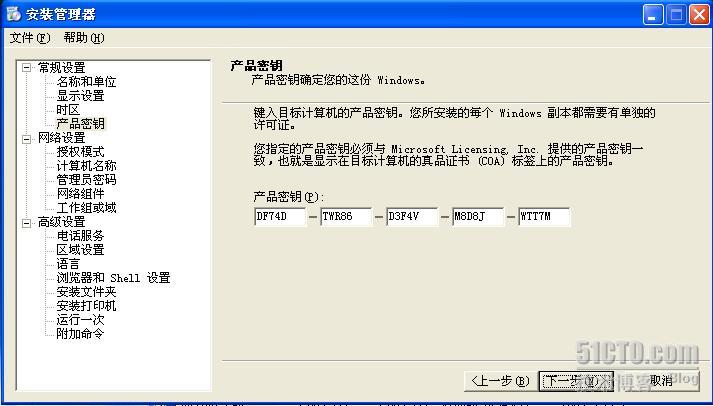
输入产品的密钥为DF74D-TWR86-D3F4V-M8D8J-WTT7M.
计算机名为Adiministrator;
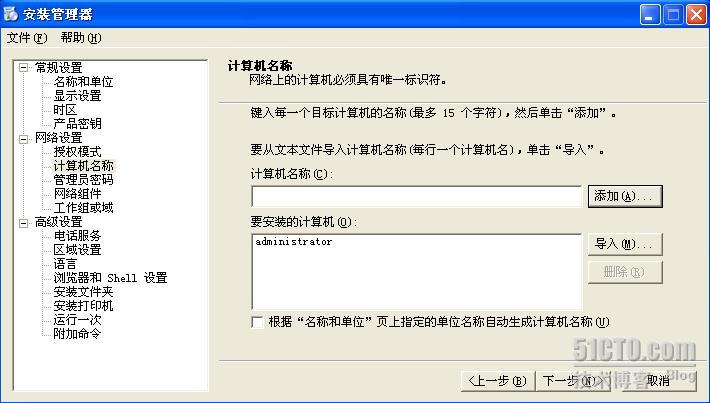
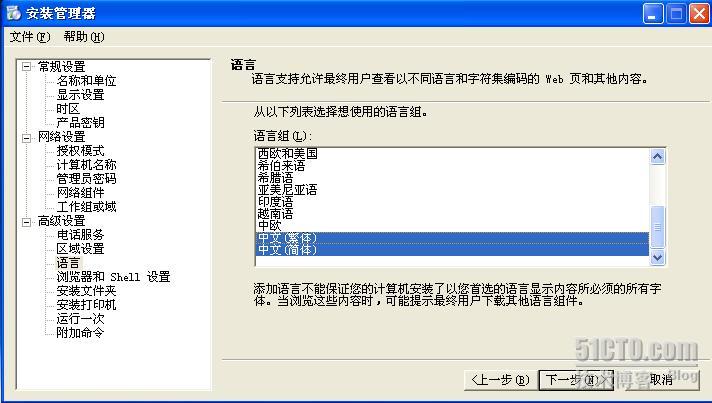
把语言选问中文简体和中文繁体。
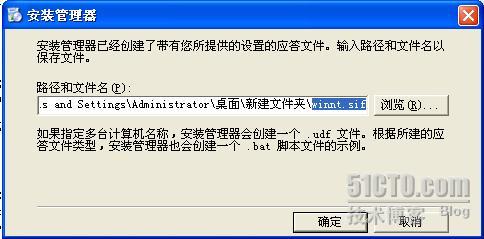
最后一步把文件名该为winnt.sif的格式.
2.把win2003SP2补丁解压到SP2文件夹中,把win2003安装镜像文件解压到win2003文件夹中。
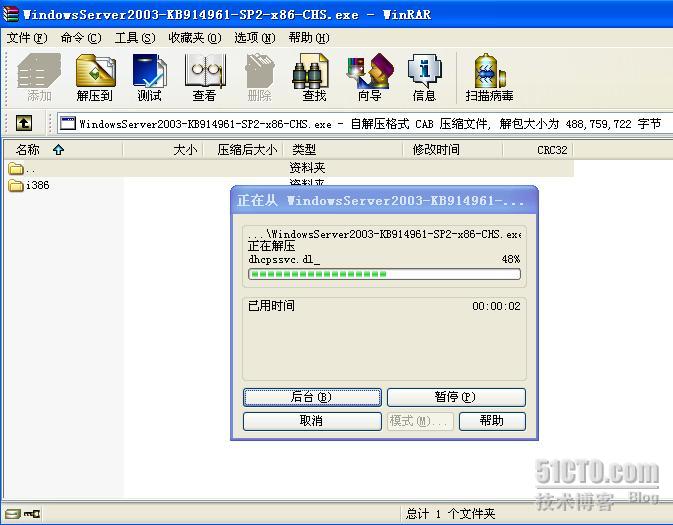
Win2003正在解压。
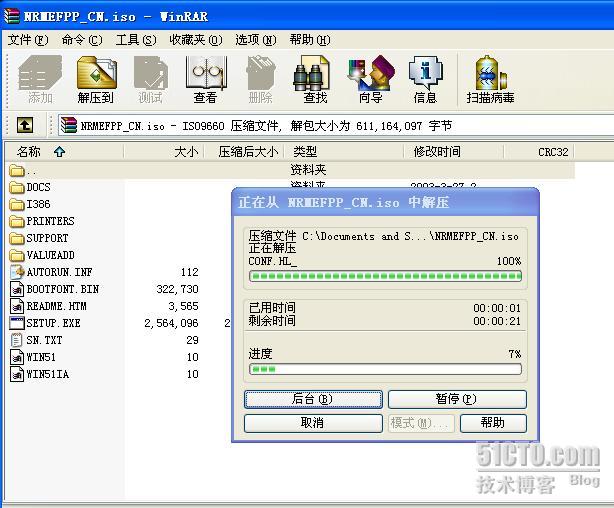
解压已完成。

2003SP2补丁正在解压。
解压已完成。

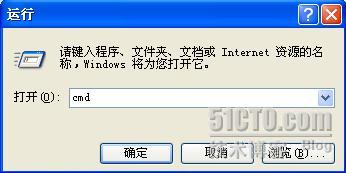
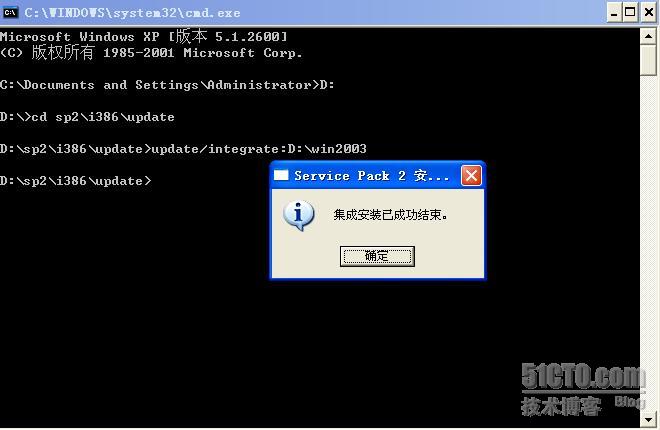
用命令把WIN2003SP2补丁集成到window2003安装光盘里。在运行里CMD打开doc.
接着输入一下命令先输入 D: 回车, cd sp2\i386\update 回车,然后在输入 update/integrate:D:\win2003
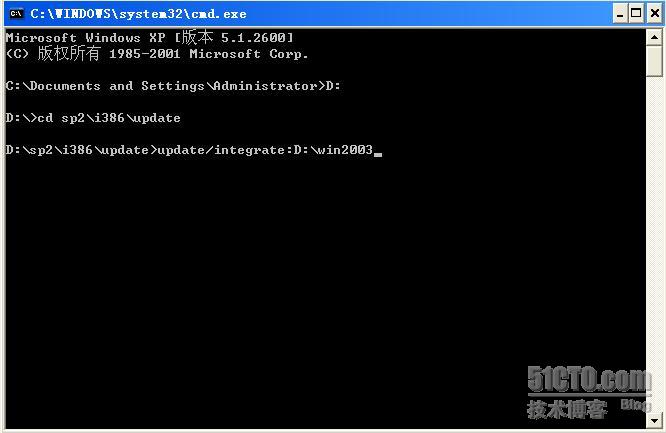
正在集成SP2补丁。
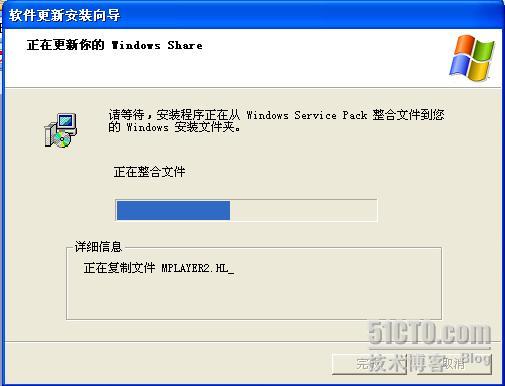
SP2补丁集成成功。
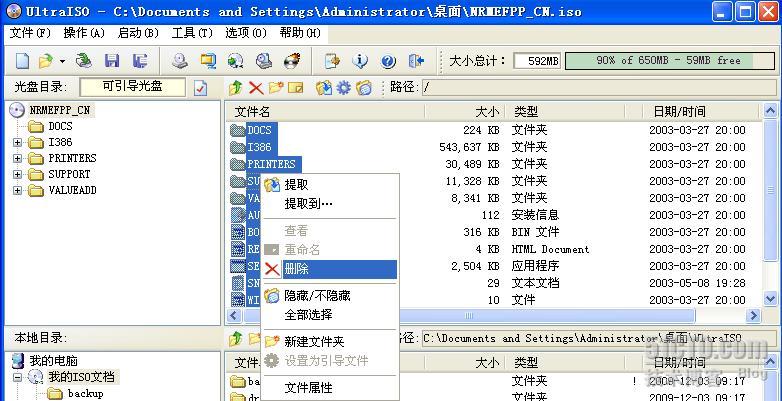
3.然后打开UitraISO工具把win2003集成后的文件放入和winnt.sif无人值守应答文件放入win2003安装光盘的i386目录下。
放入一个可引导光盘,把这个可引导光盘的内容全部删除。
然后在D盘找到win2003文件夹把里面集成后的文件全部托进去。
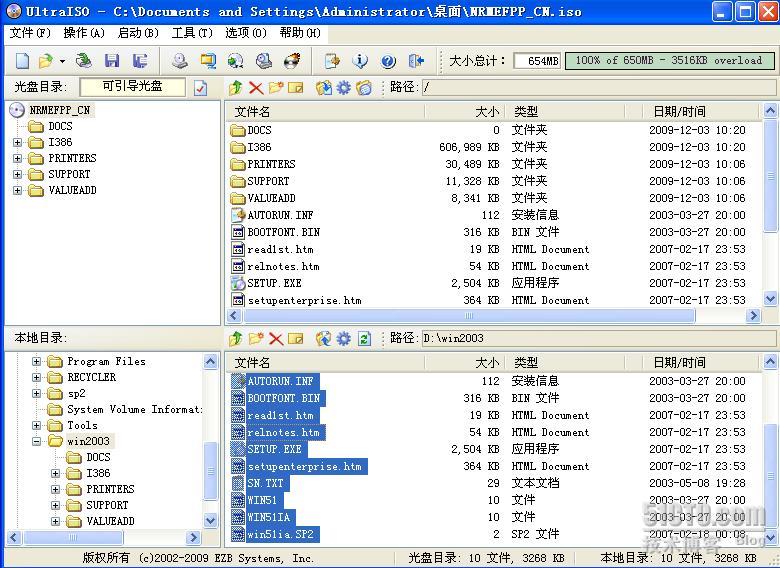
然后在找到无人值守应答文件托入I386目录下。
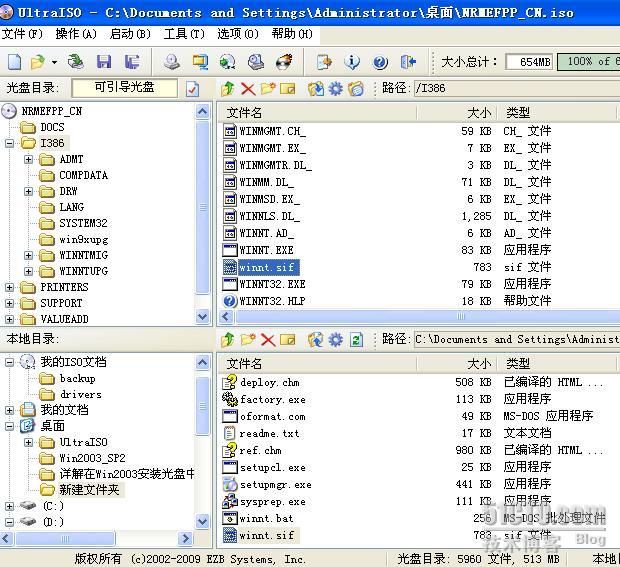
最后把文件改名另存为桌面。
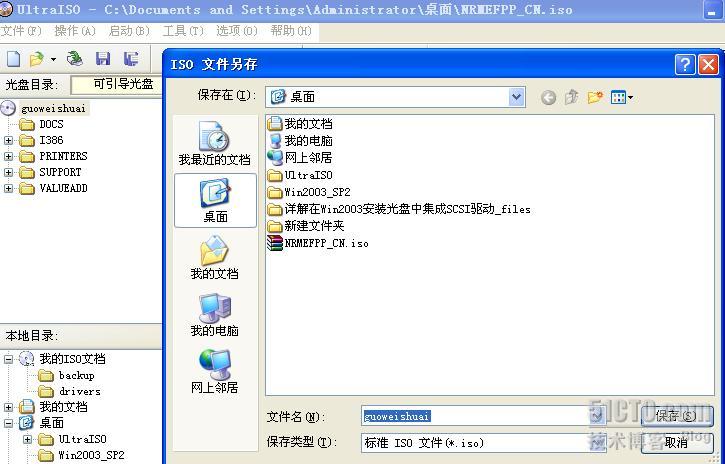
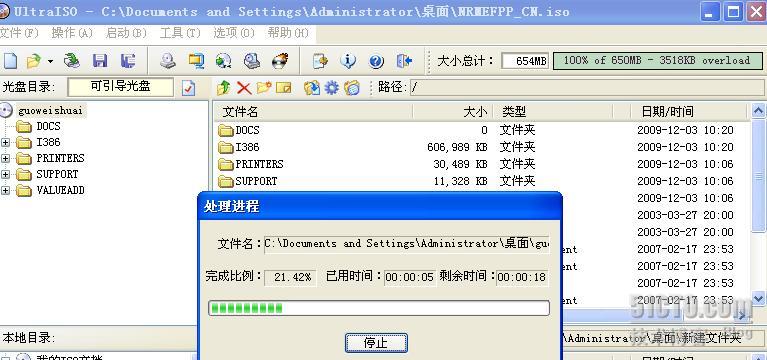
正在另存为…..
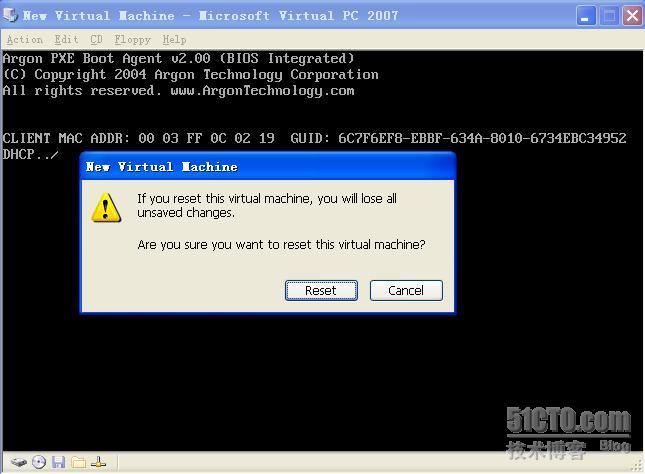
完成后,我们新建一个裸机测试一下,我用的是2007VPC虚拟机。
启动后在CD挂入刚才集成后的镜像文件。然后在从启一下计算机。
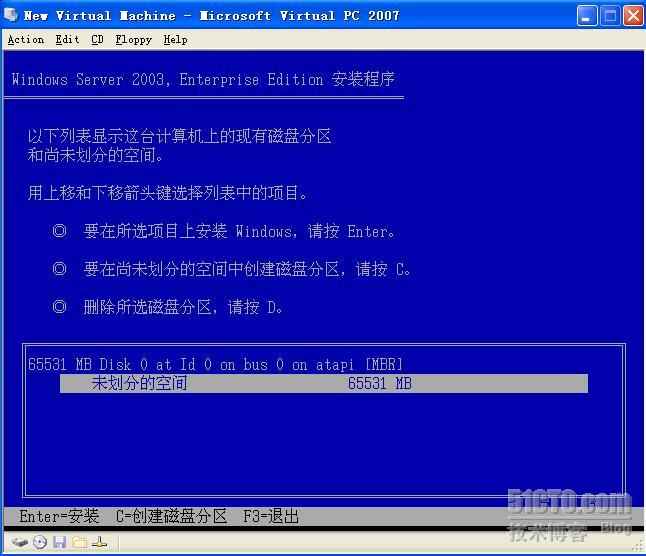
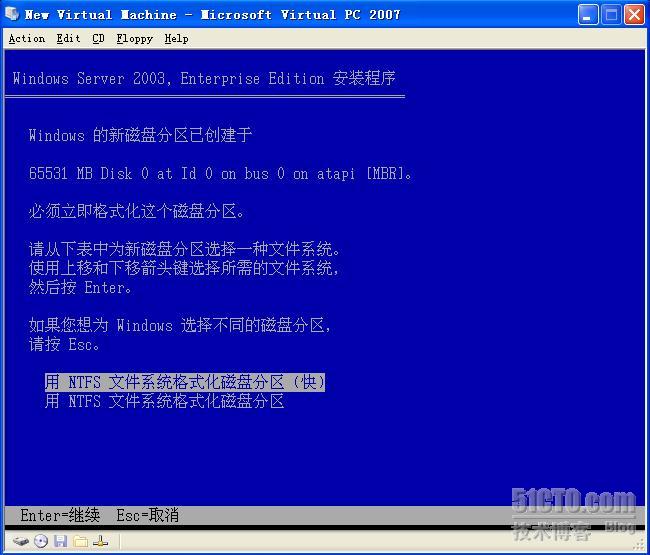
还是需要要做前面这几部。磁盘分区和格式化磁盘
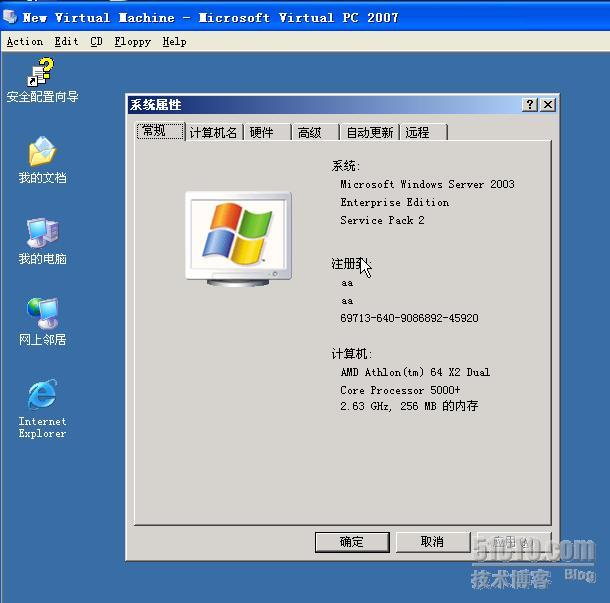
等一将近半个小时WIN2003集成SP2+无人值守终于完成了。
转载于:https://blog.51cto.com/guoweishuai/238415


![【java】【项目实战】[外卖六]套餐管理业务开发](https://img-blog.csdnimg.cn/0249b1eec7fd447394a4a742c7b409f6.png)